background image

11

Operation

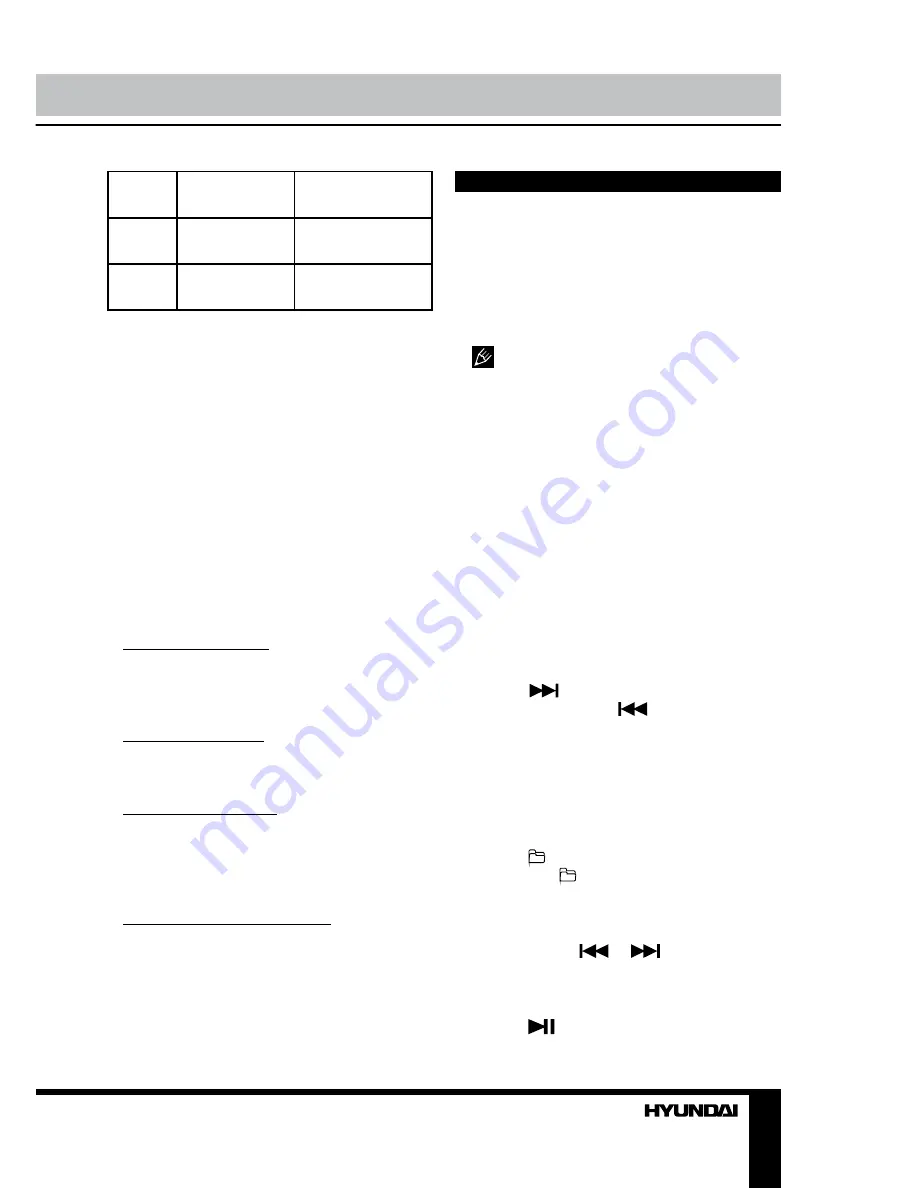
4

Jazz, Country

Weather, 
Finance, Children

5

Nation, Oldies

Social, Religion, 
Phone IN

6

Folk

Travel, Leisure, 
Document

When PTY is selected, the radio starts to 

search corresponding PTY information, and 
stops if the corresponding PTY information 
is detected. If no buttons are pressed within 
several seconds, previously selected PTY is 
searched. During 1 loop, if desired PTY is not 
found, the unit will return to previous mode. 
Press PTY/CLK button to switch the PTY 
function off.

Other parameter setting

To choose the corresponding option, press 

and hold SELECT button for 2 seconds, then 
press it repeatedly until the display shows the 
needed option. Turn VOLUME knob to choose 
the needed value. After choosing, leave the 
unit idle to activate.

TA SEEK/TA ALARM
In TA SEEK mode, the unit will seek for 

traffic announcement program when TA button 
is pressed; in TA ALARM the unit does not 
retune to TA information.

PI SOUND/PI MUTE
PI sound refers to the reception noise 

when the AF function tries to scan alternative 
frequency.

MASK DPI/MASK ALL
During MASK DPI mode, the unit will mask 

only the AF which has different PI, this is the 
default mode; during MASK ALL mode, the unit 
will mask the AF which has different PI and no 
RDS signal with high field strength.

RETUNE S/L - SHORT/LONG
“RETUNE” refers to the time period the 

unit allows for radio scan when reception is 
interrupted. “S” represents a long time period, 
and “L” represents a short time period.

USB/SD/MMC operations

Connecting a USB-device/Memory 

card

Insert a USB device into the USB port of 

this unit. Or detach the front panel and insert 
an SD/MMC memory card until a click into the 
memory card slot. To remove the card, press it 
until a click, then pull to remove.

  USB/SD/MMC supported capacity: up 

to 16 Gb.

For correct and satisfactory operation, 

licensed SD/MMC memory cards of famous 
brands should be used with this unit. Avoid 
using memory cards of unknown brands. Some 
models of USB devices cannot be supported 
by this unit due to incompatibility.

Playback

When a USB or a memory card is first 

connected, playback will begin automatically.

Depending on the number of files and folders, 

the device may take several seconds to begin 
playback. If no MP3/WMA files are detected, 
“USB” or “SD” will be displayed.

Track select

•  Press 

 button to skip to the beginning 

of the next track. Press 

 button to skips to 

the previous track.

•  Press F/PS button; track number will blink 

on the display. Rotate VOLUME knob to select 
the track number. Press SELECT button to 
confirm your selection.

Folder select

Press 5/ - button to select the previous 

folder. Press 6/ + button to select the next 
folder.

Fast forward/rewind

Press and hold 

 or 

 button to rewind 

or fast forward the current track.

Pause

Press 1/

 button to temporarily stop file 

Summary of Contents for H-CCR8086

Page 1: ...л чит т нич ю н льт цию гл т чн Б з вы дны www sotmarket ru д бн я инф м ция т в тзывы бз ы и ы Инструкция для Hyundai H CCR8096 Перейти в карточку товара 8 800 775 98 98 ...

Page 2: ...USB SD MMC МЕДИАПЛЕЕР USB SD MMC MEDIA PLAYER Руководство по эксплуатации Instruction manual H CCR8086 ...

Page 3: ...sing the ISO Connector Operation Control elements Front panel Inner panel LCD layout General operations Turning on off Mode selection Volume control Mute function Loudness Audio parameter setting Preset EQ modes Beep function Clock Preset volume AUX in jack Radio operations Band select Manual tuning Automatic tuning Storing and recalling stations Mono stereo control RDS function 2 3 3 3 4 4 4 4 4 ...

Page 4: ... installation Before use the device in winter it is recommended to heat up the passenger compartment during 20 seconds or to the operation temperature Using the unit with the temperature that goes beyond the operation temperature greatly decreases the operation resource of the screen and other components of the unit and can result in an outage Disconnect the vehicle s negative battery terminal whi...

Page 5: ...lation 2 After installing the sleeve into the dashboard bend tabs fitting to the size of the dashboard to fix the sleeve in place 3 Make the necessary wire connections Ensure the connections are correct 4 Install the unit into the sleeve until the side locks are fixed 2 1 182 53 1 Dashboard 2 Sleeve tab to bend Trim frame installation To install the trim frame press it to the unit body and push it...

Page 6: ...be displayed and some buttons may not function To detach the front panel press OPEN button then distract the left side of the panel from the fastening of the unit The control panel can easily be damaged by shocks After removing it place it in a protective case and be careful not to drop it or subject it to strong shocks The rear connector that connects the main unit and the control panel is an ext...

Page 7: ...ection may cause serious damage to this unit Cut the connector connect the colored leads of the power cord to the car battery as shown in the color code table below for speaker and power cable connections Location Function Connector A Connector B 1 Rear right Blue 2 Rear right Blue White 3 Front right Grey 4 Front right Grey White Battery 12V Yellow 5 Front left Green Power antenna Orange 6 Front ...

Page 8: ...button 10 R PS button 11 TA button 1 2 3 4 5 6 7 8 9 10 11 12 13 14 15 16 17 18 19 20 21 12 AF button 13 PTY CLK button 14 1 button 15 2 INT button 16 3 RPT button 17 4 RDM button 18 5 button 19 6 button 20 AUX in jack 21 USB port Inner panel 1 2 3 1 SD MMC card slot 2 RESET button hole 3 Connector Pressing RESET hole will erase the clock setting and stored stations ...

Page 9: ...n indicator 13 CLASS equalizer mode 14 AF function indicator 15 FLAT equalizer mode 16 ТА function indicator 17 Equalizer indicator 18 TP function indicator 19 PTY function indicator 20 Mute mode indicator 21 Stereo reception indicator 22 Signal indicator 23 MP3 playback 24 WMA playback 25 ESP function indicator 26 Subwoofer indicator not active 27 Digit display radio frequency track number name e...

Page 10: ...CK POP and OFF equalizer modes Beep function Press SELECT button repeatedly until BEEP ON OFF is displayed Rotate VOLUME knob to select between ON beep sound is heard when a button is pressed and OFF no sound is heard when a button is pressed Clock Press and hold PTY CLK button to display the time on the screen Then press and hold this button again the time indication will blink Press button to ad...

Page 11: ...unit to automatically search another station with the same PI Program Identification as the current station but with a stronger signal so that you do not have to retune the stations when driving between different transmitter coverage areas When AF symbol is on it means RDS information is received when AF symbol is flashing it means RDS information is not yet received PS Program Service name the na...

Page 12: ...LONG RETUNE refers to the time period the unit allows for radio scan when reception is interrupted S represents a long time period and L represents a short time period USB SD MMC operations Connecting a USB device Memory card Insert a USB device into the USB port of this unit Or detach the front panel and insert an SD MMC memory card until a click into the memory card slot To remove the card press...

Page 13: ...rent track Press again to cancel Random Press 4 RDM button to play all the tracks in the current folder in random order Press again to cancel ID3 tags If an MP3 file contains ID3 information such information will be displayed during the file playback For display of various ID3 tag categories folder file title artist album name press BND ID3 button repeatedly This unit may not support some version ...

Page 14: ...d incorrectly Make correct wiring connection The car ignition is not on If the power supply is properly connected to the car accessory switch the ignition on The fuse is blown Replace the fuse No sound Volume is in minimum Adjust volume to a desired level Wiring is not properly connected Check wiring connection The radio does not work The antenna cable is not connected Insert the antenna cable pro...

Page 15: ...ons Weight 178 х 50 х 115 mm 1 8 kg Temperature range 200 C 600 C FM Stereo Radio Frequency range 87 5 108 0 MHz Presettable stations 18 Stereo separation 35 dB 1 kHz MW AM Radio Presettable stations 12 Frequency range 530 1710 kHz Usable sensitivity 30 dBμ Line out Stereo RCA line out 2 V Specifications are subject to change without notice Dimensions are approximate ...

Page 16: ...имволы ЖК дисплея Основные операции Включение выключение Выбор режима работы Регулирование громкости Приглушение звука Тонкомпенсация Функция beep Часы Громкость по умолчанию Настройка параметров аудио Режимы эквалайзера Вход AUX Операции с радио Выбор диапазона Поиск радиостанций 15 16 16 16 17 17 17 17 18 18 18 19 19 20 20 20 22 22 22 22 23 24 24 24 24 24 24 24 24 24 24 24 24 25 25 25 25 25 25 2...

Page 17: ...а не попали посторонние предметы Они могут вызвать сбои в работе или стать причи ной возгорания или поражения лазерным лучом Началом эксплуатации устройства счи тается момент его установки в автомобиль Перед началом использования устройства в зимний период рекомендуется прогреть салон автомобиля в течение 20 минут или до достижения эксплуатационного диапазо на температуры устройства Использование ...

Page 18: ...иля или вносить какие либо другие изменения в его конструкцию проконсуль тируйтесь с продавцом Устанавливайте устройство там где оно не будет закрывать водителю обзор и отвлекать от дорожной обстановки и не сможет нанести травм пассажирам в случае внезапной остановки автомобиля напри мер при экстренном торможении Никогда не устанавливайте устройство в таких местах где оно будет подвергаться воздей...

Page 19: ...1 Выберите такое положение в котором отверстия для винтов на кронштейне 3 будут совмещены с отверстиями для винтов на корпусе устройства и вкрутите по два винта 2 с каждой стороны 2 Винт 3 Монтажный кронштейн штатного радиоприемника 4 Приборная панель или консоль авто мобиля 5 Защелка снимите эту деталь 2 2 5 5 4 3 При установке по методу Б монтаж ный кожух и внешняя декоративная рамка не использу...

Page 20: ...внешних факторов тряски ударов После снятия ее с устройства держите панель в защитном футляре и старайтесь не ронять ее и не наносить физических повреждений Очень важным элементом является коннектор на задней части панели Не нажимайте на него ногтями ручками от вертками Если панель загрязнилась или запы лилась протрите ее сухой чистой тканью Для чистки разъема в задней части панели используйте там...

Page 21: ...е допускайте короткого замыкания проводов динамиков на корпус головного устройства или автомобиля Использование разъема ISO 1 Если в Вашем автомобиле есть разъ ем ISO произведите подключение как показано на рисунке 2 Для подключений без разъемов ISO внимательно проверьте все провода перед подключением неправильное подключение может привести к повреждениям изделия Обрежьте разъем подключите цветные...

Page 22: ...ронтальн правый Серый Белый Питание 12В желтый 5 Фронтальный левый Зеленый Питание антенны оранжевый 6 Фронт левый Зеленый Белый 7 Тыловой левый Коричневый Зажигание красный 8 Тыловой левый Коричневый Белый Земля черный Провод питания антенны предназна чен для подачи питания на антенну и для удаленного управления дополнительным усилителем ...

Page 23: ...5 16 17 18 19 20 21 11 Кнопка TA 12 Кнопка AF 13 Кнопка PTY CLK 14 Кнопка 1 15 Кнопка 2 INT 16 Кнопка 3 RPT 17 Кнопка 4 RDM 18 Кнопка 5 19 Кнопка 6 20 Входной разъем AUX 21 USB порт Внутренняя панель 1 2 3 1 Слот для карт памяти SD MMC 2 Кнопка отверстие RESET 3 Коннектор При нажатии кнопки RESET все выполненные установки будут удалены из памяти устройства Надпись на внутренней панели Во время дви...

Page 24: ...P 12 Индикатор функции EON 13 Режим эквалайзера CLASS 14 Индикатор функции AF 15 Режим эквалайзера FLAT 16 Индикатор функции ТА 17 Индикатор работы эквалайзера 18 Индикатор функции TP 19 Индикатор функции PTY 20 Индикатор отключения звука 21 Индикатор стерео приема сигнала 22 Графический индикатор сигнала 23 Воспроизведение MP3 24 Воспроизведение WMA 25 Индикатор системы электронной стаби лизации ...

Page 25: ...егулировать вы бранный параметр Bass Treble от 10 до 10 Balance от L10 левый до R10 правый Fader от R10 тыл до F10 фронт При включенном эквалайзере регулирование высоких и низких частот невозможно Режимы эквалайзера Нажимайте кнопку SELECT до отображе ния на дисплее EQ OFF Вращайте регуля тор VOLUME для выбора одного из режимов эквалайзера FLAT CLASS ROCK и POP Функция Beep Нажимайте кнопку SELECT...

Page 26: ...х станций Моно стерео прием для FM радио Нажимайте кнопку SELECT пока на дисплее не отобразится надпись STEREO или MONO Вращайте регулятор VOLUME чтобы включить режим стерео STEREO или моно MONO приема Достичь улучшения дистанционного сигнала можно включив режим моно что позволяет убрать лишние звуковые шумы Сервис RDS Сервис RDS Система радио данных до ступен не во всех регионах Имейте в виду что...

Page 27: ... Music group Speech group 1 Pop Rock News Affairs Info 2 Easy Light Sport Educate Drama 3 Classics Culture Science Varied 4 Jazz Country Weather Finance Children 5 Nation Oldies Social Religion Phone IN 6 Folk Travel Leisure Document Кноп ка Музыкаль ные про граммы Информационные программы 1 поп музыка рок музыка новости текущая инфор мация общая информация и сообщения 2 легкая музыка легкая клас ...

Page 28: ...уйте функцию MASK DPI В режиме MASK DPI устройство маскирует только альтернативные частоты с разными информационными програм мами В режиме MASK ALL устройство маскирует и информационные программы и станции не поддерживающие RDS RETUNE L RETUNE S Функция RETUNE S L SHORT LONG RETUNE означает временной интервал прерывания радио сигнала для сканирова ния S означает короткий интервал L означает длинны...

Page 29: ...опку 2 INT для последо вательного воспроизведения первых 10 секунд каждого трека Нажмите эту кнопку еще раз для отмены Повтор Нажмите кнопку 3 RPT для повторного воспроизведения текущего файла Нажми те еще раз для отмены Случайное воспроизведение Нажмите кнопку 4 RDM для воспроизве дения треков в текущей папке в случайном порядке Нажмите еще раз для отмены ID3 теги Если MP3 файл содержит информаци...

Page 30: ...правильно Зажигание машины не включено Если источник питания подключен надлежащим образом к выключателю машины установите ключ зажигания в положение АСС Сгорел предохранитель Замените предохранитель Нет звука Уровень громкости звука установлен на минимум Отрегулируйте громкость звука до не обходимого уровня Неправильно подсоедине ны провода Выполните подсоединение электропро водки правильно Радиоп...

Page 31: ...атур 200 С 600 С Стерео FM радио Количество сохраняемых станций 18 Частотный диапазон 87 5 108 0 МГц Разделение стерео 35 дБ 1 кГц AM радио Количество сохраняемых станций 12 Частотный диапазон 530 1710 кГц Используемая чувствительность 30 дБ Выход Линейный стереовыход RCA 2 В Технические характеристики могут быть изменены заводом изготовителем без пред варительного уведомления Указанные геометриче...

Page 32: ......

Page 33: ...л т з з любым д бным б м гл т чн я л жб дд ж и Д т в з з в в ии ф мл ни дит нл н з 2 мин ты м нии Д т в и л т вин и тзывы ции и ид и Hyundai H CCR8096 Описание Характеристики Отзывы ...

Reviews: