background image

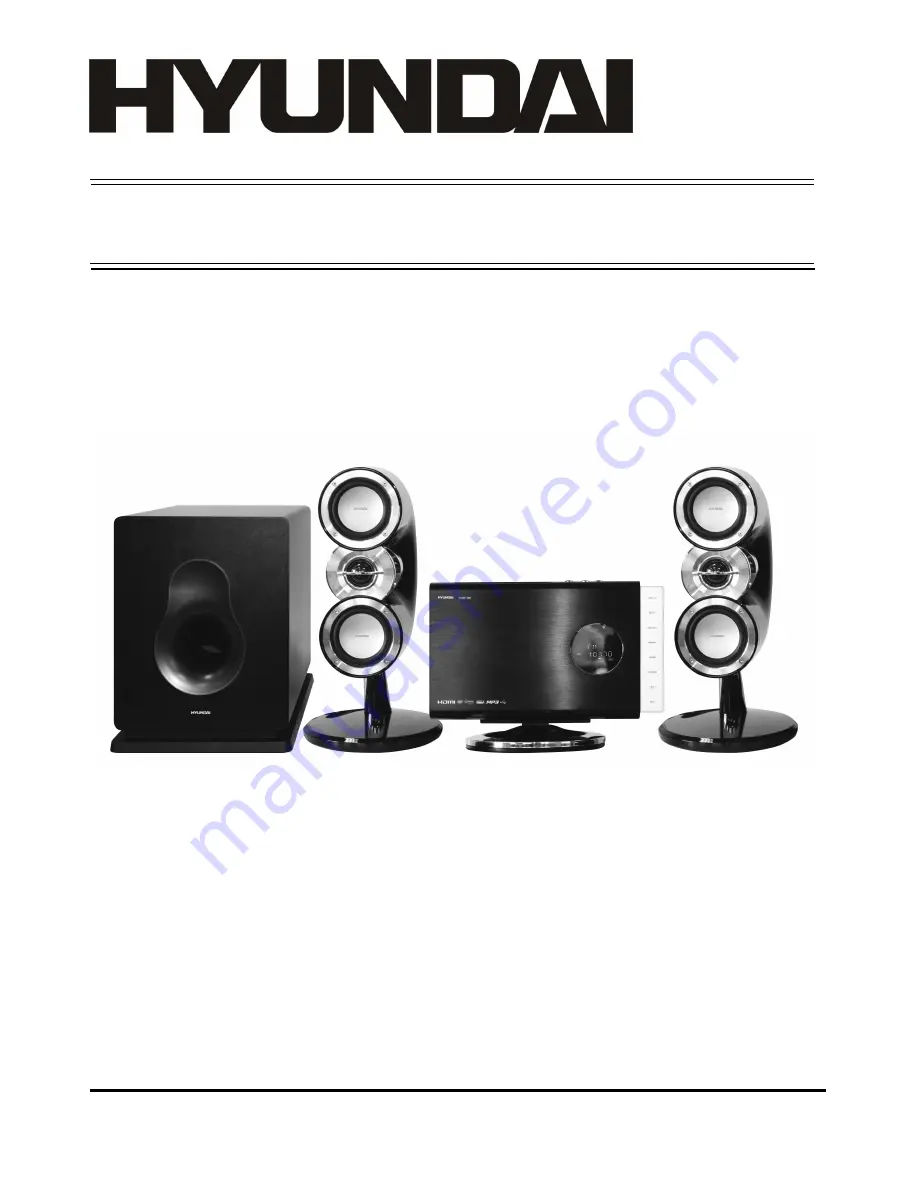
H-MS1105

DVD MICRO SYSTEM

Instruction manual

 DVD

Summary of Contents for H-MS1105

Page 1: ...H MS1105 DVD MICRO SYSTEM Instruction manual DVD ...

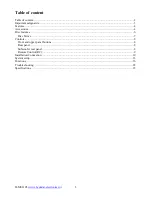
Page 2: ...t 2 Important safeguards 3 Features 4 Accessories 4 Disc features 6 Disc Terms 7 Controls 8 Front and upper panel buttons 8 Rear panel 8 Subwoofer rear panel 8 Remote Control RC 9 Installation Connection 10 System setup 13 Functions 16 Troubleshooting 22 Specifications 23 ...

Page 3: ...n t use constant current source Supply line cord protection Make sure that the cord is right connected and does not have any damage Incorrect attachment and damage of cord may cause fire and electrical shock Service Do not try to eliminate breakages by your own When the sound is off the indicator does not light the smoke appears or any other troubles take place which were not mentioned in this man...

Page 4: ...formance is much better than that of any previous home video playing equipment it will give you the uppermost enjoyment Touch pad buttons Supports DVD R RW DVD R RW CD R RW Compatible with DVD DVCD Super VCD VCD HDCD CDDA MP3 WMA Kodak Picture CD JPEG Built in Dolby Digital AC 3 decoder Support of MPEG4 Connectors composite component YUV line in RCA HDMI output USB slot Russian and English OSD Acc...

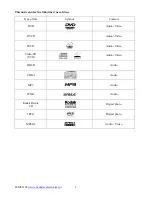
Page 5: ...an play the following types of discs Type of disc Symbol Contents DVD Audio Video DVCD Audio Video SVCD Audio Video Video CD VCD Audio Video HDCD Audio CDDA Audio MP3 Audio WMA Audio Kodak Picture CD Digital photo JPEG Digital photo MPEG4 Audio Video ...

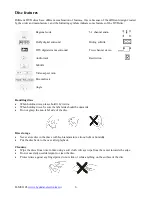
Page 6: ...Subtitle Video aspect ratio Parental lock Angle Handling discs When holding discs please hold it by its rim When holding discs be sure the label side should be upwards Do not grasp the non label side of the disc Disc storage Never store disc in the place with high temperature strong light or humidity Put the disc back to the case after playback Cleaning Wipe the discs from time to time using a sof...

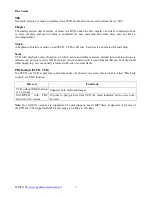
Page 7: ...lness picture divided into certain portions is called scene and every scene will be showed on screen menu with a scene number that can be easily found while on playing A scene usually is formed with one or several tracks PBC function SVCD VCD If a SVCD or a VCD is played a content menu may be showed on screen this is what is called Play back control viz PBC function Disc sort Functions VCD without...

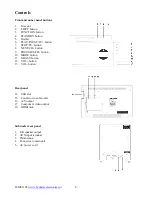
Page 8: ...LAY PAUSE TU button 7 STOP TU button 8 NEXT CH button 9 PREVIOUS CH button 10 MODE button 11 S BASS button 12 VOL button 13 VOL button Rear panel 14 USB slot 15 Connector to subwoofer 16 A V output 17 Component video output 18 HDMI jack Subwoofer rear panel 1 L R speaker output 2 AUX input terminal 3 FM antenna 4 Connector to main unit 5 AC power cord ...

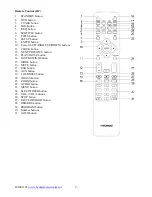
Page 9: ...or LEFT RIGHT UP DOWN buttons 11 CLOCK button 12 NEXT PREVIOUS button 13 PLAY PAUSE button 14 FAST REWIND button 15 MODE button 16 MUTE button 17 USB button 18 AUX button 19 LOUDNESS button 20 S BASS button 21 ZOOM button 22 AUDIO button 23 MENU button 24 SLEEP TIMER button 25 VOL VOL buttons 26 STOP button 27 FAST FORWARD button 28 OSD RDS button 29 PROGRAM button 30 Number buttons 31 GOTO button...

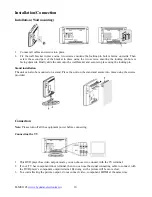
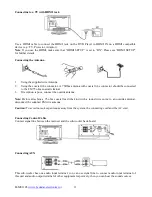
Page 10: ...ing the locking pin Stand installation The unit can also be mounted on a stand Place the unit on the stand and secure into place using the screws provided Connection Note Please turn off all the equipment power before connecting Connecting the TV 1 This DVD player has video output mode you can choose it to connect with the TV terminal 2 If your TV has component input terminal then you can use the ...

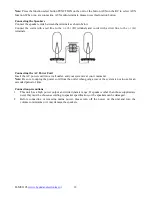
Page 11: ...e connected to the FM 75 ohm coaxial terminal 3 If reception is poor connect the outside antenna Note Before attaching a 75 ohm coaxial lead the kind with a round wire going to an outside antenna disconnect the supplied FM wire antenna Caution To avoid noise keep antennas away from the system the connecting cord and the AC cord Connecting Control Cable Connect signal line between the main set and ...

Page 12: ...G terminals Connecting the AC Power Cord Insert the AC power cord into a wall outlet and your system is at your command Note Be sure to unplug the power cord from the outlet when going away or the system is not in use for an extended period of time Connection precautions 1 This unit has a high power output and wide dynamic range If speakers other than those supplied are used they must be chosen ac...

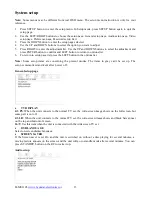
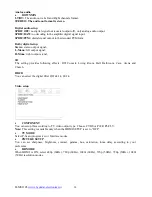
Page 13: ...ns list 6 To return to setup page list press the LEFT button in the options list Note Some setup items are concerning the present modes The items in gray can t be set up The setup is memorized and kept after power off General setup page TV DISPLAY 4 3 PS When the unit connects to the normal TV set the wide screen image shows on the full screen but some part is cut off 4 3 LB When the unit connects...

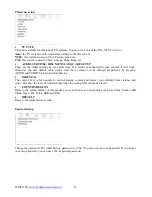
Page 14: ... R Mono right output signal 3D The setting provides following effects Off Concert Living Room Hall Bathroom Cave Arena and Church HDCD You can select the digital filter Off 44 1k 88 2k Video setup COMPONENT You can setup this according to TV video output type Choose CVBS or Pr CR Pb Cb Y Note This setting is available only when the HDMI SETUP is set to OFF TV MODE Select P Scan progressive or Inte...

Page 15: ...disc default value works And these settings can be changed respectively by pressing AUDIO and SUBTITLE buttons when playing PARENTAL The control level is for parental to control playing content and protect your children from violence and erotic The disc the level of which is higher than the setting level cannot be played COUNTRY REGION Refer to the selling market of this product you can choose a c...

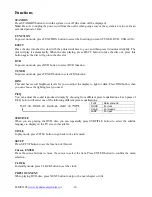
Page 16: ...M This unit has several brightness levels for you to adjust the display to light or dark Press DIM button then you can choose the lighting level you need P EQ You can adjust the sound reproduced simply by choosing from different preset equalizations Each press of P EQ button will select one of the following different preset equalizations FLAT Normal sound ROCK For rock CLAS For classic JAZZ For ja...

Page 17: ...e track or all the disc repeat play can be set by pressing the mode button When playing a DVD disc this function can be used to play a title chapter or disc repeatedly Repeatedly press MODE button the screen shows in circle When playing a CD disc this function can be used to play a track or folder repeatedly Repeatedly press MODE button the screen shows orderly When playing MP3 disc this function ...

Page 18: ...n to select one of languages to play SLEEP TIMER If you want to set the daily timer or the sleep timer press SLEEP TIMER button VOLUME buttons VOL VOL Press VOL button to increase the volume Press VOL button to decrease the volume OSD RDS Press OSD button to display the playing information of the disc on the TV screen PROGRAM If your DVD disc has one or more music chapters or titles you can setup ...

Page 19: ...select MENU then press ENTER button to enter the REMOTE KEY FUNCTION list STOP entering picture thumbnail mode NEXT next picture PREV previous picture PLAY to play picture Select CONTINUE to go to the next menu page ZOOM change zoom mode UP DOWN LEFT RIGHT move zoom center during zoom in picture Select EXIT MENU to exit Note Some JPEG format discs may not support rotation and zoom function Slide S...

Page 20: ...the display Press MODE button to select the Stereo or Mono channel to receive the FM radio mode it can get the best effect RDS Radio Data System Reception Many FM stations are broadcasting added data compatible with RDS This radio set offers convenient functions using such data PS Program Service Name When an RDS station is received the RDS indicator lights and automatically displays the name of t...

Page 21: ... or it will return to time display The sound source of the timer on mode is the same as the sound source when the unit was turned off by the standby switch To display the daily time Press SLEEP TIMER button in standby mode the daily time is displayed Wait for a moment until the display returns to the time display To cancel the daily timer setting In standby mode repeatedly press SLEEP TIMER button...

Page 22: ...ct Perform proper audio setup Sound distorted Sound volume level is too high Decrease the sound volume level Disc is not inserted Insert a disc into the slot Unit cannot read a disc Disc is inserted incorrectly Insert the disc correctly The direction of the RC to the sensor Use the RC in compliance with the instruction manual The distance between the RC and the sensor exceeds 8 meters Use the RC i...

Page 23: ...back DVD DVCD Super VCD VCD HDCD CDDA MP3 WMA Kodak Picture CD JPEG Built in sound decoders Dolby Digital AC 3 HDMI RCA Line in Composite video Component YUV USB Progressive scan MPEG 4 Support of subtitle for MPEG4 Support of color systems PAL NTSC 16 9 and 4 3 two screen size for selection Russian and English OSD Children lock Functions Support DVD disks of all zones Additional Characteristics o...

Page 24: ...H MS1105 www hyundai electronics ru 24 24 25 26 26 DVD 28 29 30 30 30 30 31 32 35 39 45 46 ...

Page 25: ...H MS1105 www hyundai electronics ru 25 100 240 1 ...

Page 26: ...H MS1105 www hyundai electronics ru 26 DVD DVD Hyundai DVD R RW DVD R RW CD R RW DVD DVCD Super VCD VCD HDCD CDDA MP3 WMA Kodak Picture CD JPEG Dolby Digital AC 3 MPEG4 YUV RCA HDMI USB FM 1 1 1 2 1 1 1 ...

Page 27: ...H MS1105 www hyundai electronics ru 27 DVD DVCD SVCD Video CD VCD HDCD CDDA MP3 WMA Kodak Picture CD MPEG 4 JPEG ...

Page 28: ...H MS1105 www hyundai electronics ru 28 DVD DVD 5 1 Dolby digital surround DTS ...

Page 29: ...H MS1105 www hyundai electronics ru 29 DVD DVD SVCD VCD CD VCD PBC SVCD VCD SVCD VCD VCD PBC 1 1 SVCD VCD PBC 2 0 VCD DivX 3 Bit rate MP3 64 256 ...

Page 30: ...H MS1105 www hyundai electronics ru 30 1 2 EJECT 3 FUNCTION 4 STANDBY 5 6 PLAY PAUSE TU 7 STOP TU 8 NEXT CH 9 PREVIOUS CH 10 MODE 11 S BASS 12 VOL 13 VOL 14 USB 15 16 V 17 18 HDMI 1 2 AUX 3 FM 4 5 ...

Page 31: ...4 DIM 5 P EQ 6 SUBTITLE 7 TITLE 8 SETUP 9 ENTER 10 11 CLOCK 12 NEXT PREVIOUS 13 PLAY PAUSE 14 FAST REWIND 15 MODE 16 MUTE 17 USB 18 AUX 19 LOUDNESS 20 S BASS 21 ZOOM 22 AUDIO 23 MENU 24 SLEEP TIMER 25 VOL VOL 26 STOP 27 FAST FORWARD 28 OSD RDS 29 PROGRAM 30 31 GOTO ...

Page 32: ...H MS1105 www hyundai electronics ru 32 1 2 1 2 3 HDMI ...

Page 33: ...H MS1105 www hyundai electronics ru 33 HDMI HDMI HDMI HDMI HDMI HDMI 1 2 75 FM 75 3 75 FM AUX FUNCTION AUX AUX ...

Page 34: ...H MS1105 www hyundai electronics ru 34 R L G 1 2 ...

Page 35: ...H MS1105 www hyundai electronics ru 35 1 SETUP SETUP 2 3 4 5 ENTER 6 4 3 PS 4 3 LB 16 9 STANDBY ...

Page 36: ...H MS1105 www hyundai electronics ru 36 SPDIF SPDIF SPDIF RAW SPDIF PCM Dolby Digital HDCD 44 1k 88 2k CVBS Pr CR Pb Cb Y HDMI ...

Page 37: ...H MS1105 www hyundai electronics ru 37 YUV HDMI HDMI 480p 60Hz 720p 60Hz 1080i 60Hz 576p 50Hz 720p 50Hz 1080i 50Hz PAL NTSC Auto Auto NTSC PAL AUDIO SUBTITLE ...

Page 38: ...H MS1105 www hyundai electronics ru 38 1234 ...

Page 39: ...lectronics ru 39 STANDBY STANDBY FUNCTION FUNCTION TUNER DVD USB AUX EJECT EJECT DVD DVD DVD TUNER TUNER DIM P EQ FLAT ROCK CLAS JAZZ SUBTITLE DVD SUBTITLE TITLE TITLE SETUP SETUP Cursor ENTER ENTER CLOCK CLOCK PREVIOUS NEXT ...

Page 40: ... NEXT PREVIOUS CD NEXT PREVIOUS PLAY PAUSE STOP PLAY PAUSE STOP PLAY PAUSE FAST REWIND FAST FORWARD FAST REWIND FAST FORWARD PLAY PAUSE MODE DVD CD MP3 MENU Number buttons VIDEO CD MENU PBC 0 9 10 10 0 9 10 10 0 9 28 10 8 DVD MENU MUTE MUTE USB ...

Page 41: ...SB AUX AUX AUX LOUDNESS LOUDNESS S BASS S BASS ZOOM ZOOM 2x 3x 4x 1 3 AUDIO Video CD AUDIO DVD AUDIO SLEEP TIMER SLEEP TIMER VOLUME buttons VOL VOL VOL VOL OSD RDS OSD RDS PROGRAM DVD PROGRAM ENTER STOP 10 I NEXT CD MP3 PROGRAM MENU PROGRAM GOTO ...

Page 42: ...w hyundai electronics ru 42 GOTO 10 0 9 ENTER STOP STOP NEXT PREV PLAY ZOOM UP DOWN LEFT RIGHT JPEG 12 12 USB USB MP3 1 USB 2 FUNCTION USB USB 3 USB 4 USB 4 USB USB FM FUNCTION TUNER FM FAST FORWARD FAST FORWARD 1 ...

Page 43: ...REWIND FAST REWIND 1 TU PROGRAM 16 CH CH NEXT PREVIOUS NEXT PREVIOUS MODE FM RDS Radio Data System FM RDS PS RDS RDS PS OSD RDS 3 CT PS PTY News Rock Classical music CT CT RDS CT RDS CLOCK PS OSD RDS CT PTY 3 PS CLOCK VOL VOL CLOCK VOL VOL CLOCK 10 ...

Page 44: ...www hyundai electronics ru 44 CLOCK SLEEP TIMER VOL VOL SLEEP TIMER VOL VOL SLEEP TIMER ON OFF VOL VOL 10 SLEEP TIMER SLEEP TIMER ON VOL VOL OFF SLEEP TIMER SLEEP TIMER 10 20 80 90 00 SLEEP TIMER SLEEP TIMER 00 ...

Page 45: ...H MS1105 www hyundai electronics ru 45 DVD 8 ...

Page 46: ...ndai electronics ru 46 2 1 50 x 2 100 FM 16 FM 87 5 108 DVD R RW DVD R RW CD R RW DVD DVCD Super VCD VCD HDCD CDDA MP3 WMA Kodak Picture CD JPEG Dolby Digital AC 3 HDMI RCA YUV USB MPEG 4 MPEG4 PAL NTSC 16 9 4 3 220 50 ...

Reviews: