background image

23 


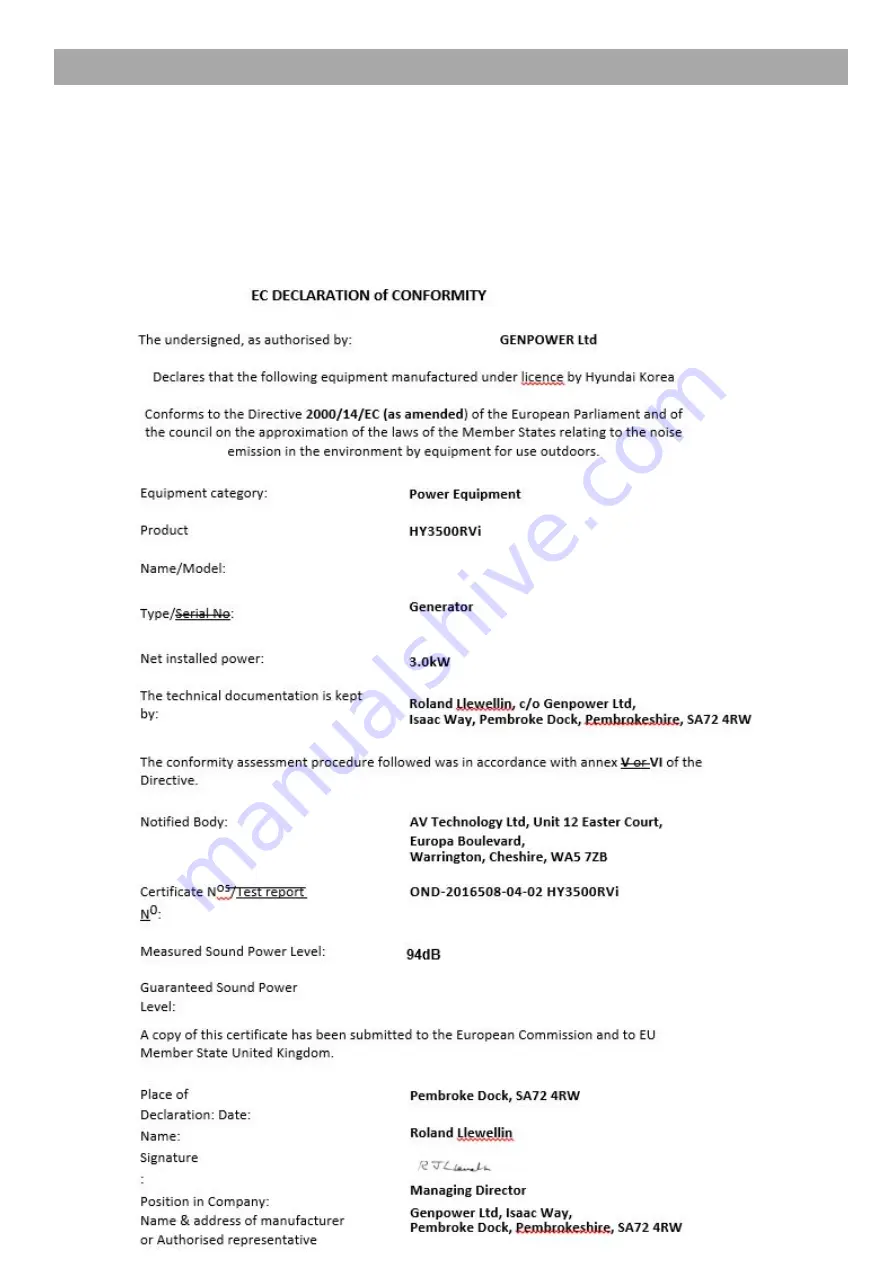
Genpower Ltd confirms that these Hyundai products conform to the following CE Directives. 

97/68/EC 


Non Road Mobile Machinery Directive 


2000/14/EC   

Outdoor Noise Directive 

2004/108/EC  

Electromagnetic Compatibility Directive 

2006/42/EC   

Machinery Directive 

2006/95/EC   

Low Voltage Directive 


11. DECLARATION OF CONFORMITY


Summary of Contents for HY3500RVi

Page 1: ...1 FOR YOUR SAFETY You must read and understand this manual before use Keep this manual for future reference ...

Page 2: ...IONS 8 3 ASSEMBLY 9 12 4 STARTING PROCEDURE 12 5 STOPPING PROCEDURE 13 6 USING THE MACHINE 14 15 7 MAINTENANCE 16 19 8 TROUBLESHOOTING 20 9 SPECIFICATION 21 10 RECYCLING 22 11 DECLARATION OF CONFORMITY 23 12 CONTACT DETAILS 24 13 WARRANTY 24 INDEX ...

Page 3: ...se around whilst using the machine 1 6 Some or all of the following warning signs symbols and or PPE pictograms may appear throughout this manual You MUST adhere to their warnings Failure to do so may result in personal injury to yourself or those around you DANGER Indicates a hazard which if not avoided could result in serious injury or death WARNING Indicates a hazard which if not avoided could ...

Page 4: ...de any of the following Home garage tent camper van mobile home caravan or boat This is not exhaustive and if you are in any doubt contact your dealer 1 15 If you think you have or someone around you has been affected by carbon monoxide poisoning 1 16 Get them fresh air immediately by leaving the affected area or by opening doors and windows If safe and practical to do so make sure that the machin...

Page 5: ...40 Electrical Safety where applicable 1 41 Electricity can kill NEVER work on LIVE ENERGISED equipment 1 42 Prior to carrying out any maintenance work you MUST identify electrical isolation methods and isolate all electrical supplies 1 43 Prior to use and with all electrical supplies isolated you MUST check all electrical cables plugs and connectors for the following 1 44 Are intact and have no si...

Page 6: ...areas 1 59 1 There is an explosion risk if the battery terminals are short circuited when connecting disconnecting ALWAYS exercise great care so that the terminals or battery leads are NOT allowed to touch and cause a spark ALWAYS use suitable insulated tools 1 60 Vibrations where applicable 1 61 Prolonged use of hand held operated machines will cause the user to feel the effects of from vibration...

Page 7: ...ant and cautious when hearing ear protection because your ability to hear alarm warnings will be reduced 1 72 Noise emissions for this equipment is unavoidable Carry out noisy work at approved times and for certain periods Limit the working time to a minimum For your personal protection and protection of people working nearby it is also advisable for them to wear hearing protection 1 73 See Certif...

Page 8: ...8 2 1 3 4 1 Generator Set 2 Exhaust 3 24 Litre Stainless Steel Fuel Tank 4 Remote LCM Controller 1 Vehicle Under Mount Kit 2 Vehicle Slide Out Mounting Kit 2 PART LOCATIONS OPTIONS ...

Page 9: ...pened on the vehicle to avoid gasses entering the vehicle WARNING ALL FUELS ARE FLAMMABLE This product uses a separate fuel tank and must be installed in a safe location by a professional Attention must be made to the location of the fuel tank and filler cap to ensure installation complies with safety regulations NOTE The generator is shipped without oil and MUST be filled before operation Recomme...

Page 10: ...engine to run smoothly and efficiently 2 5 Once a suitable mounting location has been found install the generator 2 6 If using the fixed mounting attach the generator directly to the generator frame then attach the anti vibration mounts to the top of the frame to be mounted to the vehicle Anti vibration Mounts Generator Frame 2 7 If using the slide out frame option fix the anti vibration mounting ...

Page 11: ...een the exhaust flange and the flexi pipe Exhaust Flange Mounting Hangar Flexi Pipe 2 12 The fuel tank needs to be installed in a suitable and safe location 2 13 The fuel filler cap must be installed on the exterior of the vehicle and easy to access for refuelling purposes 2 14 Only use fuel grade hoses for installation 2 15 The remote LCM controller should be installed for easy access 2 16 Connec...

Page 12: ...ow as AC OFF on the remote LCM controller NOTE Connect all electrical loads in the OFF position then turn ON for operation Turn all electrical loads OFF and disconnect from the generator before stopping the generator Exceeding the generators wattage current capacity could damage the generator and or the electrical devices connected to it DO NOT exceed the generators wattage current capacity 3 0 Tu...

Page 13: ...ets NEVER start or stop the engine with electrical devices plugged in and turned on 4 1 Let the engine idle with no load for several minutes 4 2 Press the Power OFF button on the remote LCM controller 4 3 Turn the main generator switch to the OFF position 5 STOPPING PROCEDURE ...

Page 14: ...rators wattage current capacity 5 0 If overloaded the generator will cut the power supply and switch back to AC OFF mode on the remote LCM controller 5 1 Observe the following to prevent overloading of the unit Add up the total wattage of all electrical devices to be connected at one time This total should NOT be greater than the generators wattage capacity The rated wattage of lights can be taken...

Page 15: ...AC ON button on the remote LCM controller 5 9 Connect the electrical load to the generator socket with the electrical load turned off 5 10 Once connected turn on the electrical load 5 11 Once running the remote LCM controller will go into power save mode and the screen will appear blank If you need to operate or check the generator status press the Power ON button the remote LCM controller DO NOT ...

Page 16: ...ng protection Maintenance Every 100 Hours or 6 Months Every 3 Years Change Oil X Clean Adjust Spark Plug X Clean Adjust Valve Clearance X Change Air Filter Elements X Clean Fuel Tank Filter X Check Exhaust Mounts X Replace Fuel Pipe X 6 0 Cleaning the external of the generator 6 1 Use a damp cloth to wipe exterior surfaces 6 2 A soft bristle brush may be used to remove dust dirt oil etc 6 3 A vacu...

Page 17: ...generator 6 14 You MUST check the engine oil level before starting every session CAUTION A dirty air filter will restrict air flow which will reduce engine efficiency When using the generator in very dusty areas you must clean or replace the air filter more often Never operate the machine without the air filter being fitted it can cause damage to the engine which is not covered by warranty 6 15 Re...

Page 18: ...ir filter and air filter cover 6 20 You MUST allow the engine to cool down before carrying out any maintenance 6 21 Always replace with the same model spark plug as fitted 6 22 To check spark plug remove the generator cover 6 23 Remove the spark plug HT lead cap and unscrew the spark plug 6 24 Clean the spark plug electrode using a soft wire brush making sure that there is no damage to the insulat...

Page 19: ...atic electricity which often builds up in ungrounded devices 3 19 Floating earth portable generator use 3 20 This range of generators adopt a floating earth configuration which means that the Neutral of the alternator is not connected to the Earth of the machine 3 21 It is therefore IMPORTANT that you ONLY use the generator to supply equipment in the following combinations 3 22 One or more of CLAS...

Page 20: ...tor shuts down during operation Low Oil Fill Oil Low Fuel Fill Fuel Not enough power Air Flow Obstructed Increase Air Flow Exhaust Obstructed Check exhaust has smooth exit No AC Power Electric load damaged Replace electric load Overload Reduce the electrical load Loose wires Inspect and tighten wires Remote LCM Controller not working Overload Reduce electric load Short circuit Check for damaged or...

Page 21: ...ve Gap mm 0 08 0 10 Speed Regulation System Electronic Control Starting Type Remote Electric Recoil Start Alternator Phase Single Voltage Regulation Digital Inverter Regulation Frequency Hz 50 Rated AC Voltage V 230 Power Output kW 3 0 Max Power Output kW 3 5 Fuel Tank Capacity L 24 Net Weight Kg 46 Dimensions L x W x H mm 530 x 445 x 270 Power Factor COSφ 1 9 SPECIFICATION ...

Page 22: ... recycling centre 8 4 Certain products contain batteries which should not be disposed of in your domestic waste 8 5 You MUST recycle batteries in accordance with your local authority or recycling centre 8 6 Unwanted packaging and materials should be stored and taken to a recycling centre so it can be disposed of in a manner which is compatible with the environment 8 7 The following symbol means th...

Page 23: ...orm to the following CE Directives 97 68 EC Non Road Mobile Machinery Directive 2000 14 EC Outdoor Noise Directive 2004 108 EC Electromagnetic Compatibility Directive 2006 42 EC Machinery Directive 2006 95 EC Low Voltage Directive 11 DECLARATION OF CONFORMITY ...

Page 24: ...our machine for the manufacturer s warranty please visit https www hyundaipowerequipment co uk warranty 10 0 Our manuals are constantly being reviewed and updated However if you find and error omission or something you find unclear please contact your dealer for assistance 10 1 Our latest manuals are also placed online 10 2 We reserve the right to make any modifications without prior notice whenev...

Page 25: ...25 NOTES ...

Page 26: ...26 ...

Page 27: ...27 ...

Page 28: ...28 ...

Reviews: