background image

5

4

Items

2

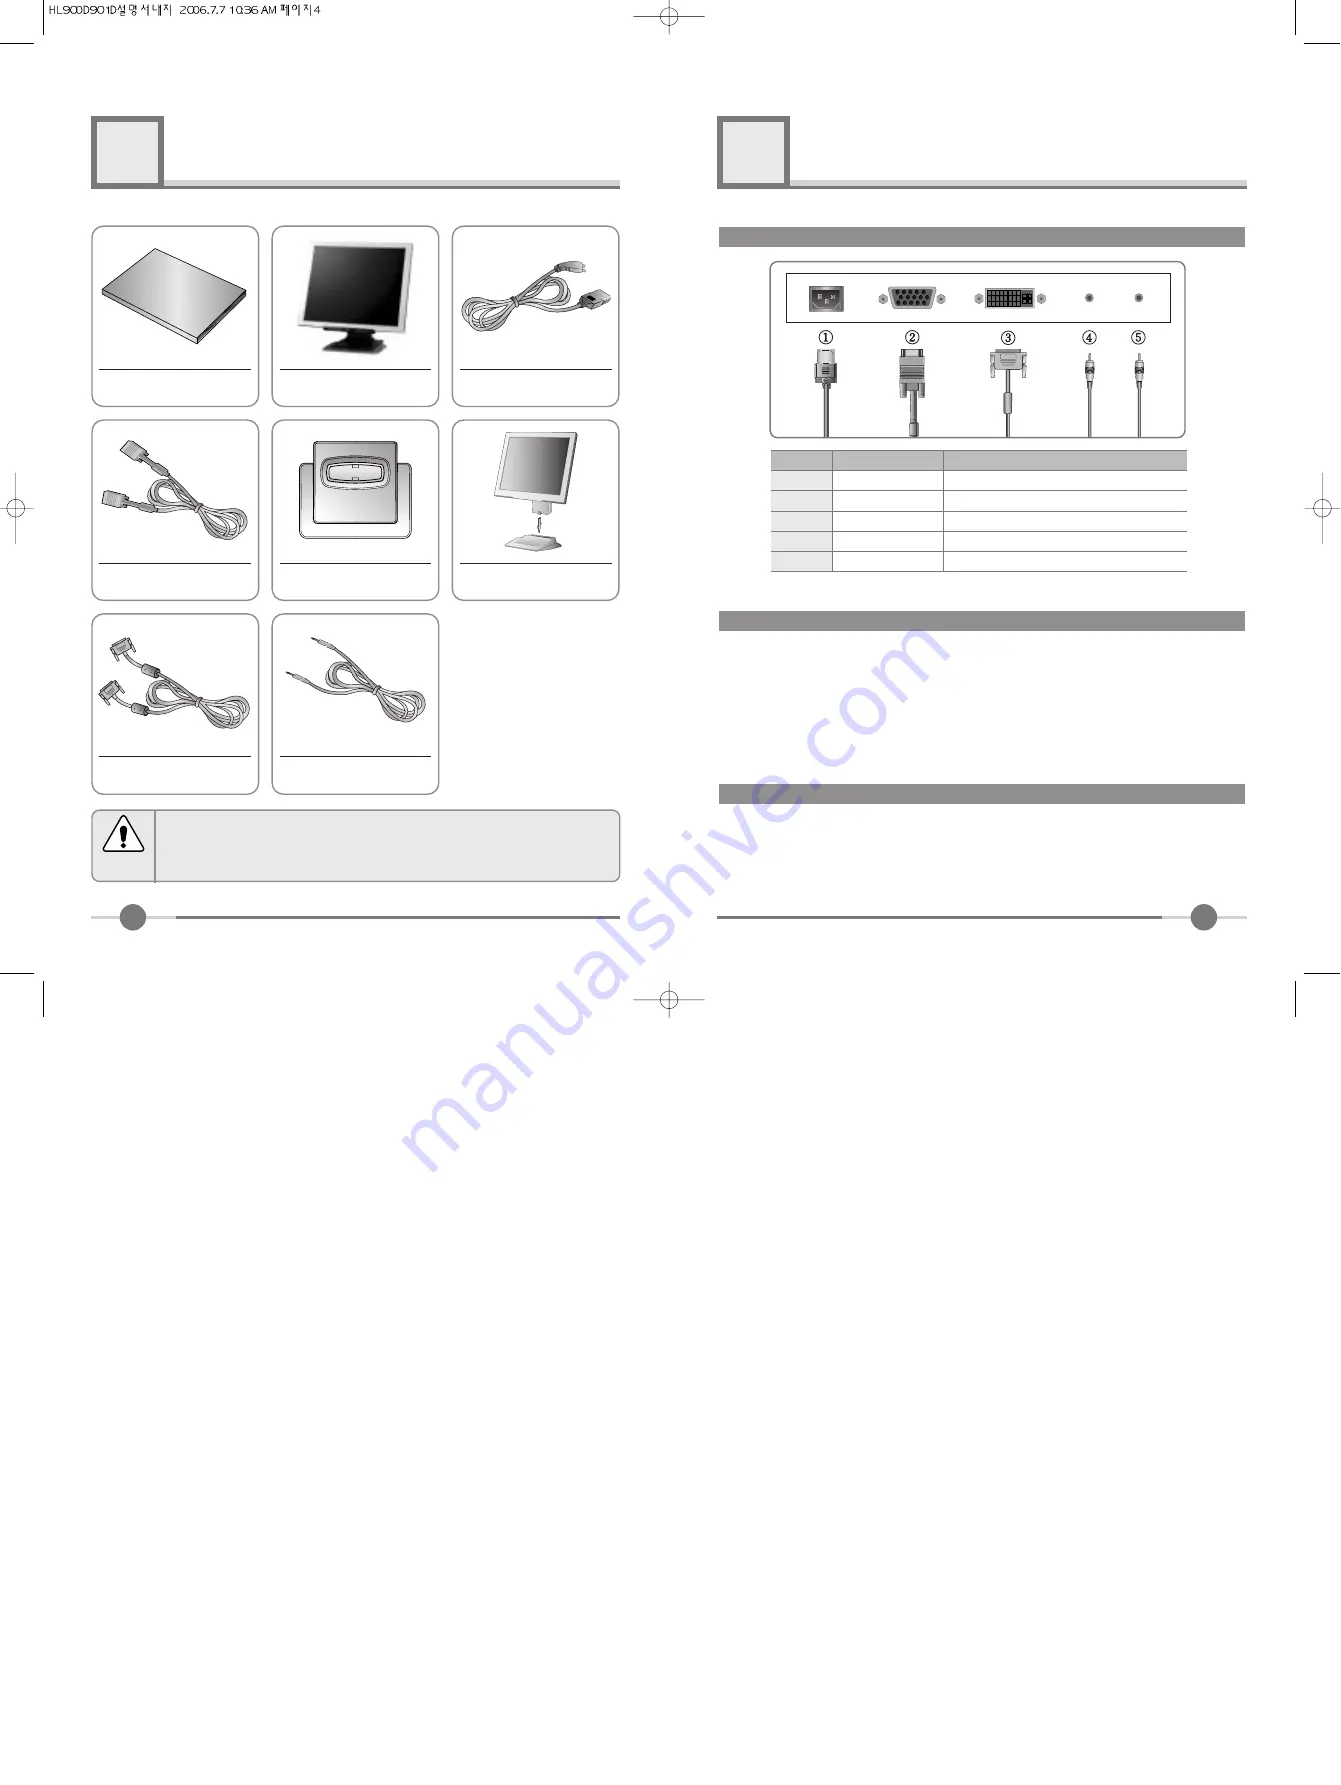
Please make sure the following items are included with your monitor.

If any items are missing, contact your dealer.

Notice

User Manual

15-pin D-Sub Signal

Cable

DVI-D Cable (Option)

Audio Cable

Stand

Push  the  hook  until
hanging

LCD Monitor

Power cord

Setting up the LCD monitor

3

How to connect the power cord and the several cables to the LCD monitor.

Power

PC

DVI (Option)

SPK IN

SPK OUT

Power Cord

15-pin D-Sub Signal Cable

DVI-D Cable

*1

Audio Cable

*2

External Speaker Cable

*2

No.

Cable connections

Name

All  LCD  monitors  need  time  to  become  thermally  stable  whenever  you  turn  on  the

monitor  after  letting  the  monitor  be  turned  off  for  a  couple  of  hours.  Therefore,  to
achieve  more  accurate  adjustments  for  parameters,  allow  the  LCD  monitor  to  be
warmed up for at least 30 minutes before making any screen adjustments.

Warm-up Time

The  adoption  of  the  new  VESA  Plug  and  Play  solution  eliminates  complicated  and
time consuming setup. It allows you to install your monitor in a Plug and Play compati-
ble system without the usual hassles and confusion. Your PC system can easily identi-
fy and configure itself for use with your display. This monitor automatically tells the PC
system  its  Extended  Display  Identification  Data  (EDID)  using  Display  Data  Channel
(DDC)  protocols  so  the  PC  system  can  automatically  configure  itself  to  use  the  flat
panel display.

Plug & Play

*1 : For DVI Model Only.          *2 : For Audio Model Only.

*1 : For Audio Model Only.

*1

1

2

3

4

5

Summary of Contents for LCD Monitor U90D

Page 1: ...User s Reference T TF FT T L LC CD D M Mo on ni it to or r H Hi ig gh h r re es so ol lu ut ti io on n T TF FT T L LC CD D M Mo on ni it to or r H Hi ig gh h r re es so ol lu ut ti io on n U90D...

Page 2: ...cord and the several cables to the LCD monitor 5 Plug Play 5 Warm up Time 5 4 Adjusting The Monitor 6 How to use the Function Key 6 Main OSD Menu 6 PICTURE 7 COLOR 7 OSD 7 MISC 7 MWE 7 5 Appendix 8 Di...

Page 3: ...ty and dust Operating environment 0 35degrees Celsius Operating environment 30 80relative humidity Do not block the fan louvers There is the risk of fire or dam age to the monitor 220V Use a proper vo...

Page 4: ...itor be turned off for a couple of hours Therefore to achieve more accurate adjustments for parameters allow the LCD monitor to be warmed up for at least 30 minutes before making any screen adjustment...

Page 5: ...om 10 to 40 sec TRANSPARENCY You can adjust OSD Transparency MISC LANGUAGE Selects language in OSD menu RECALL Discards current setting and replaced all parameters with the factory default values INPU...

Page 6: ...onnector Input signal Analog RGB 15 pin D Sub connector DVI D Connector Input signal Digital DVI D Connector Pin No 1 2 3 4 5 Analog Red Input Analog Green Input Analog Blue Input Ground DDC Ground Pi...

Page 7: ...5 or 1 seconds The monitor is using its power management system Move the computer s mouse or press a key on the key board Image is not stable and may appear to vibrate Check that the display resolutio...

Page 8: ......

Reviews: