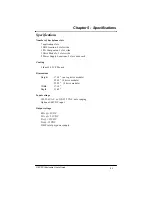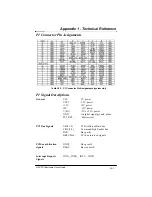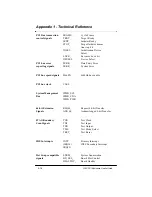
2-6
G8 CPCI Enclosure User’s Guide
Chapter 2 - Hardware
Removal and installation of the hot-swap fan tray
Note:
Removing the fan tray interrupts power to all chassis fans. As a
result, you should have another fan tray ready to install immediately
after the first one is removed.
1.
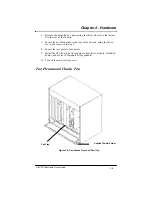
Loosen the two captive thumb screws located on both sides of the fan
access door at the front of the enclosure.
2.
Open the access door.
3.
Slide the fan tray out of the chassis.
4.
Slide the replacement fan tray into the chassis.
5.
Close the access door and tighten the two captive thumb screws.
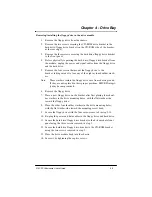
Removing/installing a fan
1.
Remove the fan tray.
2.
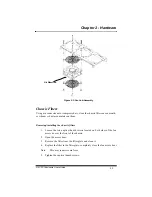
Remove the four screws securing the fan and its two finger guards to
the fan tray, taking care not to lose any of the eight flat washers.
3.
Swap out the old fan for a new one and place it between the two fin-
ger guards.
Note:
The arrow indicating the fan air direction.
4.
Secure the new fan and the finger guards to the fan tray using the four
screws and the eight flat washers removed in step 2.
Note:
Two washers accompany one screw. One washer goes on top
of the fan, and one goes on the bottom of the fan, providing a
cushion between the fan and the finger guards.
5.
Install the fan tray in the chassis.
Summary of Contents for G8
Page 1: ...G8 CPCI Enclosure User s Guide G8 8 Slot CompactPCI Enclosure User s Guide 095 30004 00 Rev A ...
Page 8: ...iv Table of Contents This page was intentionally left blank G8 CPCI Enclosure User s Guide ...
Page 20: ...2 8 G8 CPCI Enclosure User s Guide Chapter 2 Hardware This page was intentionally left blank ...

