background image

ida 812-1x MIO Operator’s Guide
Operation

-18-

4. ida 812-1x MIO Operation

The 

ida 812-1x MIO

 is controlled entirely from the host system by

IBM commands and requires very little operator intervention.

The configuration of the printer may be changed from the system
with Function Selection via the Line (FSL) sequences as de scribed
in 

Chapter 7, Function Selection via the Line and 

the "ida 812-1x

PCL Platform, Programmer's Guide", doc. no. D62026.

The printer can be tested via the line as described in the
Programmer's Guide referred to above. The 

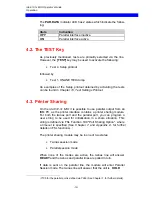
[TEST]

 key found on

the rear panel may also be used for the test procedure, see 

Section

4.2, The Test Key

.

4.1. The Rear Panel

The rear panel  consists of:

The 

SYNC

 indicator LED which indicates twinax connection

to the host system

The 

[TEST]

 control key

The 

Device Address

 switch

The 

PAR.DATA

 indicator LED

The twinax socket

The parallel input port for optional connection to a PC

The 

SYNC

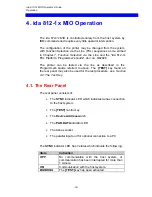
 indicator LED has 3 states which indicate the follow ing:

State

Indication

OFF

No communication with the host system, or
communication has been interrupted for more than
1 minute.

ON

Communication with the host system.

BLINKING

The 

[TEST]

 key has been activated.

Summary of Contents for 812-1x MIO

Page 1: ...operated in a commercial environment Operation of this equipment in a residential area is likely to cause interference in which case the user at his own expense will be required to take whatever measures may be required to correct the interference EMC directive Only if installed in a printer with metal casing will this product observe the rules and regulations of the EMC directive If so required a...

Page 2: ...46 31 680710 Telefax 00 46 31 682670 i data UK Ltd Unit 3 Cartel Business Centre Stroudley Road Basingstoke Hants RG24 8FW United Kingdom Telephone 00 44 1 256 460033 Telefax 00 44 1 256 460066 i data France Parc de Haute Technologie 2 rue Alexis de Tocqueville 92183 Antony Cedex France Telephone 00 33 1 46114340 Telefax 00 33 1 46114341 i data Inc 250 V Executive Drive Edgewood New York 11717 U S...

Page 3: ...serJet 5 HP LaserJet 5Si HP PaintJet XL300 HP DeskJet 1200C HP DeskJet 1600 C HP Color LaserJet and to any subsequent releases until otherwise specified It is assumed that the reader has a basic knowledge and understanding of IBM computer systems especially the 36 38 and AS 400 systems Prerequisite Manuals The original HP LaserJet User s manuals LaserJet is a registered trademark of Hewlett Packar...

Page 4: ...As the ida 812 1x MIO emulates the IBM 5219 printer useful information may be obtained from IBM 5219 Printer Models DO1 DO2 Programmer s Reference Guide IBM Order No GA 23 1025 Using the IBM Pageprinter 3812 with an IBM System 36 or System 38 IBM Order No S544 3343 Device Configuration Guide AS 400 IBM Order No SC21 8106 ...

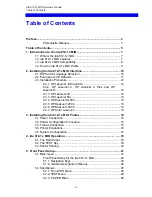
Page 5: ...aserJet 4 Plus and HP LaserJet 5 12 2 3 3 HP LaserJet 4V 12 2 3 3 HP LaserJet 5Si 13 2 3 4 HP PaintJet XL300 13 2 3 5 HP DeskJet 1200 C 13 2 2 6 HP DeskJet 1600 C 13 2 2 7 HP Color LaserJet 13 3 Installing the ida 812 1x MIO Printer 14 3 1 Power Connection 14 3 2 Printer Configuration Procedure 15 3 3 Twinax Connection 15 3 4 Printer Emulations 16 3 5 System Configuration 17 4 ida 812 1x MIO Opera...

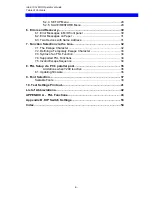
Page 6: ...ction via the Line 32 7 1 The Escape Character 32 7 2 Defining a Temporary Escape Character 33 7 3 Syntax of an FSL Function 34 7 4 Supported FSL Functions 34 7 5 Invalid Escape Sequence 34 8 FSL Setup via PC s parallel port 35 Limitations when Y249 is active 36 8 1 Updating firmware 36 9 Font Selection 37 Scalable Fonts 39 10 Test Settings Printout 41 List of Abbreviations 42 APPENDIX A FSL Funct...

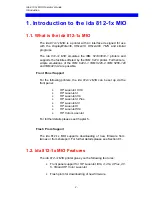
Page 7: ...234 2 are possible Front Panel Support For the following printers the ida 812 1x MIO can be set up via the front panel HP LaserJet IIISi HP LaserJet 4 HP LaserJet 4Si HP LaserJet 4 Plus HP LaserJet 4V HP LaserJet 5 HP LaserJet 5Si HP Color LaserJet For further details please see Chapter 5 Flash Prom Support The ida 812 1x MIO supports downloading of new firmware from twinax or from shareport For f...

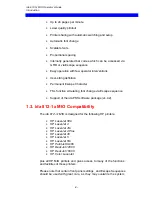
Page 8: ...n simulating font change via Escape sequence Support of the ida PSS software package vs 4 2 1 3 ida 812 1x MIO Compatibility The ida 812 1x MIO is designed for the following HP printers HP LaserJet IIISi HP LaserJet 4 HP LaserJet 4Si HP LaserJet 4 Plus HP LaserJet 4V HP LaserJet 5 HP LaserJet 5Si HP PaintJet XL300 HP DeskJet 1200C HP DeskJet 1600 C HP Color LaserJet plus all HP MIO printers and gi...

Page 9: ...setup functions are downloaded as special commands from your IBM system The ida 812 1x MIO interface intercepts these commands and uses them for its own internal setup Chapter 6 Function Selection via the Line is a brief description of these commands and is mainly intended for users already familiar with i data products For more detailed information on the settings used in the ida 812 1x MIO pleas...

Page 10: ...e damaged by static discharge To prevent this damage the interface comes wrapped in an antistatic bag When you remove the interface from the bag and when you install it hold the interface by the edges only Do not touch the components or connections Do not throw away the antistatic bag If the interface is removed from the printer later it should be kept in the antistatic bag 2 1 DIP Switch Language...

Page 11: ...ault please see Appendix B DIP Switch Settingsand FSL Y8 in Appendix A for further details Note Sending a restore command to factory default i e X3 will reset language settings to the DIP switch settings 2 2 European or US Defaults The ida 812 1x MIO default setup for Europe and for the US differ in two respects 1 Paper size A4 for Europe and Letter for US 2 Language Multinationalin Europe and Uni...

Page 12: ... MIO Modular Input Output card from the bottom slot on the rear of the printer by loosening the screws and pulling the card out of the printer 2 Insert the ida 812 1x MIO interface twinax connector at the bottom in place of the card you just removed and tighten screws 2 3 2 HP LaserJet 4 HP LaserJet 4 Plus and HP LaserJet 5 1 Loosen the screws on the cover plate positioned to the left of the paral...

Page 13: ...rt the ida 812 1x MIO interface twinax connector at the left in the slot and tighten screws 2 3 7 HP DeskJet 1600 C 1 Remove the HP JetDirect card from the slot on the rear of the printer by loosening the screws and pulling the card out of the printer 2 Insert the ida 812 1x MIO interface twinax connector to the left in place of the card you just removed and tighten screws 2 3 8 HP Color LaserJet ...

Page 14: ...ilable on the ida 812 1x MIO However certain front panel settings and LaserJet escape sequences should be used with great care as they may overwrite the system settings or be overwritten from the system and this may cause formatting problems 3 1 Power Connection When you connect the power make sure that the mains lead has a correctly wired plug with a ground connection and insert the plug into a p...

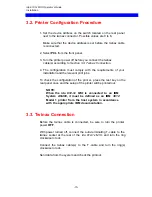
Page 15: ...vant print jobs To check the configuration of the print er press the test key on the rear panel once and the setup of the printer will be printed out NOTE When the ida 812 1x MIO is connected to an IBM System AS 400 it must be defined as an IBM 3812 Model 1 printer from the host system in accordance with the appropriate IBM documentation 3 3 Twinax Connection Before the twinax cable is connected b...

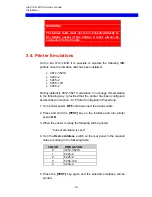
Page 16: ...You change this emulation in the following way provided that the printer has been configured as described in Section 3 2 Printer Configuration Procedure 1 Turn printer power OFF and disconnect the twinax cable 2 Press and hold the TEST key on the interface and turn printer power ON 3 When the printer is ready the following will be printed Current emulation is xxxx 4 Turn the Device Address switch ...

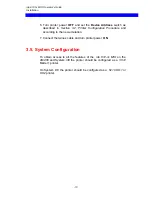
Page 17: ...uration Procedure and according to the new emulation 7 Connect the twinax cable and turn printer power ON 3 5 System Configuration To obtain access to all the features of the ida 812 1x MIO on the AS 400 and System 38 the printer should be configured as a 3812 Model 1 printer On System 36 the printer should be configured as a 5219 DO1 or DO2 printer ...

Page 18: ...bed in the Programmer s Guide referred to above The TEST key found on the rear panel may also be used for the test procedure see Section 4 2 The Test Key 4 1 The Rear Panel The rear panel consists of The SYNC indicator LED which indicates twinax connection to the host system The TEST control key The Device Addressswitch The PAR DATAindicator LED The twinax socket The parallel input port for option...

Page 19: ...rom an IBM PC as the printer interface contains a printer sharing module For both the twinax port and the parallel port you can program a user string to be used for initialisation in a share situation This string is defined via FSL Function 100 Port Sharing Option where a timeout is specified See Chapter 7 and Appendix A for further details on FSL functions 1 The printer sharing module may be in o...

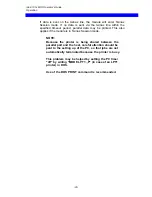
Page 20: ...This also applies if the module is in Twinax Session mode NOTE Because the printer is being shared between the parallel port and the host careful attention should be paid to the setting up of the PC so that jobs are not automatically terminated because the printer is busy This problem may be helped by setting the PC timer off by writing MODE LPT1 P in case of an LPT1 printer in DOS Use of the DOS ...

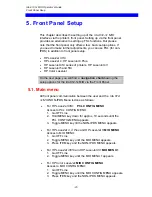
Page 21: ...up options for the ida 812 1x MIO via the Front Panel 5 1 Main menu All front panel communication between the user and the ida 812 1x MIO NON IPDS Menu is done as follows For HP LaserJet IIISi PCL CONFIG MENU Access to PCL CONFIG MENU 1 Go OFF Line 2 Hold MENU key down for approx 10 seconds until the PCL CONFIG MENU appears 3 Toggle MENU key till the NON IPDS MENU appears For HP LaserJet 4 4 Plus ...

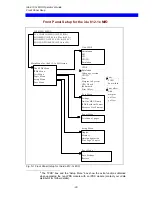
Page 22: ...intout Non IPDS Paper Menu Test Menu Main Menu for ida 812 1x MIO setup Orientation LPI CPI CPGID Emulation Non IPDS Menu IPDS Menu Test Menu Paper Menu Setup Menu Save Menu PCL CONFIG MENU HP LJ IIISi MIO MENU HP LJ 4 4 Plus LJ 5 MIO MENU1 HP LJ 4 5Si HP 4 V Font FGID Font width Print offset Add margins x offset y offset MIO CONFIG MENU HP Color LJ Fig 5 1 Front Panel Setup for the ida 812 1x MIO...

Page 23: ...IISi Go from ida 812 1x Setup Menu to Non IPDS Menu Press ENTER key Go to next Menu IPDS Menu Press MENU key Change settings Use and keys Mark with an asterisk Press ENTER Go to next setting Press MENU Save settings After change of settings you toggle to SAVE MENU using MENU key and press ENTER SAVE SETT NO will appear in the display To select YES you press or key When YES appears you press ENTER ...

Page 24: ...e supplement to setting up the interface via FSL NON IPDS MENU Can be used as an alternative supplement to non IPDS configuration using FSL functions TEST MENU Used for generating settings printout and HEX dumps PAPER MENU Used to set up the number of installed trays and tray features By definition a tray is always present in the FSL environment consequently this setting has no effect in the non I...

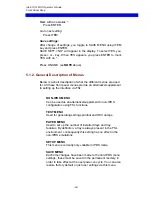
Page 25: ...e 5 2 1 Non IPDS Menu Each of the following functions correspond to an FSL function the corresponding FSL function number is indicated in brackets after the function name Unless otherwise specified changes take effect immediately after they have been saved via the SAVE RESTORE menu ORIENTATION corresponds to FSL Y10 Possible selections are P Portrait L Landscape COR COR Compter Output Reduction as...

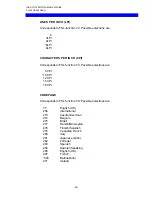
Page 26: ...tion Y3 Possible selections are 5 CPI 10 CPI 12 CPI 15 CPI 16 CPI CODEPAGE Corresponds to FSL function Y8 Possible selections are 37 English US 256 International 273 Austrian German 274 Belgium 275 Brazil 277 Danish Norwegian 278 Finnish Swedish 276 Canadian French 280 Italy 281 Japanese Latin 282 Portugal 283 Spanish 284 Spanish Speaking 285 English UK 297 French 500 Multinational 871 Iceland ...

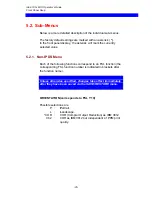
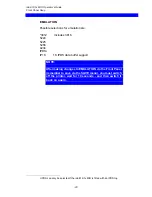
Page 27: ...16 5224 5225 5256 4234 IPDS3 IP1K 1K IPDS data buffer support NOTE After making changes to EMULATION via the Front Panel remember to save via the SAVE menu you must switch off the printer wait for 10 seconds and then switch it back on again 3 IPDS can only be selected if the ida 812 1x MIO is fitted with an IPDS top ...

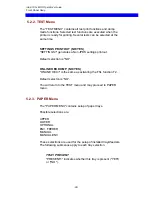
Page 28: ...gs printout Default selection is NO ONLINE HEX DUMP NO YES ONLINE HEX is the same as activating the FSL function T2 Default selecton is NO You will return to the TEST menu and may proceed to PAPER menu 5 2 3 PAPER Menu The PAPER MENU contains setup of paper trays Possible selections are UPPER LOWER OPTIONAL ENV FEEDER MANUAL MANUAL ENV These selections are used for the setup of installed trays fee...

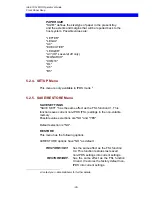
Page 29: ...INGS SAVE SETT has the same effect as the FSL function X1 This function saves current non IPDS FSL settings in the non volatile memory Possible value selections are NO and YES Default selection is NO RESTORE This menu has the following options All RESTORE options have NO as default RESTORE SET has the same effect as the FSL function X4 This function restores last saved non IPDS settings into curre...

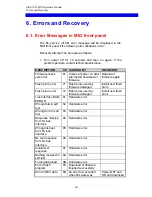
Page 30: ... error 71 Flash prom used by firmware damaged Install new flash prom Flash prom error 72 Flash prom used by firmware damaged Install new flash prom Line interface RAM ERROR 81 Hardware error Wrong data in self test 82 Hardware error Wrong word in self test 83 Hardware error Response missing from Twinax interface 84 Hardware error Wrong interrupt from Twinax interface 85 Hardware error No test resp...

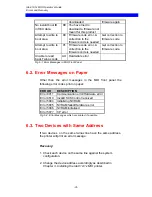
Page 31: ...ont Panel 6 2 Error Messages on Paper Other than the error messages in the MIO front panel the following error codes print on paper ERROR DESCRIPTION Error 8011 Communication error Hardware error Error 4510 Invalid SCS Control received Error 5004 Initializing NVRAM Error 5005 NVRAM failed Hardware error Error 5006 NVRAM initialized Error 50 CP error Fig 6 2 Error Messages which are printed if poss...

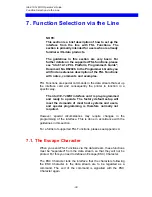
Page 32: ...ly the printer to function in a specific way The ida 812 1x MIO interface card is pre programmed and ready to operate The factory default setup will meet the demands of most host systems and users and special programming is therefore normally not required However special circumstances may require changes in the programming of the interface This is done in accordance with the guidelines in this sec...

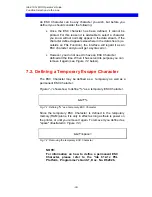
Page 33: ...cter defined all the time When it has served its purpose you can remove it again see Figure 7 2 below 7 2 Defining a Temporary Escape Character The ESC Character may be defined as a temporary as well as a permanent ESC Character Figure 7 1 shows how to define as a temporary ESC Character Fig 7 1 Defining as a temporary ESC Character Since the temporary ESC Character is defined in the temporary mem...

Page 34: ...iption with notes comments and examples you are referred to the ida 812 1x PCL Platform Programmer s Guide Doc No D62026 The notations below are used in the FSL summary description given in Appendix A is the defined ESC Character indicates the factory default indicates USA factory default where if differs from standard factory default indicates mandatory parameter which must be defined indicates o...

Page 35: ...ined as Escape Character for the twinax FSL module Function Y249 is automatically deactivated after timeout on the shareport i e settings defined in Y249 cannot be saved in the NVRAM5 The setup sequence must only contain ASCII characters Apostrophe notation can be used if characters are included in the US ASCII 7 bit character set All other data must be in HEX notation Activating the Y249 Engineer...

Page 36: ...ted i e LPI 6 for Y2 and CPI 10 for Y3 4 Non operative Test FSL functions T1 On line HEX dump T3 ASCII dump T1 online HEX dump will produce on line HEX dumps of data from the twinax line T3 will produce ASCII dumps from the twinax line 8 1 Updating firmware The ida 812 1x MIO firmware complete firmware may be updated via share port Firmware is downloaded from the share port using the ESC P2command...

Page 37: ...FSL functions are required you are referred to the Programmer s Guide D62026 In the following Default GFID Table the Attribute Symbol Set and Translate Table figures will refer to the following ATTRIBUTE 0 No attributes 1 Bold 2 Italic 3 Bold and italic 4 Proportional 5 Proportional bold 6 Proportional italic 7 Proportional bold and italic SYMBOL SET and TRANSLATE TABLE 0 Default table 1 Roman 8 2...

Page 38: ... 0 1 12 1 68 Letter Gothic Italic 6 2 1 12 1 69 Letter Gothic Bold 6 1 1 12 1 80 Prestige 8 0 1 10 1 85 Courier 3 0 1 10 1 86 Prestige 8 0 1 10 1 87 Letter Gothic 6 0 1 12 1 91 Letter Gothic Italic 6 2 1 12 1 95 Courier Italic 3 2 1 10 1 109 Letter Gothic Italic 6 2 1 12 1 110 Letter Gothic Bold 6 1 1 12 1 111 Prestige Bold 8 1 1 10 1 112 Prestige Italic 8 2 1 10 1 115 Courier Bold 3 1 1 10 1 116 ...

Page 39: ...s and point size have been linked together using the system described below GFID Number XXXYY where XXX point size and YY typeface attribute Possible typeface values are Typeface ID PCL No Name of Typeface 0 5 CG Times Roman 4 4116 Coronet 10 4 Helvetica 14 36 Helvetica Narrow 20 23 Century Schoolbook 24 4297 Marigold 30 17 Humanist CG Optima 34 4168 Antique Olive 40 31 ICT Avant Garde 44 4197 Gar...

Page 40: ...talic Y96 4815 This is 48 point Helvetica Narrow bold upright Y96 1301 This is 13 point Times Roman bold upright Font examples Other relationships between IBM GFID and printer typefaces fonts can be programmed using Function 91 or 97 See Programmer s Guide for more details on Function 97 GFIDs may be selected with the normal procedure or using Function 96 ...

Page 41: ...one Function 59 Barcode definitions None Function 61 User strings None Function 62 Setup strings None Function 73 Translate table 1 ROMAN 8 Function 74 Symbol set def None Function 88 Physical margins 288 480 288 480 288 480 Function 89 Physical margin comp Off Function 90 User Esc strings None Function 91 User defined font translation table None Function 92 Point size strings None Function 93 Att...

Page 42: ...APL A Programming Language ASCII American Standard Code for Information Interchange CPI Characters Per Inch DIP Dual Inline Package EEPROM Electrically Erasable Programmable Read Only Memory FSL Function Selection via the Line GFID Global Font ID HEX Hexadecimal LED Light Emitting Diode RAM Random Access Memory RPQ Request for Price Quotation SCS SNA Character String SNA Systems Network Architectu...

Page 43: ...nition 61 Setup for User Strings 62 Setup for IBM defined Strings 73 Select Translate Table 74 Printer Symbol Set Definition Strings 75 Overwrite Translate Table 88 Physical Margins 89 Physical Margin Compensation 90 User ESC String Definition 91 Font Definition 92 Font Point Size Definition String 93 Font Attribute Definition string 94 Font Typeface Definition String 96 Font Change Simulation 97 ...

Page 44: ...intout Z Function Zn Send user defined string S Function Sn Send user defined string W Function Wn Print Barcode X Functions X1 Store settings in the permanent memory X3 Restore the settings to factory default settings and reset printer X4 Restore the settings to Power Up defaults read the permanent memory ...

Page 45: ...Norwegian 278 Finnish Swedish 280 Italian 281 Japanese English 282 Portuguese 283 Spanish 284 Spanish Speaking 285 English UK 297 French 500 Multinational 10 Page Format Y10 n1 n2 n1 0 Portrait 1 Landscape 2 COR 82 COR Y10 82 then COR is independent of print quality n2 1 Tractor Upper 2 Drawer 1 Upper 3 Drawer 2 Lower 4 Manual feeder 5 Envelope feeder 6 Drawer 3 Lower 11 Paper Path Y11 n1 1 Tracto...

Page 46: ...US Legal 13 18 215mm x 315mm 99 Use system SPPS or SHF SVF values n2 Tray 1 Tractor Upper 2 Drawer 1 Upper 3 Drawer 2 Lower 4 Manual feeder 5 Envelope feeder 6 Drawer 3 Lower 7 255 Reserved for optional feeder 20 Reserved for DOD n3 Validation paper size 1 A4 2 Legal 3 Letter 4 Executive 5 Letter Monarch 6 Business 7 International DL 8 International C5 9 B5 10 A3 11 Ledger 15 Comm 9 Envelope 16 B5...

Page 47: ...ual feeder 5 Envelope feeder 6 Drawer 3 Lower n3 1 to 255 expressed in 1 100 100 22 Printer Driver Selection Y22 n1 2 HP PCL 4 4 HP PCL 5 37 IBM Printer Emulation Select Y37 n1 n1 Emulation 3812 5224 5225 5256 4234 4245 IPDS IPDS Only with IPDS support n2 Secondary Address 0 6 48 Permanent ESC Character Selection Y48 char or Y48 xx char character selected from the current IBM character table xx HE...

Page 48: ...FF String contents in HEX 62 Setup for IBM defined strings Tray select strings 62 n1 string n1 120 Tractor Tray 1 121 Envelope feed 123 Manual Cut sheet Feeder 125 Tray 1 126 Tray 2 127 Tray 3 73 Select Translate Table Y73 n1 n2 n1 Translate Table 1 Roman 8 2 IBM PC 8 3 ECMA Latin 1 5 US ASCII 6 OCR A 7 OCR B 8 PC 850 n2 Symbol Set 1 Roman 8 2 IBM PC 8 3 ECMA Latin 1 5 US ASCII 6 OCR A 7 OCR B 8 P...

Page 49: ... ASCII HEX required to print the character 88 Physical Margins Y88 n1 n2 n3 n1 32000 to 32000 Horizontal margin compensation in 1 1440 0 n2 32000 to 32000 Vertical margin compensation in 1 1440 0 n3 0 2 Page format as defined in FSL 10 89 Physical Margin Compensation Y89 n1 n2 n1 0 No compensation 1 Compensation as defined in FSL 88 n2 1 Tractor Upper 2 Drawer 1 Upper 3 Drawer 2 Lower 4 Manual fee...

Page 50: ...Font Definition Y91 n1 n2 n3 n4 n5 n6 n1 IBM GFID 1 65535 IBM GFID no n2 Typeface 0 255 Pre program med typeface value n3 Attribute 0 Remove all current attri butes 1 Bold 2 Italic 3 Bold and Italic 4 Proportional 5 Prop Bold 6 Prop Italic 7 Prop Bold and Italic n4 Symbol Set 1 Roman 8 2 IBM PC 8 3 ECMA Latin 1 5 US ASCII 6 OCR A 7 OCR B 8 PC 850 n5 Point Size 1 255 Point size n6 Translate Table 1...

Page 51: ...tion String Y93 n1 n2 n1 1 8 String no in decimal n2 00 FF String contents in HEX 96 Font Change Simulation For selection of scalable fonts please see Chapter 9 Y96 n1 1 65535 GFID no 97 User GFID Font Selection Y97 n1 n2 n3 n1 1 65535 GFID No n2 string String for 0 rotation n3 string String for 90 rotation 98 Automatic Page Orientation APO Y98 n1 n2 n1 0 Activate APO 1 Deactivate APO 2 Validate A...

Page 52: ...settings after share timeout 1 255 Timeout in no of sec onds 20 n2 00 FF String in HEX to be sent to printer before transmission of data when printer is selected by sharing unit 119 Auto Configuration Select Y119 n1 n1 0 Disable auto configuration 2 Enable Auto configuration 120 Settings printout at power up Y120 n1 n1 0 Disable 1 Enable ...

Page 53: ...national United States Canada German Austria Belgium Brasil Canada France Denmark Norway Finland Sweden France Italy Japan English Portugal Spain Spanish Speaking Great Britain Iceland ON 1 2 3 4 United States Canada This dip switch setting and the Canada France switch set default page size to Letter size 8 5 x11 All other combinations set default page size to A4 8 27 x 11 69 Default page size ON ...

Page 54: ... 8 14 Settings Printout 28 SETUP MENU 24 TEST MENU 24 28 Front Panle Non IPDS Menu 25 Function Selection via the Line 32 Supported 34 Syntax 34 H HP Compatibility 8 HP LaserJet 4 installation 12 HP LaserJet 4Si installation 12 HP LaserJet IIISi installation 12 HP PaintJet XL300 installation 12 13 I Installation Printer 14 O Operation 18 P Printer configuration 15 Printer emulations 16 Printer Shar...

Page 55: ...grammers and operators of i data equipment This form may be copied and used to communicate your view about this publication Your interest is appreciated Comments may be written in your own language use of English is not required Please send this form to i data Customer Services i data international a s Vadstrupvej 35 43 DK 2880 Bagsvaerd Denmark ...

Reviews: