Getting Started with GPS Logger
The following demonstrates how to get started with your
GPS Logger
and
@trip PC
:
1. Install @trip PC
2. Charge GPS Logger
3. Power on
4. Get first GPS fix
5. Connect PC to import data
1. Install @trip PC
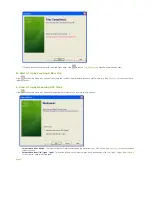
Insert the CD-ROM to the CD-ROM drive and follow the on-screen instructions to install
@trip PC
.
Top
2. Charge GPS Logger
GPS Logger Dock/ USB Cable
serves as a charger as well as data transfer medium. Please follow the instructions shown in the illustrations
below to connect your
GPS Logger
to PC and have it fully charged.
It takes about 4 hours to fully charge your
GPS Logger
for the first time. 2-hour charge is enough for later use. The red LED indicator stays on
during charging, and goes off when charging is complete. Remove your
GPS Logger
when charging is complete.
Tip
: You can also use any market available standard USB car charger or USB travel charger to charge up the battery power for your
GPS Logger
.
Note
: One side of the USB connector marked with an arrow should face up when you intend to connect it to the device, in order to avoid
unexpected damage caused by incorrect plugging.
Connect & Remove
GPS Logger USB Cable
Connect & Remove
GPS Logger USB Cable
Summary of Contents for GT-120
Page 31: ...Next...
Page 34: ...Next...


