background image

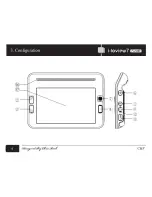
3. Configuration


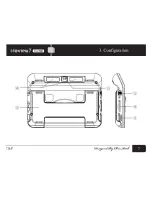
  Power on/off button


Power on : To turn on the unit, press the button for 3 seconds or more.


Power off : To turn off the unit, press the button for 3 seconds or more again


                        with the power on state.


If you experience an operation error or malfunction, press the button for 6


seconds to shut down the system.


  Zoom 

 button


  Zoom 

 button


Press the button to enlarge the display image.


Press the button to reduce the size of display image.


The magnification ratio is as follows:


Including digital magnification in a snap shot mode: 1.8x~275x 

Live mode only: 0.3x~50x


8


C&P
 

Summary of Contents for 7

Page 1: ...sit www MagnifyingAids com or call 1 727 526 2020 Magnifying Aids Inc 4760 East Bay Drive Ste E Clearwater FL 33764 Phone 727 526 2020 Toll 1 866 691 2450 Fax 727 531 7224 Portable Video Magnifier Use...

Page 2: ...k or fire Do not touch power plug with wet hands to prevent electronic shock Important Misuse of the product may result in personal injury or damage to the unit Use only the adapter supplied with the...

Page 3: ...months usage the lifespan of the battery may be shortened Keep the product out of direct sunlight and extreme temperatures The display may not work properly The recommended operating temperature is b...

Page 4: ...ctions before use 15 3 Configuration 16 4 Hot keys Features 13 1 Sound on off 13 2 Battery status 13 3 Saving image 13 4 Factory reset 14 5 Power saving mode 14 6 Menu 14 5 Technical specifications 21...

Page 5: ...sing the i loview 7 700Z Please check for the following items in the i loview 7 700Z package 1 Portable magnifier i loview 7 700Z 2 SD card 3 Power adapter 4 Carrying pouch 5 User s manual 6 Microfibe...

Page 6: ...use Please connect the supplied power adapter to the DC input jack to charge the battery 2 Remove the LCD protection film before using the unit 3 Be careful not to allow foreign material to adhere to...

Page 7: ...3 Configuration 6 C P...

Page 8: ...3 Configuration C P 7...

Page 9: ...th the power on state If you experience an operation error or malfunction press the button for 6 seconds to shut down the system Zoom button Zoom button Press the button to enlarge the display image P...

Page 10: ...background mode Yellow text on blue background mode Yellow text on black background mode View mode selector switch By switching this button you can select either the close up or mid range distance vi...

Page 11: ...to the left right up or down to navigate through menu or change menu item level Press the Jog button enter to select the desired menu item 1 Normal mode Still image Playback photo You can move around...

Page 12: ...reases and screen freeze Ear phone jack DC jack You can insert the power adapter here to charge the battery The indicator shows the battery charging status The indicator is red when charging the batte...

Page 13: ...3 Configuration LED lights Leg When you place the unit on the reading material unfold the leg Speaker LCD screen 12 C P...

Page 14: ...drops to 30 of full charge You can check the status of the remaining battery power by pressing the Zoom button and Color mode button simultaneously for 3 seconds or more The indicator icon disappears...

Page 15: ...aults 5 Power saving mode If you leave the unit turned on and unused for 3 minutes it automatically goes into the Power saving mode If the unit is left further 3 minutes after entering the Power savin...

Page 16: ...images by moving the Jog button left or right Also in the Playback photo mode you can zoom in out the images and adjust their colors and screen brightness level Pressing the snap shot button will retu...

Page 17: ...YES Press down the Jog button one more time to confirm it If you do not want to delete the image one the screen you can select NO by moving the Jog button left or right and press the Jog button enter...

Page 18: ...4 Hot keys features Screen Brightness 3 Screen brightness This allows you to adjust the screen brightness There are five 5 different levels C P 17...

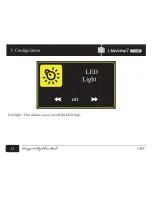
Page 19: ...3 Configuration LED Light on Led light This allows you to on off the LED light 18 C P...

Page 20: ...4 Hot keys features Sound Volume 3 Sound volume This allows you to adjust the sound volume There are five 5 different levels C P 19...

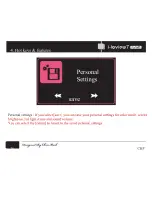
Page 21: ...Settings save Personal settings If you select save you can save your personal settings for color mode screen brightness led light status and sound volume You can select the return to return to the sa...

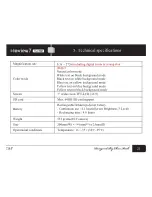
Page 22: ...llow background mode Yellow text on blue background mode Yellow text on black background mode 7 widescreen TFT LCD 16 9 Max 64GB SD card support Rechargeable lithium polymer battery Continuous use 4 1...

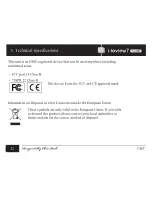
Page 23: ...5 Class B CISPR 22 Class B This device bears the FCC and CE approval mark Information on Disposal in other Countries outside the European Union These symbols are only valid in the European Union If yo...

Page 24: ...6 Warranty 1 The warranty term is for one 1 year except for the battery which is warranted for six 6 months 2 The warranty does not cover any product problems caused due to misuse or neglect C P 23...

Page 25: ...Memo 24 C P...

Page 26: ...Portable Video Magnifier C P Creativity and Personality for Assistive Technology www chrisparkdesign com Designed in Newport Beach California Made in South Korea...

Reviews: