background image

Ioint® Secure DVI 4K KVM Switch User Manual

ƒ‰‡ͳ͹


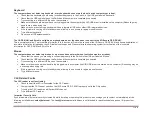
Step 3 

 Connecting the Computers  

3.1   Using USB cables, connect each computer to the USB port  
        

in “computer interface ports” area on product.


3.2   If computer uses audio output, e

.

g

speakers/headphones, connect audio cable 

        from its audio output port to the corresponding audio input port on product. 
3.3   If the computer uses a smart card/CAC reader, connect a USB cable between  
         the CAC-enabled computer and the corresponding CAC port on product. 


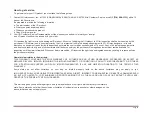
Step 4- Powering 

U

p the Computers  

Power up all the attached computers and check the display and peripheral functionality

.  

All computers can be powered on simultaneously. 


When you power on your computers, the Switch emulates both a mouse and keyboard  
on each port and allows your computers to boot normally. The computer connected to  

port “1” will be displayed on the monitor. Check to see that the keyboard, monitor, and


mouse are working normally

Proceed to do this with all occupied ports to verify that all  

Computers are connected and responding correctly

If you encounter an error, check your  

cable connections for that computer and reboot. If the problem persists,  
please refer to the Troubleshooting section in this User Manual. 
 

Color Code Label Installation 


The I/O Secure DP-DP KVM

’s port

-selector buttons can be color-coded for easier identification


Note: 


1.


If the number of product channels is larger than the number of  


sources used, make sure the computers are connected in a row  


starting from computer #1

.

For example, if there are 3 channels  


used, connect computers to channels #1, #2 and then #3. 

2.


The USB cable must be connected directly to a free USB port on 


the computer, with no USB hubs or other devices in between. 


Note:  

Your computers should recognize the Switch and automatically install 
the HID USB driver if necessary. 


Summary of Contents for SV142P1

Page 1: ...PP3 0 4 SV242P1 I O 4 Port Dual DP to DP 4K video Secure KVM with CAC PP3 0 5 SV122P1 I O 2 Port Single DP to DP 4K video Secure KVM with CAC PP3 0 6 SV122P0 I O 2 Port Single DP to DP 4K video Secur...

Page 2: ...ew 6 Security Features 6 Tamper Evident Labels 6 Other Features 7 Equipment Requirements 8 System Requirements 9 Unit Display Diagrams 11 Specifications 14 Installation 15 Pre Configuration 15 Connect...

Page 3: ...addition to expert troubleshooting advice in the unlikely event of a problem 2 port secure KVM switches share the same specification with the 4 ports only difference being having 2 hosts selections a...

Page 4: ...her liquid o The product is not working well even after carefully following the instructions in this user s manual o The product has been dropped or is physically damaged The product shows obvious sig...

Page 5: ...anti tampering system Any attempt to open product enclosure will activate the anti tamper system indicated by all channel select LEDs flashing continuously In this case product will be inoperable and...

Page 6: ...strator access log functions Product incorporates secure administrator access and log functions to provide auditable trail for all product security events including battery backup life for anti tamper...

Page 7: ...Device Detection Storage and other unsafe USB devices are rejected when connected to the Switch Only mouse keyboard and CAC reader data are passed through Secure Packaging Tear away packaging ensures...

Page 8: ...bility Using a new advanced anti tampering battery with an extremely low self discharge rate the life expectancy of the switch has been increased dramatically to over 15 years Equipment Requirements C...

Page 9: ...ess keyboards In any case do not connect wireless keyboard to product c Non standard keyboards such as keyboards with integrated USB hubs and other USB integrated devices may not be fully supported du...

Page 10: ...The product DP DP monitor is compatible of the highest resolution CAC Port The product is compatible for CAC Common Access Card reader PS 2 Port The product is compatible for standard PS 2 keyboard o...

Page 11: ...VI 4K KVM Switch User Manual Unit Display Diagram SV142P1Model Shown Unit Display Diagram Back View Unit Display Diagram Back View SV142P0 Model Shown Unit Display Diagram Front View Unit Display Diag...

Page 12: ...el Shown Unit Display Diagram Front View Unit Display Diagram Back View SV242P1 SV122P1 Model Shown Unit Display Diagram Front View Unit Display Diagram Back View Unit Display Diagram Back View Unit D...

Page 13: ...View Unit Display Diagram Back View Ioint Secure DVI 4K KVM Switch User Manual Unit Display Diagram Back View Unit Display Diagram Front View Model Shown SV222P1 Unit Display Diagram Back View SV222P...

Page 14: ...panel push buttons No of monitors per computer supported 4 SV142P1 SV142P0 SV242P0 SV242P1 Operating Temp 32 to 122 F 0 to 50 C 2 SV122P1 SV122P0 SV222P1 SV222P0 Storage Temp 4 to 140 F 20 to 60 C Vi...

Page 15: ...Service immediately and contact I O Technical Support at 1 714 564 1111 2 Do not connect product to computing devices a That include frame grabber video cards That includes special audio processing c...

Page 16: ...ected to port 1 will be displayed on the monitor Check to see that the keyboard monitor and mouse are working normally Proceed to do this with all occupied ports to verify that all Computers are conne...

Page 17: ...Now that you have connected your console and computers to the Switch it is ready for use You can select which computer you wish to control by pressing the corresponding port selector on the front of...

Page 18: ...he computer that requires CAC and the other end to the CAC port on the I O DP DP KVM that corresponds to the computer 1 2 Enable CAC for the same port connection in Step 1 1 by switching the CAC switc...

Page 19: ...e DP DP USB KVM Cable Kit is connected tightly between the Switch and the computer The Switch does not turn on Ensure that the AC power cord is securely connected to both the AC inlet and to the wall...

Page 20: ...the monitor directly into the computer you are having trouble with to see if the problem still appears Do not use video splitters I am getting a blank screen on my monitor Ensure that the power switc...

Page 21: ...d Please refer to the operating system for verification of the lock state information for CAPS NUM and Scroll Lock Mouse The computer does not detect my mouse or my mouse does not work when I switch c...

Page 22: ...ant to Part 15 of the FCC Rules These limits are designed to provide reasonable protection against harmful interference in a residential installation This equipment generates uses and can radiate radi...

Page 23: ...bility that the product SV142P1 SV142P0 SV122P1 SV122P0 SV242P1 SV242P0 SV222P1 SV222P0 to which this declaration relates are in conformity with the requirements of AS NZS regulations for Class B Info...

Page 24: ...O is unable to repair or replace the product for example because it has been discontinued I O will offer either a refund or a credit toward the purchase of another product from I O com in an amount eq...

Page 25: ...nd of such estimate shall be borne solely by the purchaser Damaged equipment must remain available for inspection until the claim is finalized Whenever claims are settled I O reserves the right to be...

Page 26: ...tact us immediately at the following email address info ioint com or our technical support line at 1 714 564 1111 After your communication is received I O Government personnel will contact you to foll...

Page 27: ...d All trade names are registered trademarks of respective manufacturers listed Windows and Windows Vista are either registered trademarks or trademarks of Microsoft Corporation in the United States an...

Reviews: