16
17
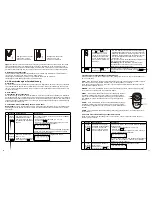
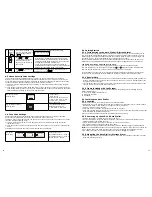
• Hold the enclosed mounting template against the wall at the selected location and mark the points
for drilling.
• Drill the holes and insert wall plugs.
• Attach the bracket to the mounting surface with the screws provided.
• Attach the Motion Sensor to the mounting bracket.
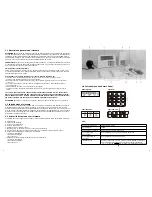
4.2.3 Introduction of Key Fob Remote Control
A. Introduction
The i.onik
®
Alarmsystem Remote Control allows you to operate the systems Smart Panel remotely,
from inside or outside the property. Using the control the system can be armed or disarmed
and the siren can be activated instantly if required (using the Panic function).
B. Operation
a. Powering up the Key Fob Remote Control
The Remote Control includes a 12V alkaline battery. To activate, unscrew and remove the back of the
Remote Control, and carefully remove the clear plastic insulation tab from the battery. If the battery
is dislodged, replace it noting the correct polarity as shown inside the battery compartment. Replace
the battery cover.
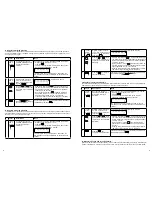
b. Enrolling the Remote Control onto the Smart Panel
Note: Before being able to use the Key Fob Remote Control supplied with the system, or any additio
-
nal Remote Controls, they first need to be enrolled (added onto the system) as follows:
ALERT
– Pressing the ALERT button on the remote will put
the system into Alert mode and a chime will sound if any of
the sensors are triggered. The Green light on the Smart
Panel LED display will flash and indicate the triggered zone.
HOME –
Pressing the HOME button on the remote will set
the system in Home mode which will operate the system in
both Arm and Alert modes in different preset zones.
PANIC –
If the HOME and ALERT buttons are pressed
together the systems alarm is immediately activated.
d. Deleting a Remote Control from the Smart Panel
If a Remote Control device is damaged or lost, it can be deleted from the system as follows:
e. Querying the ID Number of a Remote Control
The ID number of a Remote Control device can be identified as follows:
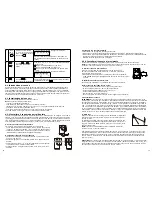
c. Operating the Key Fob Remote Control
The remote can be used to arm, disarm, and operate the system instantly.
ARM
– Pressing the ARM button on the remote will arm the system, triggering the preset exit delay.
When triggered the Smart Panel’s LED light will flash Red and indicate the triggered zone.
DISARM
– Pressing the DISARM button on the remote will disarm the system instantly and the
system will return to Standby mode.
Keys
Description
Note
1
(1234/
4-digit
PIN)
+
You must be in STANDBY
mode before enrolling a
new Remote Control onto
the Smart Panel.
To make sure you are in STANDBY mode:
- Enter the default PIN “ 1 2 3 4 ”
OR your new 4-digit PIN
- Press
- The Smart Panel will display the image below when
you are in STANDBY mode:
(One beep indicates that you entered a valid PIN,
three beeps indicate that an invalid operation was
performed).
2
(1234/
4-digit
PIN)
+
Enter the default PIN “ 1 2
3 4 ” OR your new 4-digit
PIN for setting followed
by
.
The Smart Panel will display the below image:
3
Press
then
to
enter the Remote Control
Enroll mode. Then press
any key on the new
Remote Control to enrol it
onto the system.
- LCD display flashes the ID no. of the remote to be
enrolled e.g. when enrolling the first remote ID no.
“01” will flash. Once the first remote is enrolled the
“02” will flash ready for a second remote to be enrolled
(One beep indicates that the remote was enrolled to
the Smart Panel successfully)
Note:
It is recommended that the ID No. is marked on
the remote in case it needs to be deleted at a later stage
4
Press
to complete the
setting.
Confirm the setting and return the Smart Panel to
STANDBY by pressing
Keys
Description
Note
1
(1234/
4-digit
PIN)
+
You must be in STANDBY
mode before deleting a
Remote Control from the
Smart Panel.
To make sure you are in STANDBY mode:
- Enter the default PIN “ 1 2 3 4 ”
OR your new 4-digit PIN
- Press
- The Smart Panel will display the image below when
you are in STANDBY mode:
(One beep indicates that you entered a valid PIN,
three beeps indicate that an invalid operation was
performed).
2
(1234/
4-digit
PIN)
+
Enter the default PIN “ 1 2
3 4 ” OR your new 4-digit
PIN for setting followed
by
The Smart Panel will display the below image:
3
Press
then
to
enter the Remote Control
Deleting mode. Then
input the ID no. of the
Remote Control you wish
to delete from the system.
- LCD display flashes the total number of remote
currentlyenrolled to the systemn(e.g. If the Smart
Panel has 3 remotes enrolled the LCDdisplay will
flash “03”).
- Input the remote ID no. (e.g. “02”) for the remote
you wish to delete (Inputting “00” will delete all
remote controls).
- LCD display will then flash the total number of
remotes enrolled after deletion.
(One beep indicates that the remote was successfully
deleted from the Smart Panel).
4
Press
to complete the
deletion.
Confirm the deletion and return the Smart Panel to
STANDBY by pressing
.
Keys
Description
Note
1
(1234/
4-digit
PIN)
+
You must be in STANDBY
mode before deleting a
Remote Control from the
Smart Panel.
To make sure you are in STANDBY mode:
- Enter the default PIN “ 1 2 3 4 ”
OR your new 4-digit PIN
- Press
- The Smart Panel will display the image below when
you are in STANDBY mode:
(One beep indicates that you entered a valid PIN,
three beeps indicate that an invalid operation was
performed).

