


CABLINE-CX II PLUG With Cover Assembly Manual
Document No.
ASM-17008
10
/
16
Confidential C
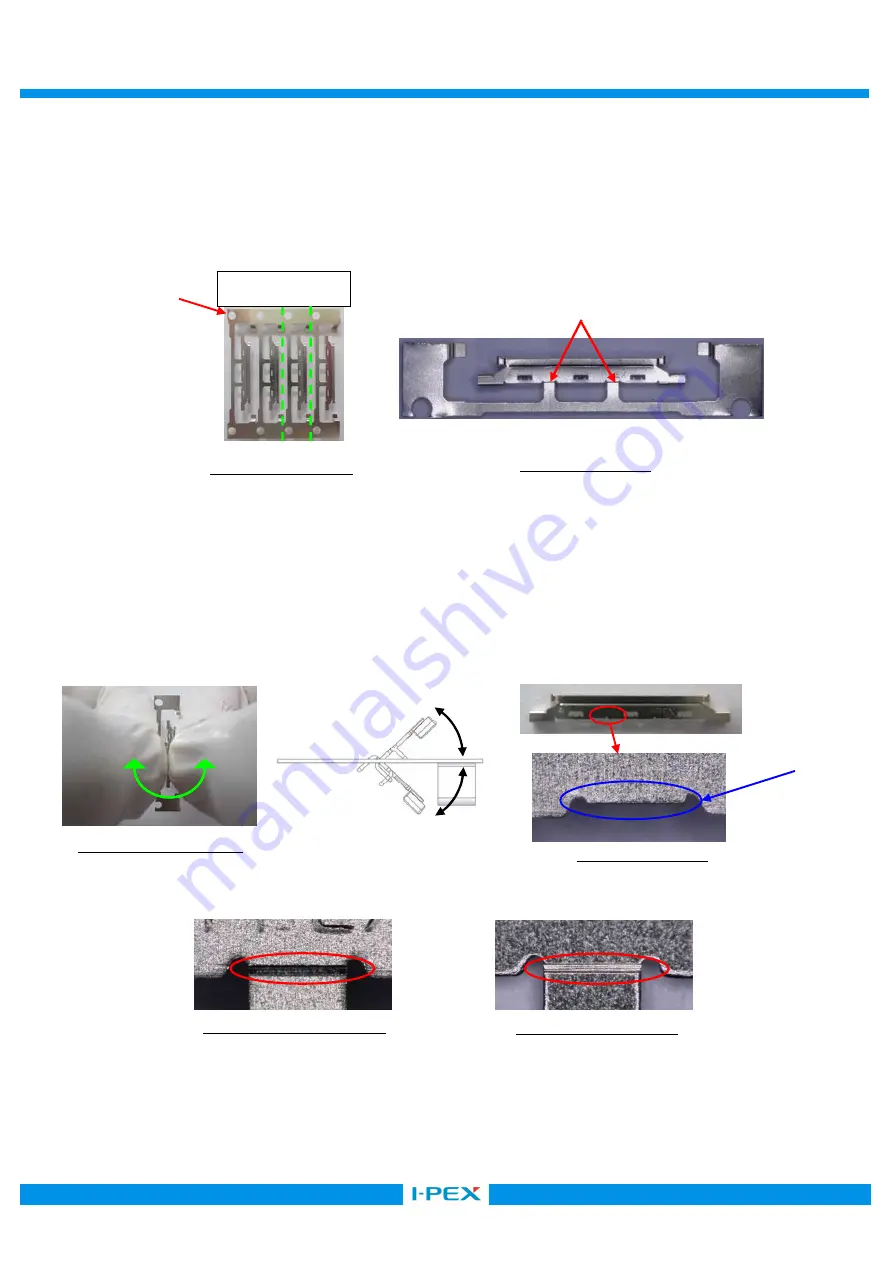
5-2. SHELL-A 取扱注意事項
(
Cautions in treating SHELL A)
SHELL-A はキャリア付きリール状態にて納品されます。SHELL-A をキャリアから折り取る手順を明記します。
SHELL A is delivered in the reel with a carrier. The following is the method to cut SHELL A from Carrier.
①
金属用はさみ等を用いて、キャリアを左下写真のカットライン(緑線)にて切断する。
Cut carrier on the cut line of the left below picture (green line) by a scissors for metal.
②
SHELL-A の中心部を持ち、±45°の範囲で 1 往復させてノッチ部から切り離す。
もし、切り離れない場合は、この往復動作を繰り返して切り離す。
切り離し後はノッチ折り取り部にバリ発生なきことを確認してください。(Photo.7)
Hold the center of Plug shell-A and cut it off from Notch by ±45 degrees of reciprocating work.
When it does not be cut, try again this reciprocating work.
After separated, check there is no burr around the cut part.(Photo.7)
SHELL-A ノッチ部状態 (SHELL-A Detail of Notch)
Carrier
Notch
Photo.4 Before cut
Photo.5 After cut
Cut Line
Photo.6 Cut condition
Photo.7 After cut
Without burrs
45°
45°
Photo.9 Bottom side
view
Photo.8 Upper side view


