24
6.2.1
After operation
1.
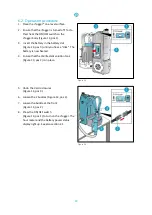
Press the self reset button on the spray gun
(Figure 15, pos 3) to stop spraying.
2.
Undo the buckle at the front
(Figure 15, pos 6).
3.
Undo the other 2 buckles
(Figure 15, pos 1).
4.
Undo the Velcro closures
(Figure 15, pos 2).
5.
Place the i-fogger® on a level surface.
6.
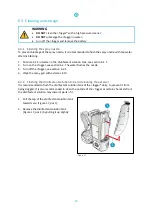
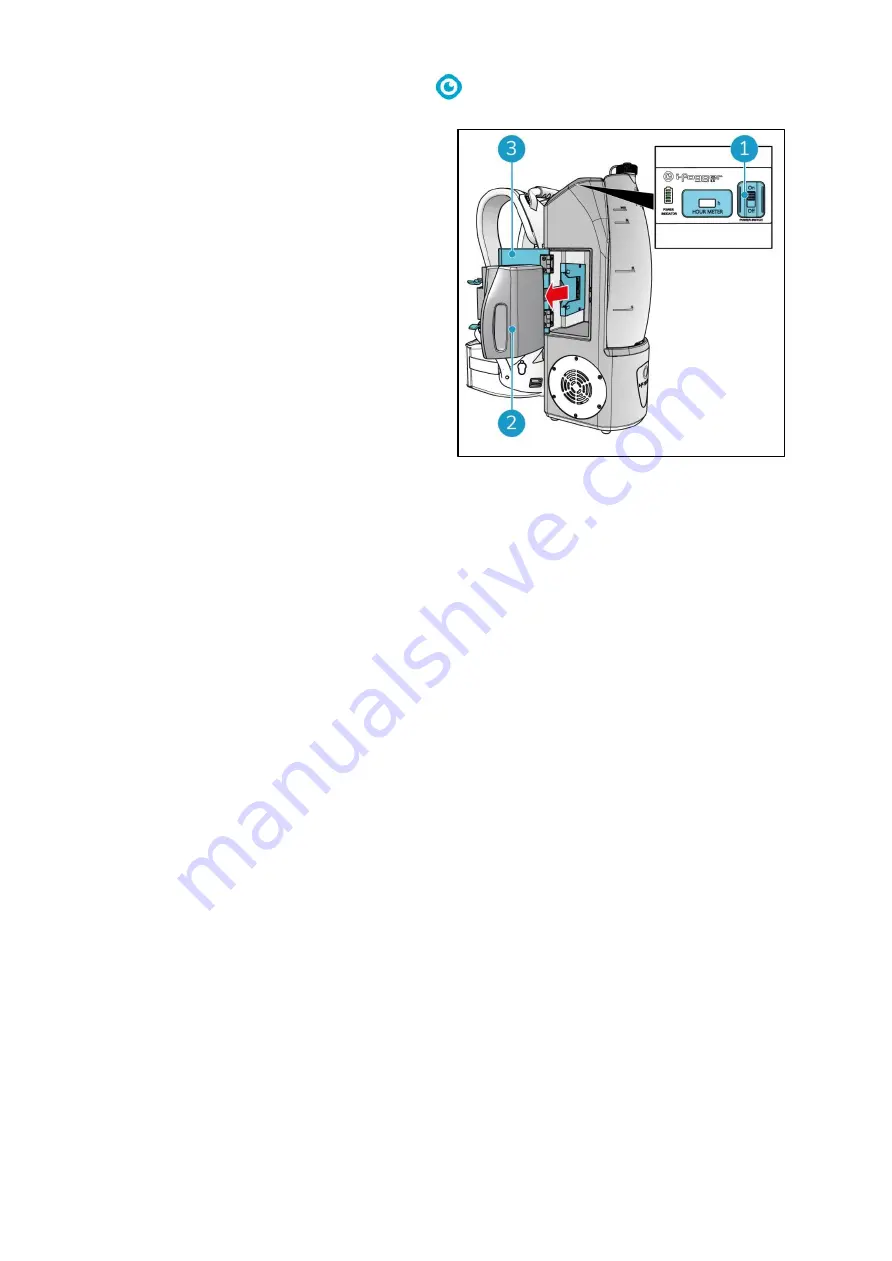
Press the ON/OFF switch
(Figure 16, pos 1) to turn off the i-fogger.
7.
Place the nozzle back in its upright position
on the side of the i-fogger. This is to avoid
leakage as there can still be liquid left in the
hose.
8.
Open the hatch (Figure 16, pos 3).
9.
Slightly press the plastic clips
together and remove the battery
(Figure 16, pos 2).
10.
Charge the battery for next use, please refer
to the user manual of the i-charge® 9 or
i-charge® 14, depending on which battery
charger you use.
Figure 16
6.2.2
Removing the disinfectant solution tank
You can remove the disinfectant solution tank by following the procedure shown in section 5.2 in
reversed order.
6.2.3
Removing the spray nozzle
You can remove the spray nozzle by following the procedure shown in section 5.2.1 in reversed
order.


