background image

2

IR Bullet Camera

INSTRUCTION MANUAL

2. INSTALLATION

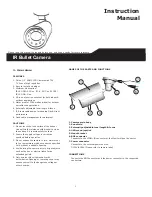
Appearance 

Step 1: Affix the camera 

Affix the instruction label to the desired 

location, knock in 3 plastic anchors after 

hole drilling and then lock in 3 self-

tapping screws to fasten the camera.


If it would be installed on the metal pillar 

without grounding out, please use the 

rubber pad enclosed for isolation. (You 

could select to use enclosed washer for 

better isolation.)

Step 2: Modify the position of camera  

Loosen the two screws (left and right) 

first (just rotate slightly one circle or the 

screws will fall down), second, rotate 

the Retaining ring then you will be able 

to hold the camera and adjust its angle. 

Fasten the screws and retaining ring to 

ensure the desired angle.

Screw on the left and right 

Retaining ring

Step 3: Adjust the lens 

Loosen the screws (just rotate the screws 

by one turn) to slide and adjust the lens 

leftward and rightward directly. After 

adjustment, be sure to lock them tightly 

for waterproof.

1

2

1. Lens adjustment control, Near & Far
2. Lens adjustment control, Tele & Wide

Notice:  Please  be  careful  when  adjusting  Tele/
Wide and Near/Far so as to avoid damage to the 
lens 

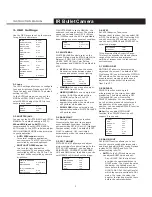
Step 4: Adjust OSD Settings

To use the OSD joystick control:

•  Press the OSD joystick control 

straight down to enter the Main menu 

or a selected item.

•  Move the OSD joystick control UP, 

DOWN, LEFT and RIGHT to navigate 

through menus and options. 

For further information on OSD settings, 

refere to next section. 

Step 5: Adjust the sun shield hood 

Loosen the screws (one circle), then move 

the sunshield hood forward and backward 

to adjust the angle of sunshade. Be 

sure to adjust the sunshield hood in 

coordination with lens in case of sunshade 

problems.

Summary of Contents for i3-B73X Series

Page 1: ...ntally touched 2 Ensure the supply voltage is correct as specified before operation 3 Do not expose the camera to rain moisture or to the temperature which exceeds the specified limit without a suitable housing 4 Avoid aiming the camera at very bright objects such as the sun or electric lights for an extended period 5 Only service this unit personally with authorization Opening or removing cover m...

Page 2: ...e left and right Retaining ring Step 3 Adjust the lens Loosen the screws just rotate the screws by one turn to slide and adjust the lens leftward and rightward directly After adjustment be sure to lock them tightly for waterproof 1 2 1 Lens adjustment control Near Far 2 Lens adjustment control Tele Wide Notice Please be careful when adjusting Tele Wide and Near Far so as to avoid damage to the len...

Page 3: ... BALANCE will perform once 3 4 BACKLIGHT Set Backlight compensation function It controls the light level to overcome sever backlight conditions Available options include OFF BLC or HLC Highlight Compensation mode The default is OFF If HLC is selected HLC is activated automatically when the camera detects high luminance 3 5 PICT ADJUST PICTURE ADJUST allows you to adjust pictuer settings for optima...

Page 4: ...ature 10 C 50 C Operating Humidity 90 MAX Storage Temperature 20 C 60 C Storage Humidity 70 MAX Mechanism Case Material Metal Dimension ΦxH Φ82 9mm x 87mm x 205 5mm 3 26 x3 43 x8 09 Weight 610g 1 36 lb approx Construction Sunshield Cable management bracket Compact die cast aluminum Tempered Glass Protection Class IP66 BURST OFF DELAY CNT 100 DAY NIGHT 100 NIGHT DAY 100 COLOR Force the camera to st...

Reviews: