70
6.
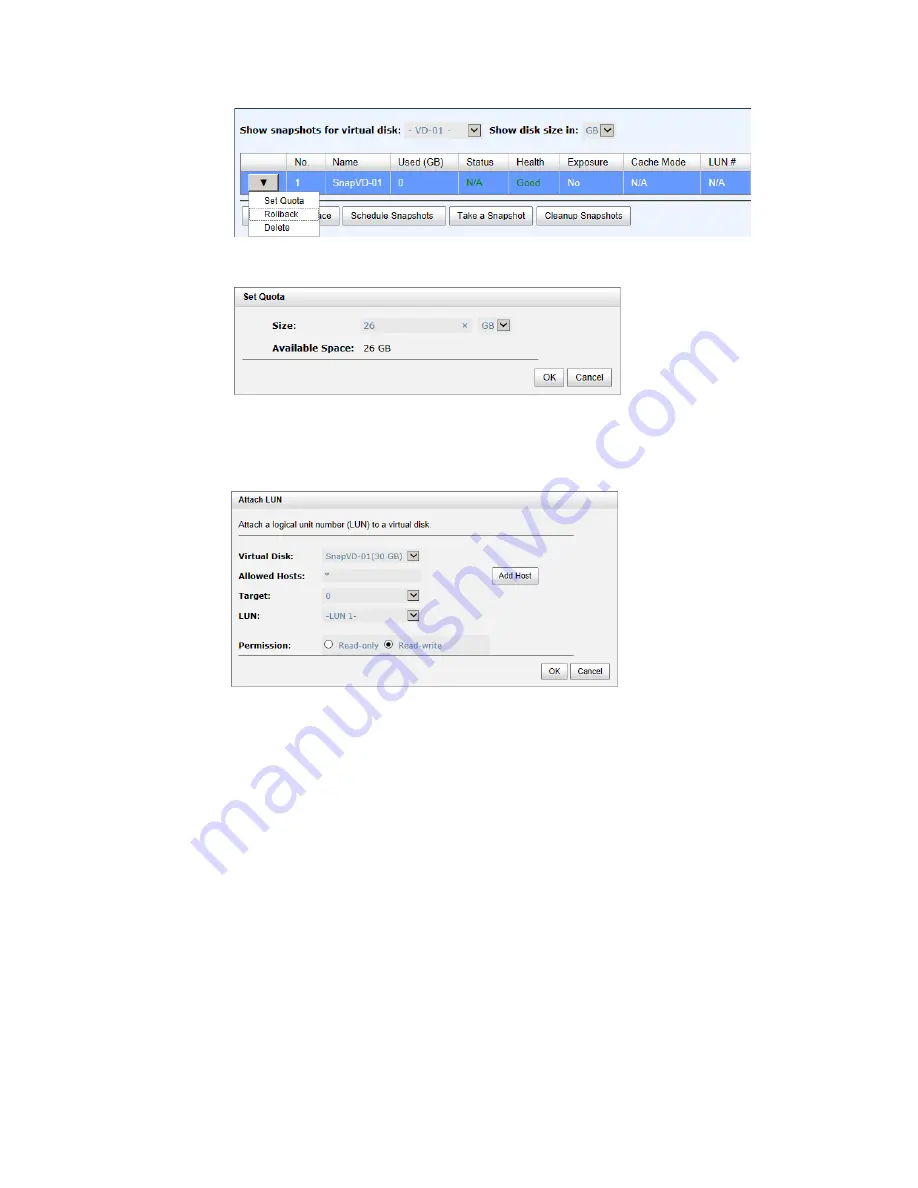
Set quota to expose the snapshot. Click
▼
-> Set Quota option.
7.
Enter a size which is reserved for the snapshot. If the size is zero, the exposed snapshot will be read
only. Otherwise, the exposed snapshot can be read / written, and the size will be the maximum
capacity for writing.
8.
Attach LUN to the snapshot.
9.
Done. The Snapshot can be used.
Cleanup Snapshots
To cleanup all the snapshots, please follow the procedures.
1.
There are two methods to cleanup snapshots. In Virtual Disks tab, selects a virtual disk. And then
click
▼
-> Cleanup Snapshots or in Snapshots tab, click Cleanup Snapshots button.
2.
Click OK to apply. It will delete all snapshots of the virtual disk and release the snapshot space.
Schedule Snapshots
The snapshots can be taken by schedule such as hourly or daily. Please follow the procedures.
1.
There are two methods to set schedule snapshots. In Virtual Disks tab, selects a virtual disk. And then
click
▼
-> Schedule Snapshots or in Snapshots tab, click Schedule Snapshots button.
2.
Check the schedules which you want. They can be set by monthly, weekly, daily, or hourly. Check
Auto Mapping to attach LUN automatically when the snapshot is taken. And the LUN is allowed to
access by Allowed Hosts.
3.
Click OK to apply.


