— 12 —
GO-5100M-USB / GO-5100C-USB
Step 2: Connecting Devices
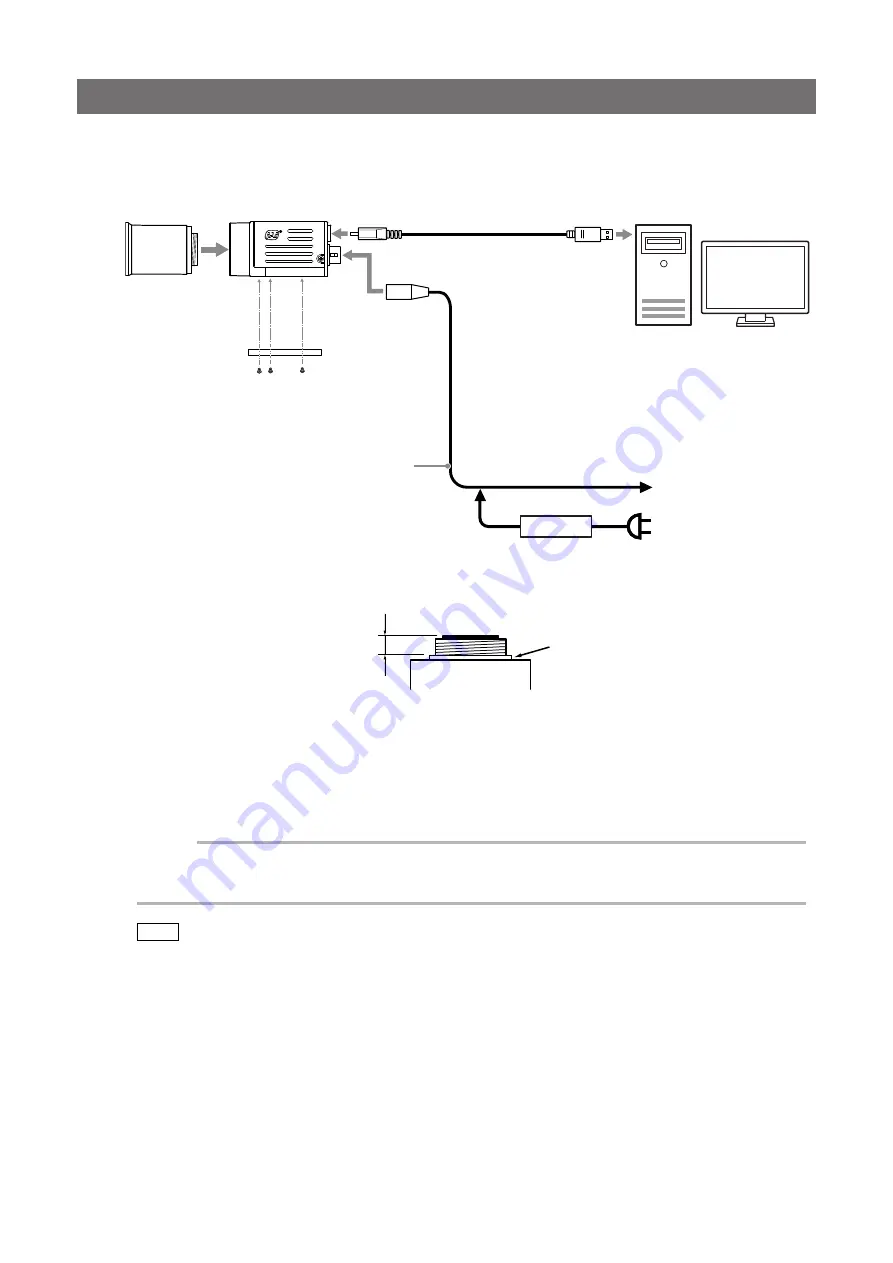
Connect the lens, USB cable, AC adapter, and other devices.
Attach the lens in a clean environment to prevent dust from adhering to the unit.
Camera body
2
Direct connection
(or MP-43 tripod adapter plate)
5
DC IN / trigger IN
connection cable
1
Lens
3
USB cable
4
Computer
to external trigger
or
6
AC adapter (not supplied)
(power supply)
1
Lens
•
C-mount lenses with lens mount protrusions of 9 mm or less can be attached.
9 mm or less
Lens mount protrusion
Lens
•
The diagonal of the camera’s CMOS image sensor is 11 mm, the size of standard 2/3-inch lenses.
To prevent vignetting and to obtain the optimal resolution, use a lens that will cover the 11 mm
diagonal. Some lens manufacturers offer lenses with an 11 mm format. If not, a 2/3-inch lens is
recommended.
Caution
•
The maximum performance of the camera may not be realized depending on the lens.
•
Attaching a lens with a mount protrusion of 9.1 mm or longer may damage the lens or camera.
Note
The following formula can be used to estimate the focal length.
focal length = WD / (1 + W/w)
WD: Working distance (distance between lens and object)
W: Width of object
w: Width of sensor (8.5 mm on this camera)


