background image


30 


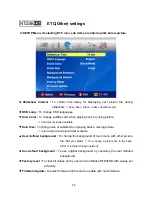
ETC(Other) settings 


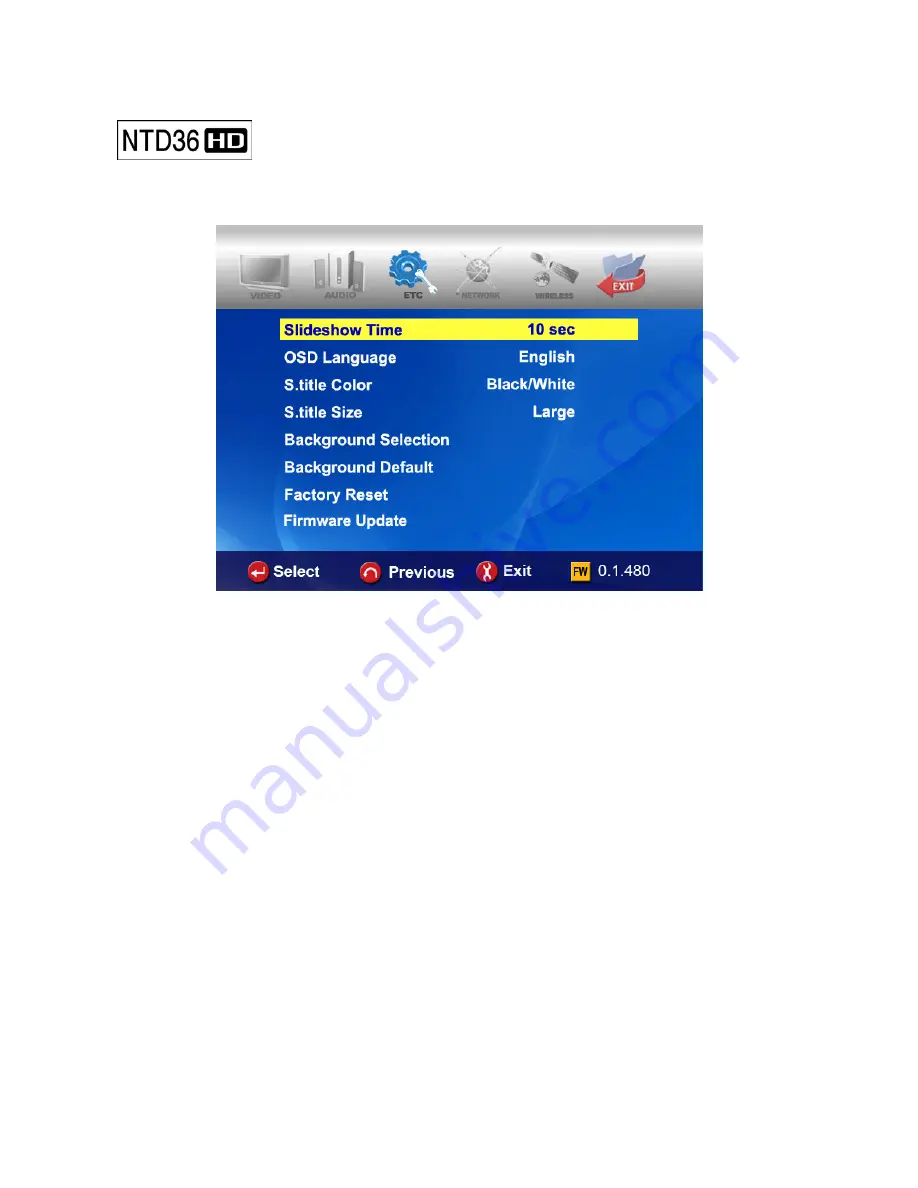
In SETUP Menu, if selecting ETC icon, sub items are listed up like below picture.


 Slideshow Interval : 

To control time delay for displaying next picture file during 

slideshow. 

 3sec, 5sec, 10sec ~ 60sec (total 9 levels) 

  OSD Lang. : 

To change OSD languages

  Sub. Color : 

To change subtitle color when playing back a moving picture


 total nine(9) kinds available.


  Sub. Size : 

To change size of subtitle when playing back a moving picture. 


 total two(2) kinds(Large/Small) available.


  User defined background : 

To change the background of main menu with other picture 

file that you want. 

 You choose a picture file in the basic 

HDD or in folder through network.


 Use default background : 

To use original background by canceling the user defined 

background. 

 Factory reset : 

To clear all values set by user and to initialize NTD36HD with values set 

at factory.


 Firmware Update: 

To select firmware bin file and to update with new firmware.


Summary of Contents for NTD36HD

Page 1: ......

Page 2: ...e harmful interference to radio or television reception which can be determined by turning the equipment off and on the user is encouraged to try to correct the interference by one or more of the foll...

Page 3: ...D36HD 14 Procedure 14 Kinds of HDD to be installed 14 HDD Installation 15 Connecting with PC 16 To create folder and to copy files 17 Disconnecting from PC 18 Connecting to TV with Composite AV cable...

Page 4: ...dress Setup Ethernet Network using a direct connection 45 4 MULTIMEDIA FILE PLAYBACK 47 How to use JUKEBOX CREATOR BGM ON 47 Enjoying movie file 48 Creating DVD Library and Enjoying it 55 Enjoying Mus...

Page 5: ...nd Section Repeat Functions After one file playback is ended the next file different in file name only is play backed automatically If you mark a specific position of a movie during playback with BOOK...

Page 6: ...Wireless Network Without the procedure to copy files from PC to NTD36HD through USB cable you can stream various media files in your PC to NTD36HD and playback them back with TV directly through NTD3...

Page 7: ...eo file may not be played back properly according to the speed performance of external USB devices or the speed performance of the devices to compose a network environment Even though video file forma...

Page 8: ...nding position when you press TV OUT button with 2 3sec time interval TV OUT button for changing TV Out mode LED of NTD36HD Front AUDIO OUT button for changing AUDIO Out mode Reference Each pressing T...

Page 9: ...gnetic filed and direct sunlight Do not block a ventilation opening Keep it unplugged during lightning storms or when unused for long period time Do not try disassembling It may cause an electric shoc...

Page 10: ...olution diluted with water tightly squeeze the cloth to remove the excess liquid wipe the affected area of the exterior and finish by wiping with a dry cloth Make sure that NTD36HD is not powered off...

Page 11: ...ton SETUP Button STOP Button Button LED of front side IR receiver Video S Video or Component DVD LED DVI D LED 2CH Stereo Audio out LED Digital Sound out LED USB Host Connection Status LED TV OUT Butt...

Page 12: ...ctor for PC S Video Digital Sound Optical Connector Composite Video Connector 2CH Stereo or 5 1CH Analog Audio Connector USB Host port Power12V DC Component Video Connector DVI Out connector Digital S...

Page 13: ...items are in the package of NTD36HD NTD36HD Remote Controller AAA size Batteries User s Manual 12V DC Power Adaptor Power cord A to B USB Cable Composite A V Cable Component Video Cable 5dBi Wireless...

Page 14: ...Accessories available at shops If below accessories needed you can buy them at shops by yourself DVI to RGB Gender DVI to HDMI Gender DVI Single Cable Coaxial Cable Optical Cable S VIDEO Cable LAN Cab...

Page 15: ...e installed HDD is not formatted please format it first according to normal HDD format procedure 6 Copy media files in your PC to the HDD of NTD36HD 7 After finishing copying files disconnect NTD36HD...

Page 16: ...HDD fixture like below picture 2 There is HDD fixture inside Push it forward 1 slightly and pull it up 2 5 Connect IDE cable and power cable like picture 3 Insert HDD carefully inside with NTD36HD lai...

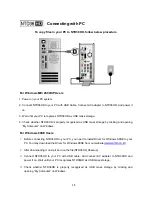
Page 17: ...omputer on Windows For Windows 98SE Users 1 Before connecting NTD36HD to your PC you need to install Driver for Windows 98SE to your PC You may download the Driver for Windows 98SE from our website ww...

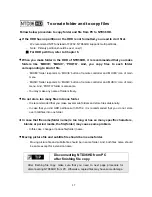
Page 18: ...ny name of folders freely Do not store too many files into one folder It is recommended that you make several sub folders and store files divisionally In case that you did HDD partition with FAT32 it...

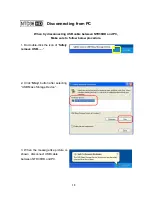
Page 19: ...PC Make sure to follow below procedure 1 Do double click the icon of Safely remove USB 2 Click Stop button after selecting USB Mass Storage Device 3 When the message like picture is shown disconnect...

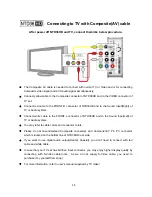
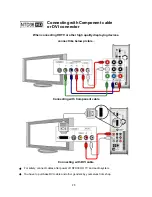
Page 20: ...6HD and to the Sound Input Left of TV or Audio system You may refer to cable colors and connector colors Please do not misunderstand Composite connectors and Component Y Pb Pr connector which is locat...

Page 21: ...t like below picture Connecting with Component cable Connecting with DVI cable For safety connect cables after power off NTD36HD TV and audio system You have to purchase DVI cable and other genders by...

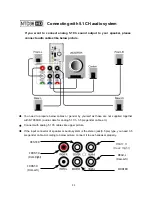
Page 22: ...TD36HD audio cable for analog 5 1Ch 3 5 pie gender cable etc Connect with analog 5 1Ch cables like upper picture If the input connector of speaker or audio system is the stereo jack 3 5 pie type you n...

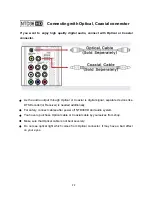
Page 23: ...DTS Decoder or Receiver is needed additionally For safety connect cables after power off NTD36HD and audio system You have to purchase Optical cable or Coaxial cable by yourselves from shop Make sure...

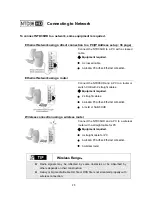
Page 24: ...les Equipment required 2 straight cables A window PC with an Ethernet connection A router or Switch HUB Wireless connection using a wireless router Connect the NTD36HD and a PC to a wireless router wi...

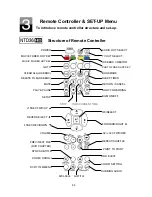
Page 25: ...PLAY PAUSE SETUP AUDIO OUT SELECT TV OUT SELECT JUKEBOX CREATOR PHOTO FODER HOT KEY BOOKMARK SLEEP TIMER RETURN CANCEL SLOW FOWARDING BGM ON OFF 15SEC FWD UP REVERSE LEFT 15SEC REV DOWN VOLUME PREV N...

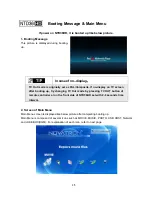
Page 26: ...display on TV screen after booting up try changing TV Out mode by pressing TV OUT button of remote controller or on the front side of NTD36HD set with 2 3seconds time interval 2 Screen of Main Menu Ma...

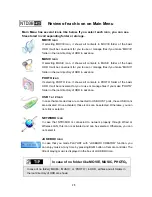
Page 27: ...HDD It will be convenient for you to use or manage files if you make PHOTO folder in the root directory of HDD in advance USB 1 or 2 icon In case that some devices are connected to USB HOST ports the...

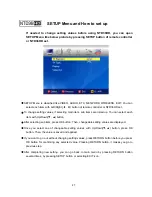
Page 28: ...are listed up You can select each item with Up Down button After selecting sub item press OK button Then changeable setting values are displayed Once you select one of changeable setting values with U...

Page 29: ...ed Full Screen Select this option if you want to adjust a movie fully to the screen of TV with no consideration of original ratio In this case according to the ratio of original movie displaying size...

Page 30: ...r to hear sound in case of using digital audio connectors Optical Coaxial Audio Channels 2 ch If selecting this option it outputs analog audio signal with 2CH If you use 2CH speaker please select this...

Page 31: ...lable Sub Size To change size of subtitle when playing back a moving picture total two 2 kinds Large Small available User defined background To change the background of main menu with other picture fi...

Page 32: ...of network connection you want to set up Connection Status It shows current network connection status Address Setup DHCP Auto IP IP address will be assigned automatically with using a router Static I...

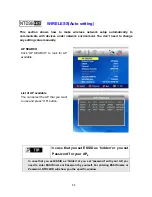
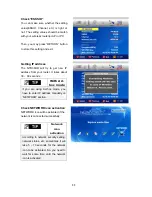
Page 33: ...SEARCH Click AP SEARCH to look for AP available List of AP available You can select the AP that you want to use and press OK button In case that you set ESSID as hidden or you set Password for your AP...

Page 34: ...address from your router It takes about 30 60 seconds With Ad hoc mode If you are using Ad hoc mode you have to enter IP address manually on NETWOKR section Check NETWORK icon activation NETWORK icon...

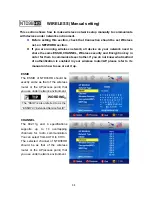
Page 35: ...do not know what method of authentication is enabled in your wireless router AP please refer to its manual on how to see or set it up ESSID The ESSID of NTD36HD should be exactly same as that of the...

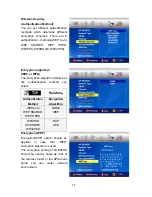
Page 36: ...WPA The encryption algorithm determines the authentication method you select Relation Authentication Method Encryption Algorithm WEP Auto WEP SHARED WEP OPEN NONE WEP WPAPSK WPA NONE WPA2PSK TKIP AES...

Page 37: ...reless Security Each manufacturer may use different wording when naming each function Make your reference for below wordings ESSID referred to as SSID or Extended Service Set ID ASCII when WEP key or...

Reviews: