background image

F


Safety Precautions


WARNING:

 As this appliance is a CLASS1 product, it must be connected to a main socket outlet with protective earth 

connection 

• 

The i

nstallation of this speaker cabinet must be carried out by 

qualified 

persons following the approved safety 

standards. 

• 

Do not 

attempt to clean the plastic enclosure 

with 

solvents or petrochemical based cleaners. 

• 

Do not place objects which are sources of heat on the speaker cabinet such as lighting equipment or smoke 

machines. 

• 

Do 

not 

expose 

the 

speaker cabinet to direct rain or water. 

Liquid 

getting 

into 

the box 

will 

risk 

a short circuit 

and 

will 

be hazardous. 

• 

Do 

not 

stack the speaker cabinet 

in 

a manner that could cause injury if a cabinet becomes dislodged. 


Only use the appliance in a moderate climate, not in tropical environments. 


    •    If the main power plug of appliance is used as a disconnected device, the disconnect device should 

be easy to operate


Additional precautions for amplified devices of the series.


• 

Before installation, ensure that the voltage and frequency 

of 

power outlet match 

the p

ower 

requirements of the loudspeaker. 

• 

Disconnect from the mains prior to making connections 

to 

the speaker. 

• 

Make sure 

that 

the power-cord is never crimped nor damaged by sharp edges. Never 

let 

the power-cord 

come 

into 

contact 

with 

other cables. Only handle the power-cord by the plug. 

• 

Replace the fuse only by a fuse with the same specifications as the original one


Warning


Before connecting 

or 

operating your new speaker, please read the instruction manual carefully. 


Functions 


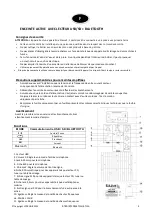
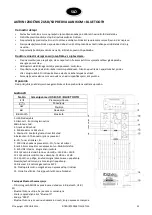
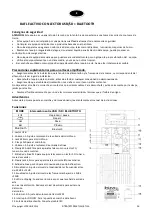
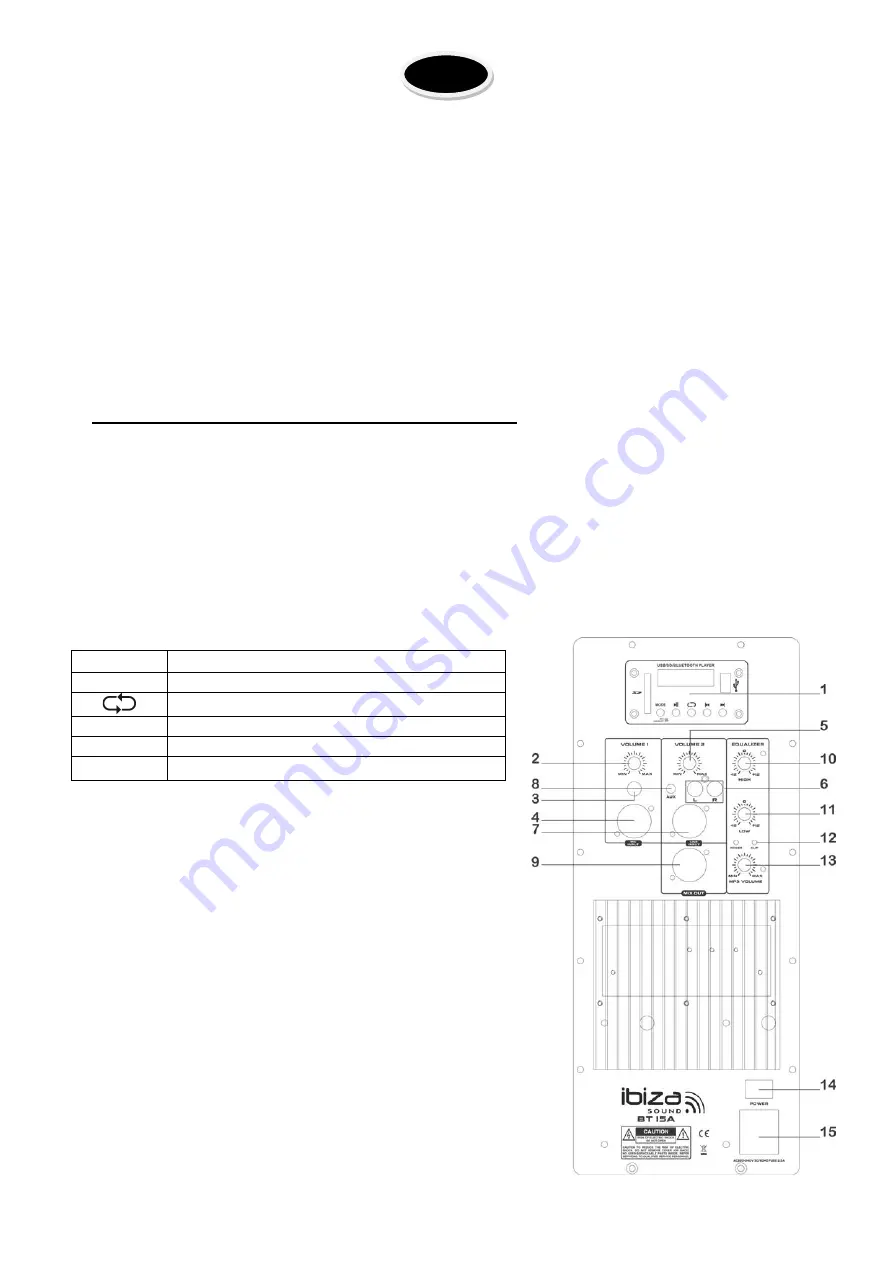
1. USB Player 

2. Volume 1: Controls the Volume of the 

Microphone input. 

3. 1/4Jack for Mic input 

4.  XLR Connector for Mic input 

5.  Volume 2: Controls the Volume of line in 

6. Balanced RCA connector for devices like CD, Tuner or mixer, etc. 

7.  XLR line in to device like CD, Tuner or mixer 

8. Jack 3.5mm connector for devices like Mobile phone 

9.  XLR Line out to another active speaker 

10. Equalizer: Controls the tone level of the high frequencies at 

range -12dB to + 12dB 

11. Equalizer: Controls the tone level of the low frequencies at range -

12dB to + 12dB 

12. Clip LED:  it lights up when the applied input signal reaches the 

level of distortion. Reduce the input level in order to avoid distortion. 

13. Volume 3: Controls the volume of MP3 

14.  Power Switch: It allows switching the unit on / off 

15.  Mains socket: Connect here an IEC mains power cable. 


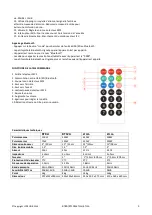
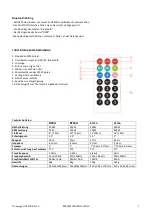
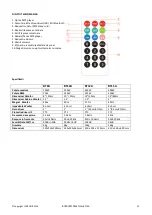
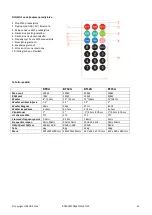
MODE


Exchange between USB / SD / BLUETOOTH





Play/Pause 


Repeat 


Last 


Next 

Bluetooth 

Bluetooth 

GB 

©Copyright LOTRONIC 2014


BT8A/BT10A/

BT12A/BT15A


Summary of Contents for BT8A

Page 1: ...tos el ctricos no pueden ser tirados a los contenedores normales Por favor cuando desee desacerse del equipo ll velo a un centro de reciclado Pregunte a las autoridades locales como proceder en este c...

Page 2: ...the speaker Make surethat the power cordis never crimpednor damaged by sharp edges Never let the power cord come into contact with other cables Only handle the power cord by the plug Replace the fuse...

Page 3: ...Q to control the tone level 10 Choosing music by numbers Specifications BT8A BT12A BT12A BT15A Max power 150W 250W 450W 500W RMS power 75W 125W 225W 250W Woofer size 8 20cm 10 25cm 12 30cm 15 38cm Woo...

Page 4: ...nceinte D branchez l enceinte du secteur avant d effectuer des branchements Assurez vous que le cordon d alimentation n est jamais coinc ni endommag par des ar tes coupantes Ne jamais laisser le cordo...

Page 5: ...Arr te le lecteur MP3 2 Commutation entre USB SD Bluetooth 3 Coupe le son du lecteur MP3 4 Saut vers l arri re 5 Saut vers l avant 6 Lecture pause du lecteur MP3 7 Baisse le volume 8 Augmente le volum...

Page 6: ...n lassen Das Netzkabel nur am Stecker handhaben Die Sicherung nur durch eine gleichwertige ersetzen Warnung Vor Anschluss oder Betrieb der Box sorgf ltig die Anleitung lesen Funktionen 1 USB Player 2...

Page 7: ...t rke 9 Equalizer zur Klangregelung 10 Direktzugriff zum Titel durch Eingabe der Nummer Technische Daten BT8A BT12A BT12A BT15A H chstleistung 150W 250W 450W 500W RMS Leistung 75W 125W 225W 250W Tieft...

Page 8: ...handleiding aandachtig door alvorens u uw nieuwe box aansluit of gebruikt Functies 1 USB player 2 Volume 1 Regelt het volume van de microfoon ingang 3 Jack voor de microfoon ingang 4 XLR connector voo...

Page 9: ...ogen 150W 250W 450W 500W RMS vermogen 75W 125W 225W 250W Woofer 8 20cm 10 25cm 12 30cm 15 38cm Spreekspoel 1 5 1 5 1 5 2 Magneet 30oz 30oz 37 Oz 45 Oz Impedantie 4 ohms 4 ohms 4 Ohm 4 Ohm Tweeter 1 1...

Page 10: ...lui difuzor va rugam sa cititi manualul cu atentie Functii 1 USB Player 2 Volum 1 Controleaza volumul intrarii microfonului 3 Mufa pentru intrarea Mic 4 Conector XLR pentru intrare Mic 5 Volum 2 Contr...

Page 11: ...0W Putere RMS 75W 125W 225W 250W Dimensiuni Woofer 8 20cm 10 25cm 12 30cm 15 38cm Dimensiuni bobina Woofer 1 5 1 5 1 5 2 Magnet Woofer 30oz 30oz 37 Oz 45 Oz Impedanta Woofer 4 ohmi 4 ohmi 4 ohmi 4 ohm...

Page 12: ...amenjajte varovalko samo z varovalko z enakimi specifikacijami kot prvotna Opozorilo Pred priklju itvijo ali delujem novega zvo nika skrbno preberite navodila za uporabo Lastnosti 1 USB Predvajalnik 2...

Page 13: ...250W 450W 500W RMS mo 75W 125W 225W 250W Woofer 8 20cm 10 25cm 12 30cm 15 38cm Woofer velikost tuljave 1 5 1 5 1 5 2 Woofer Magnet 30oz 30oz 37 Oz 45 Oz Woofer impedanca 4 ohms 4 ohms 4 ohms 4 ohms V...

Page 14: ...ado por pontas afiadas Nunca deixe o cabo de alimenta o entrar em contacto com outros cabos Apenas manusear o cabo de alimenta o pela ficha Substitua o fus vel somente por um fus vel com as mesmas esp...

Page 15: ...0 Escolha num rica de faixa Especifica es BT8A BT12A BT12A BT15A Pot ncia Max 150W 250W 450W 500W Pot ncia RMS 75W 125W 225W 250W Woofer 8 20cm 10 25cm 12 30cm 15 38cm Woofer coil 1 5 1 5 1 5 2 man Wo...

Page 16: ...cortantes No deje entrar el cable de corriente en contacto con los dem s cables Para desenchufar estire nicamente por la clavija jam s por el cable Cambie el fusible nicamente por uno de las mismas c...

Page 17: ...P3 7 Baja el volumen 8 Aumenta el volumen 9 Ecualizador para ajustar la tonalidad 10 Selecci n directa del t tulo por el n mero Caracter sticas t cnicas BT8A BT12A BT12A BT15A Potencia Max 150W 250W 4...

Page 18: ...szczajdokontaktuprzewoduzasilaniazinnymi przewodami Wyci gajprzew dzawtyczk W przypadku wymiany bezpiecznika wymieniaj go na bezpiecznik o takich samych parametrach UWAGA Przed pod czeniem oraz rozpoc...

Page 19: ...uetooth 3 Wyciszenie g osu 4 Prze czanie do poprzedniego utwory 5 Prze czenie do nast pnego utworu 6 Play Pause odtwarzanie MP3 7 Zmniejszanie g o no ci 8 Zwi kszanie g o no ci 9 EQ ton w 10 Wybierani...

Reviews: