2
© Copyright Lotronic - 2012
1. Speaker
8. Sustain/ Vibrato
15. Timbre
22. Fingered
Chord
2. ON/OFF switch
9. Demo One
16. Rhythm
23. Key light
3. Master volume
10. Demo All
17. Number
buttons
24. Percussions
4. Accom Volume
11. LED display
18. Start/Stop
25.
Chord
keyboard
5. Tempo
12. PROG
19. Sync
6. One key
13. Record
20. Fill-in
7. Follow
14. Play
21. Single
Preparation
•
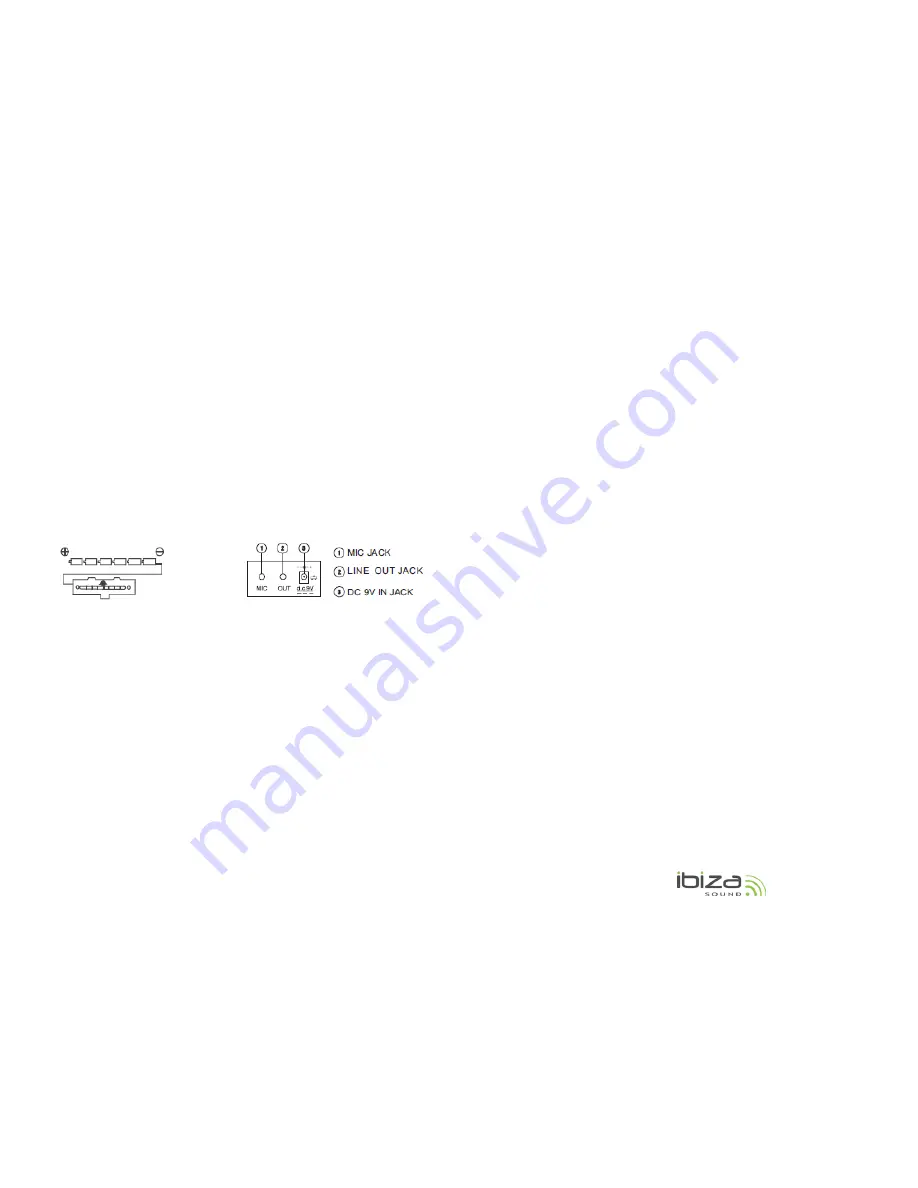
Insertion of batteries
The player will not operate on battery power when the AC/DC adaptor is connected.
Remove the cover of the battery compartment on the underside of the keyboard and
insert six pieces of 1.5V "D" size batteries (not included) into the battery compartment
following the indications (+/-) inside the compartment. Replace the cover.
Note : When the voltage of the batteries drops down and the instrument cannot perform
naturally, the batteries should be replaced in time. If the instrument is left unused for a
long time, the batteries should be taken out to avoid causing damage.
Do not mix up new and old or different types of batteries together. Keep batteries out of
children's reach. Please observe the local regulations regarding the disposal of exhausted
batteries.
•
Using AC/DC Power Supply Adaptor
The AC/DC power supply adaptor must be the one designated for the instrument. Before
connecting the AC/DC adaptor to the wall outlet, ensure that all other connections have
been made. Insert the small round plug firmly into the "DC 9V IN" jack on rear of
instrument and then insert the other end into an available AC wall outlet (Please notice
the input voltage should be the same as that of the power network).
•
Using MIC
Insert the supplied microphone into the MIC jack, then you can sing along with the
music.
•
Connecting headphones or external keyboard amplifier
Plug in the headphones (not included) with a stereo mini-jack 3.5mm plug to the "LINE
OUT" jack for private listening.
You can also use this feature to output the instrument's audio signal to keyboard
amplifier. Connect the "LINE OUT" jack to the "LINE IN" or "AUX IN' jack on the keyboard
amplifier with a LINE OUT cable (not included).
Notes
:
A. When headphones or amplifier is connected, the main speakers will be automatically
turned off.
B. Be sure that the instrument is set at a low volume level before connecting.
C. Increase the volume gradually for comfortable listening.
D. Headphones, a keyboard amplifier, or stereo equipment can be connected to this
terminal. When another apparatus is connected to this terminal, the speaker system is
automatically switched off, and sound is heard only through the connected device.
E. Always refer to the instruction manual of the amplifier for complete connection and
usage details.
•
Affix the music stand on keyboard
II.
Basic Method of Performance
Press the [POWER] switch with the LED display showing the present tempo at 120. In this
state, any operation on the instrument works.
•
Key Light
There is a key light function in the instrument. The corresponding white keys will shine
when there is a keystroke on the white key during the performance, the teaching
function, and the playing of the demo songs. The function is on when the instrument is
power on, and it can be started or quit by pressing the [Key Light] button.
•
Volume Adjustment
Press the [MASTER VOL +/-] to increase or decrease the master volume to an appropriate
level. The volume value is shown on the display. Press both buttons at the same time to
reset to the preset level. The [ACCOM +/-] button works in the same way as the [MASTER
VOL +/-] does. Press ACCOM +/- to increase or decrease the accompanied volume.
•
Demonstration Songs
There are 16 demonstration songs stored in memory. The [DEMO ONE] is in charge of
playing the present demonstration song repeatedly, while the [DEMO ALL] button is in
charge of playing all the demo songs successively. In the state of the [DEMO ONE] or
[DEMO ALL], pressing either of the buttons for the second time can stop the present
song , and the third time can get into the next song.
The 16 demo songs can be used with the backlit learning white key function.


