A
Filler plate screws
B
Filler plate
C
Shell
D
Drawer
E
Drawer screws
3.
If you are installing a 5790, slide the drawer
(D)
into the shell, as shown in Figure 92.
4.
If you are installing a 5790, install and tighten the two drawer screws
(E)
, securing the drawer to the
shell as shown in Figure 92.
5.
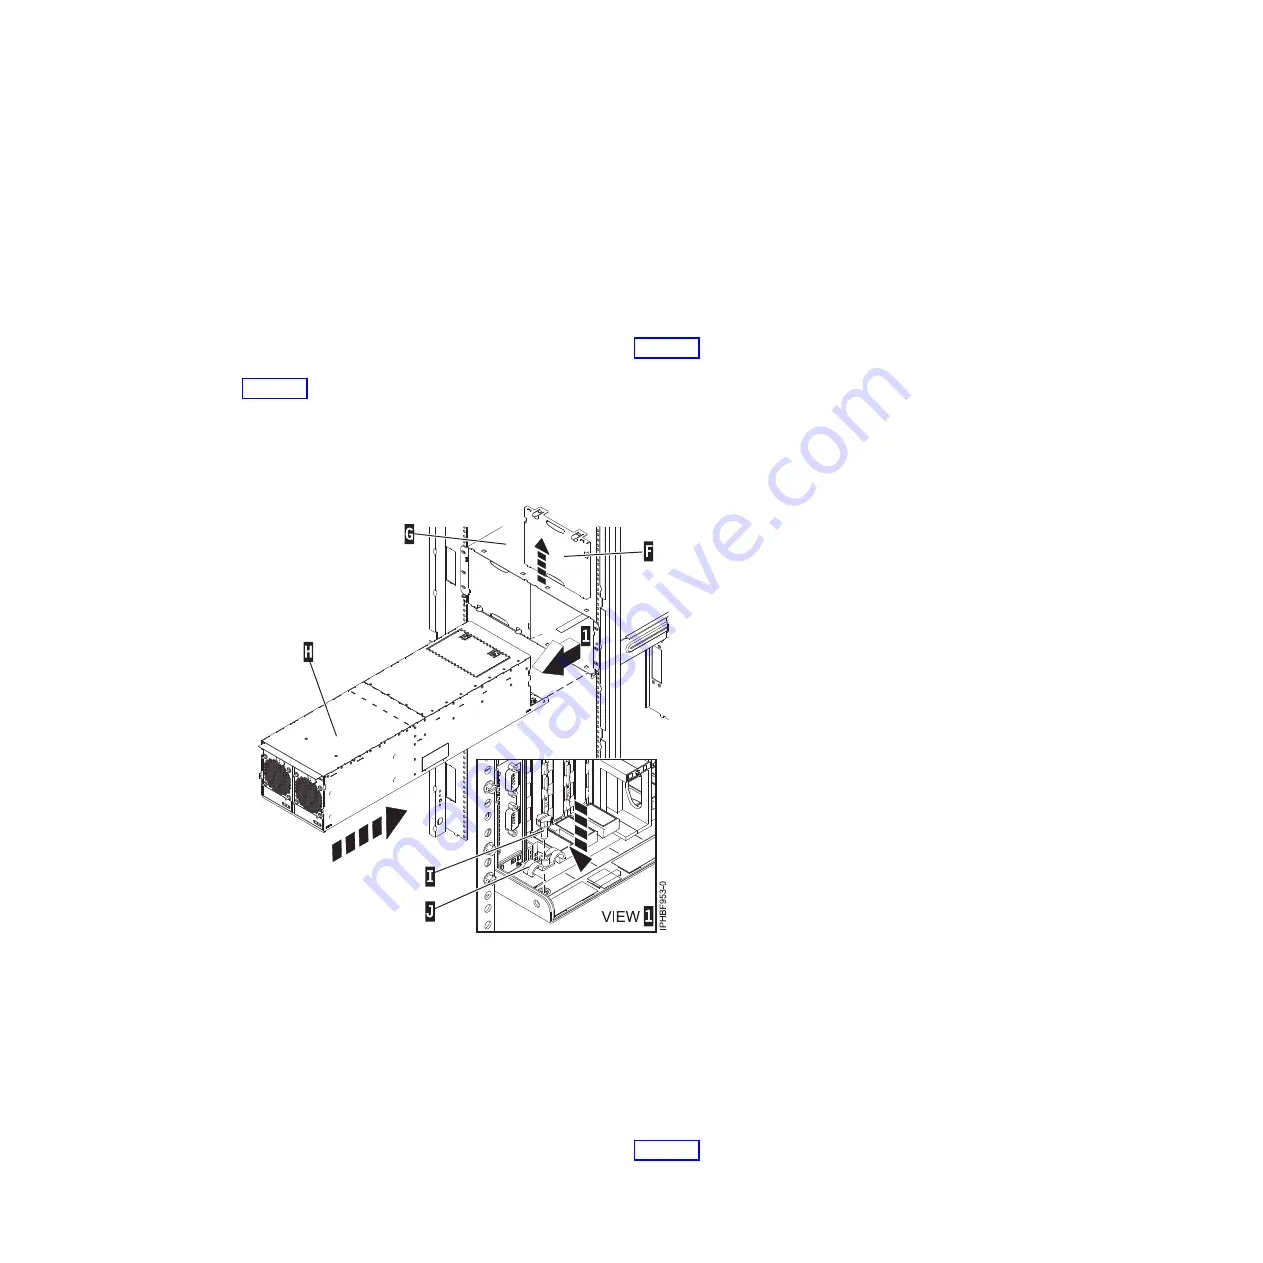
If you are installing a 5796 drawer
(H)
into an existing shell
(G)
, remove the filler plate
(F)
by
pressing down the tops tabs and pulling it out.
Note:
Your shell may have one or two filler plates. If there is a filler plate where you want to install
your drawer, you need to remove the filler plate.
F
Filler plate
G
Shell
H
Drawer
I
Thumb screw
J
Cable retention bracket
6.
Carefully move any existing cables that are blocking the drawer location.
7.
If you are installing a 5796, slide the drawer
(H)
into the shell, as shown in Figure 93.
8.
If you are installing a 5796, use a thumb screw
(I)
to install the cable retention bracket
(J)
.
Figure 92. Installing the 5790 drawer
Figure 93. Installing the 5796 drawer
90
Installing into a rack
Summary of Contents for 0551
Page 1: ...Power Systems Rack rack features and installing systems or expansion units into a rack ...
Page 2: ......
Page 3: ...Power Systems Rack rack features and installing systems or expansion units into a rack ...
Page 8: ...vi Installing into a rack ...
Page 12: ...2 Installing into a rack ...
Page 34: ...24 Installing into a rack ...
Page 118: ...108 Installing into a rack ...
Page 126: ...116 Installing into a rack ...
Page 130: ...120 Installing into a rack ...
Page 148: ...138 Installing into a rack ...
Page 164: ...154 Installing into a rack ...
Page 174: ...3 Close the front rack door 164 Installing into a rack ...
Page 181: ......
Page 182: ... Printed in USA ...


