2.
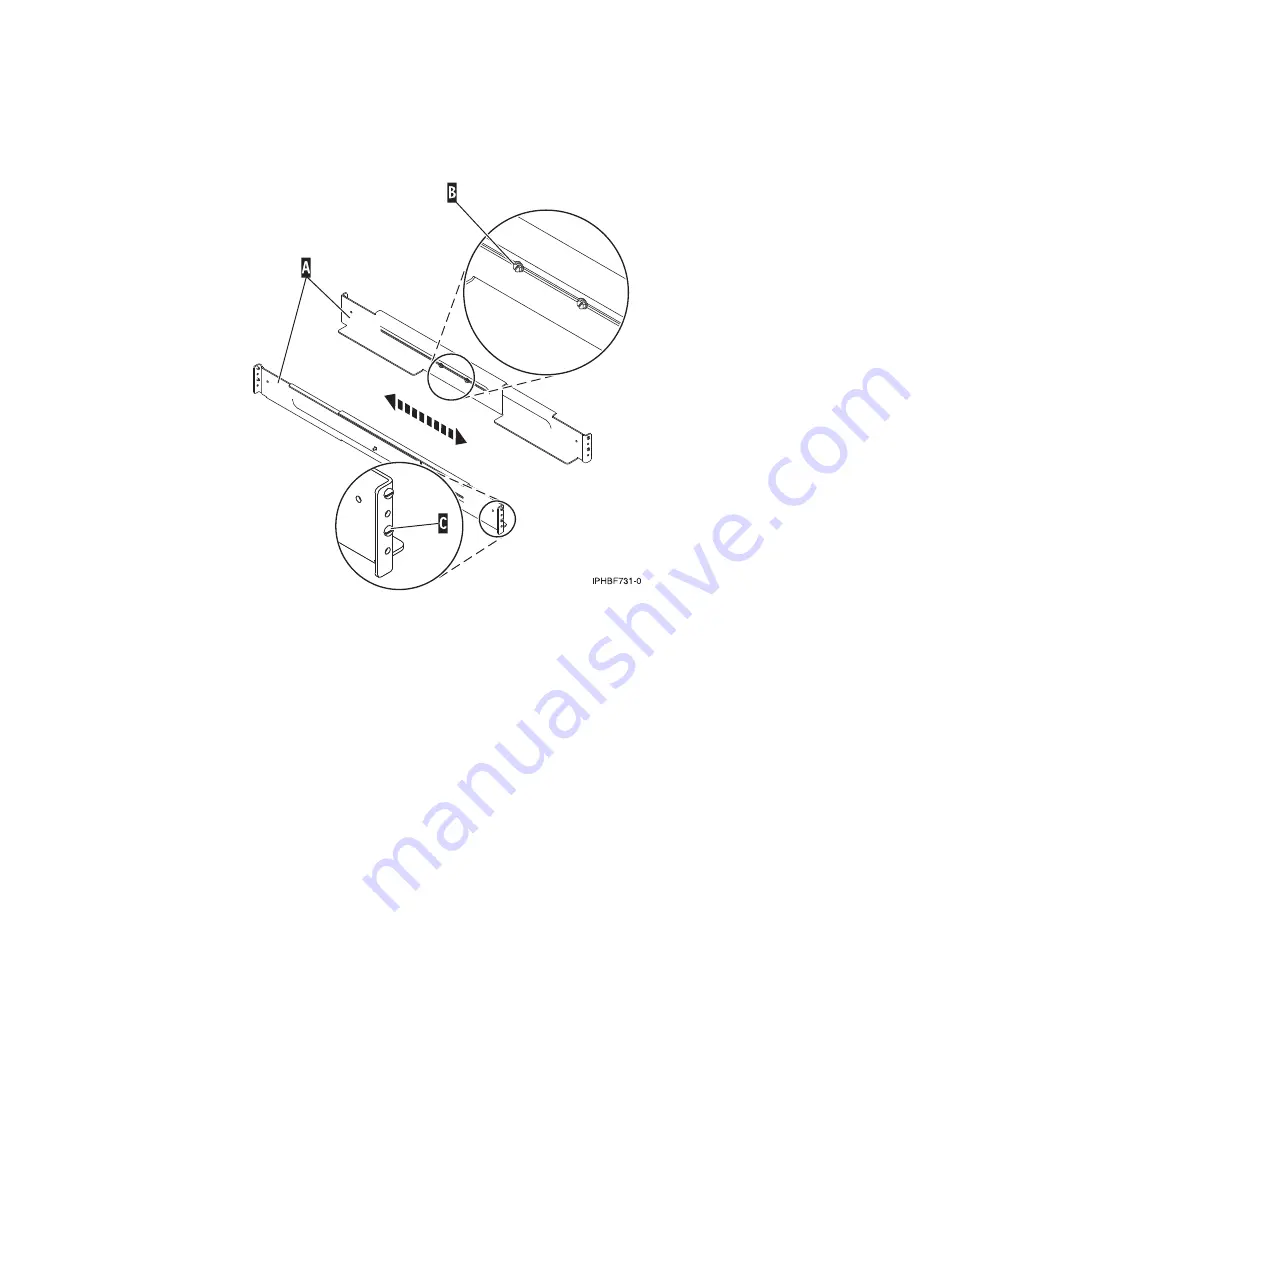
Starting at the back of the rack, extend the left rail and insert the rail pins
(C)
into the marked
locations the rack so that the rail is facing upward.
Note:
Although the rail installation can be completed by one person, the installation will be easier if
one person is positioned at the front of the rack and one person is positioned at the back of the rack.
3.
From the back of the rack, extend the right rail and insert the rail pins
(C)
into the marked locations.
4.
Moving to the front of the rack, extend the left rail and insert the rail pins
(C)
into the marked
locations.
5.
Extend the right rail and insert the rail pins
(C)
into the marked locations.
6.
Using two M5 screws
(D)
, secure the left rail to the front of rack below each rail pin
(C)
.
Figure 99. Extending the system rails
98
Installing into a rack
Summary of Contents for 0551
Page 1: ...Power Systems Rack rack features and installing systems or expansion units into a rack ...
Page 2: ......
Page 3: ...Power Systems Rack rack features and installing systems or expansion units into a rack ...
Page 8: ...vi Installing into a rack ...
Page 12: ...2 Installing into a rack ...
Page 34: ...24 Installing into a rack ...
Page 118: ...108 Installing into a rack ...
Page 126: ...116 Installing into a rack ...
Page 130: ...120 Installing into a rack ...
Page 148: ...138 Installing into a rack ...
Page 164: ...154 Installing into a rack ...
Page 174: ...3 Close the front rack door 164 Installing into a rack ...
Page 181: ......
Page 182: ... Printed in USA ...


