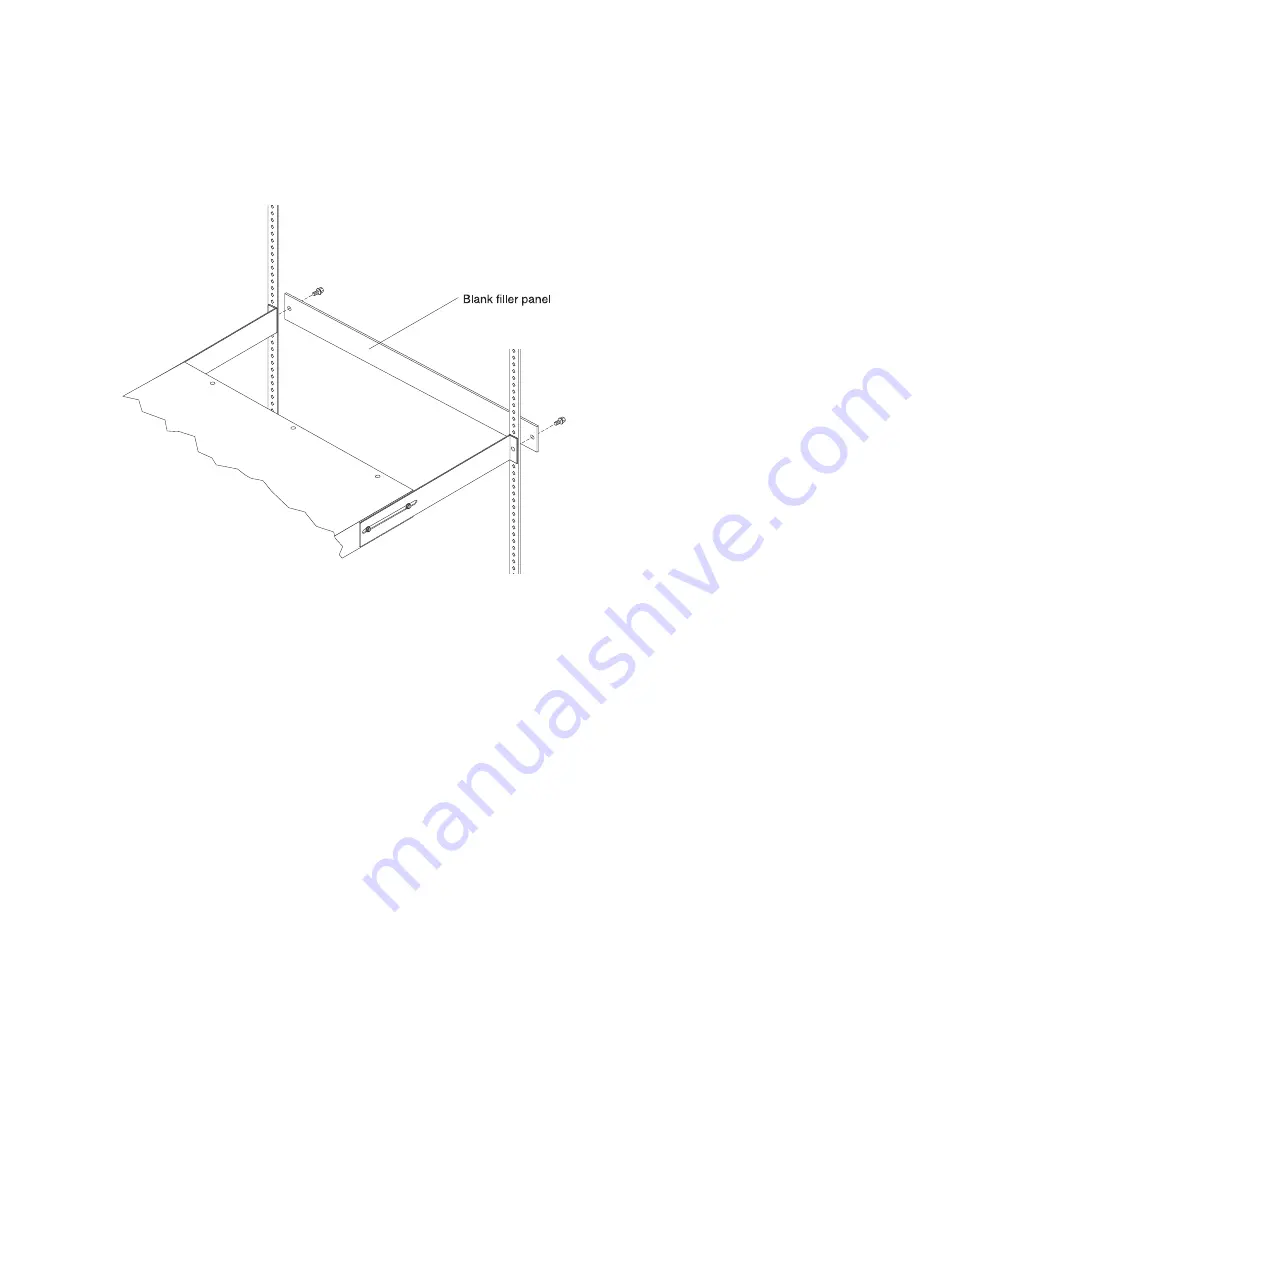
a.
Adjust the long mounting-brackets to fit the depth of the rack cabinet.
b.
Make sure that the long mounting-brackets are aligned with the inside of the rack flanges.
c.
Align the blank filler panel on the outside of the rack flanges.
d.
Attach the filler panel to the rack flanges and then to the long mounting-bracket with one M6
screw per bracket.
e.
Tighten the M3 pan-head screws that secure the long mounting-brackets to the PDU.
7.
Secure the end of the PDU+ that has the short mounting-brackets to the rack cabinet first. Make sure
that the short mounting-brackets are aligned with the outside of the rack flanges. Attach the brackets
to the rack flanges with two M6 screws and two cage nuts or clip nuts per bracket. Use the cage
nuts or clip nuts and the screws that come with the rack-mounting kit.
8.
If the PDU+ was provided with a detached power cord, connect the power cord now. Align the
connector on the power cord that was provided with the PDU+ with the connector on the front of
the PDU+, turning as necessary for key alignment. Then, turn the twist-lock on the connector
clockwise until it locks into place.
132
Installing into a rack
Summary of Contents for 0551
Page 1: ...Power Systems Rack rack features and installing systems or expansion units into a rack ...
Page 2: ......
Page 3: ...Power Systems Rack rack features and installing systems or expansion units into a rack ...
Page 8: ...vi Installing into a rack ...
Page 12: ...2 Installing into a rack ...
Page 34: ...24 Installing into a rack ...
Page 118: ...108 Installing into a rack ...
Page 126: ...116 Installing into a rack ...
Page 130: ...120 Installing into a rack ...
Page 148: ...138 Installing into a rack ...
Page 164: ...154 Installing into a rack ...
Page 174: ...3 Close the front rack door 164 Installing into a rack ...
Page 181: ......
Page 182: ... Printed in USA ...


