Removing the front cover from a 7311-D20 expansion unit
Use this procedure to remove the cover to access components or perform service.
To remove the expansion unit front cover, follow these steps:
1.
If necessary, open the front rack door.
2.
Remove the thumbs screws that are securing the covers to the rack.
3.
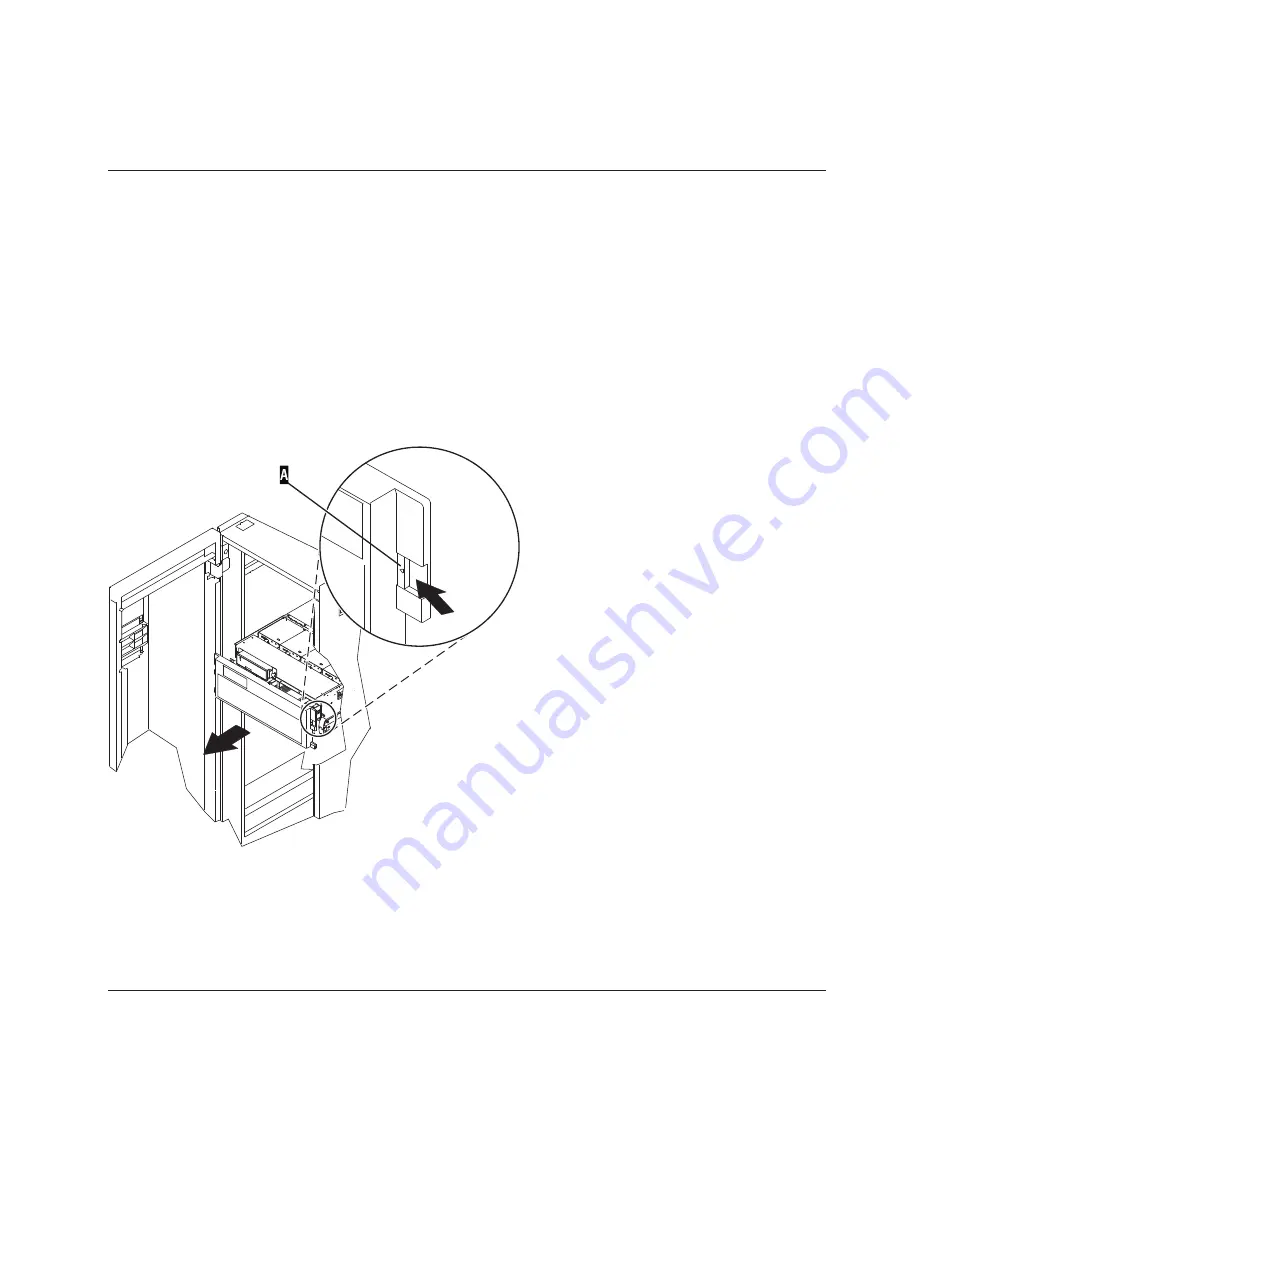
Push both cover-release latches in the direction of the arrows to release the cover as shown in the
following figure.
4.
Pivot the cover from the bottom and swing the top of the cover out.
5.
Pull the bottom of the cover up and then away from the expansion unit. This releases the two tabs
located on the bottom of the cover.
6.
Put the cover in a safe place.
Installing the front cover on a 7311-D20 expansion unit
Use this procedure to install the cover after accessing components or performing service.
To install the expansion unit front cover, follow these steps:
1.
If necessary, open the front rack door.
2.
Insert the two tabs located on the bottom edge of the cover into their locking slots, located on the
expansion unit frame.
3.
Pivot the front cover up toward the top of the expansion unit frame.
Figure 133. Removing the front cover
Chapter 12. Removing and replacing the expansion unit cover or door
141
Summary of Contents for 0551
Page 1: ...Power Systems Rack rack features and installing systems or expansion units into a rack ...
Page 2: ......
Page 3: ...Power Systems Rack rack features and installing systems or expansion units into a rack ...
Page 8: ...vi Installing into a rack ...
Page 12: ...2 Installing into a rack ...
Page 34: ...24 Installing into a rack ...
Page 118: ...108 Installing into a rack ...
Page 126: ...116 Installing into a rack ...
Page 130: ...120 Installing into a rack ...
Page 148: ...138 Installing into a rack ...
Page 164: ...154 Installing into a rack ...
Page 174: ...3 Close the front rack door 164 Installing into a rack ...
Page 181: ......
Page 182: ... Printed in USA ...


