2.
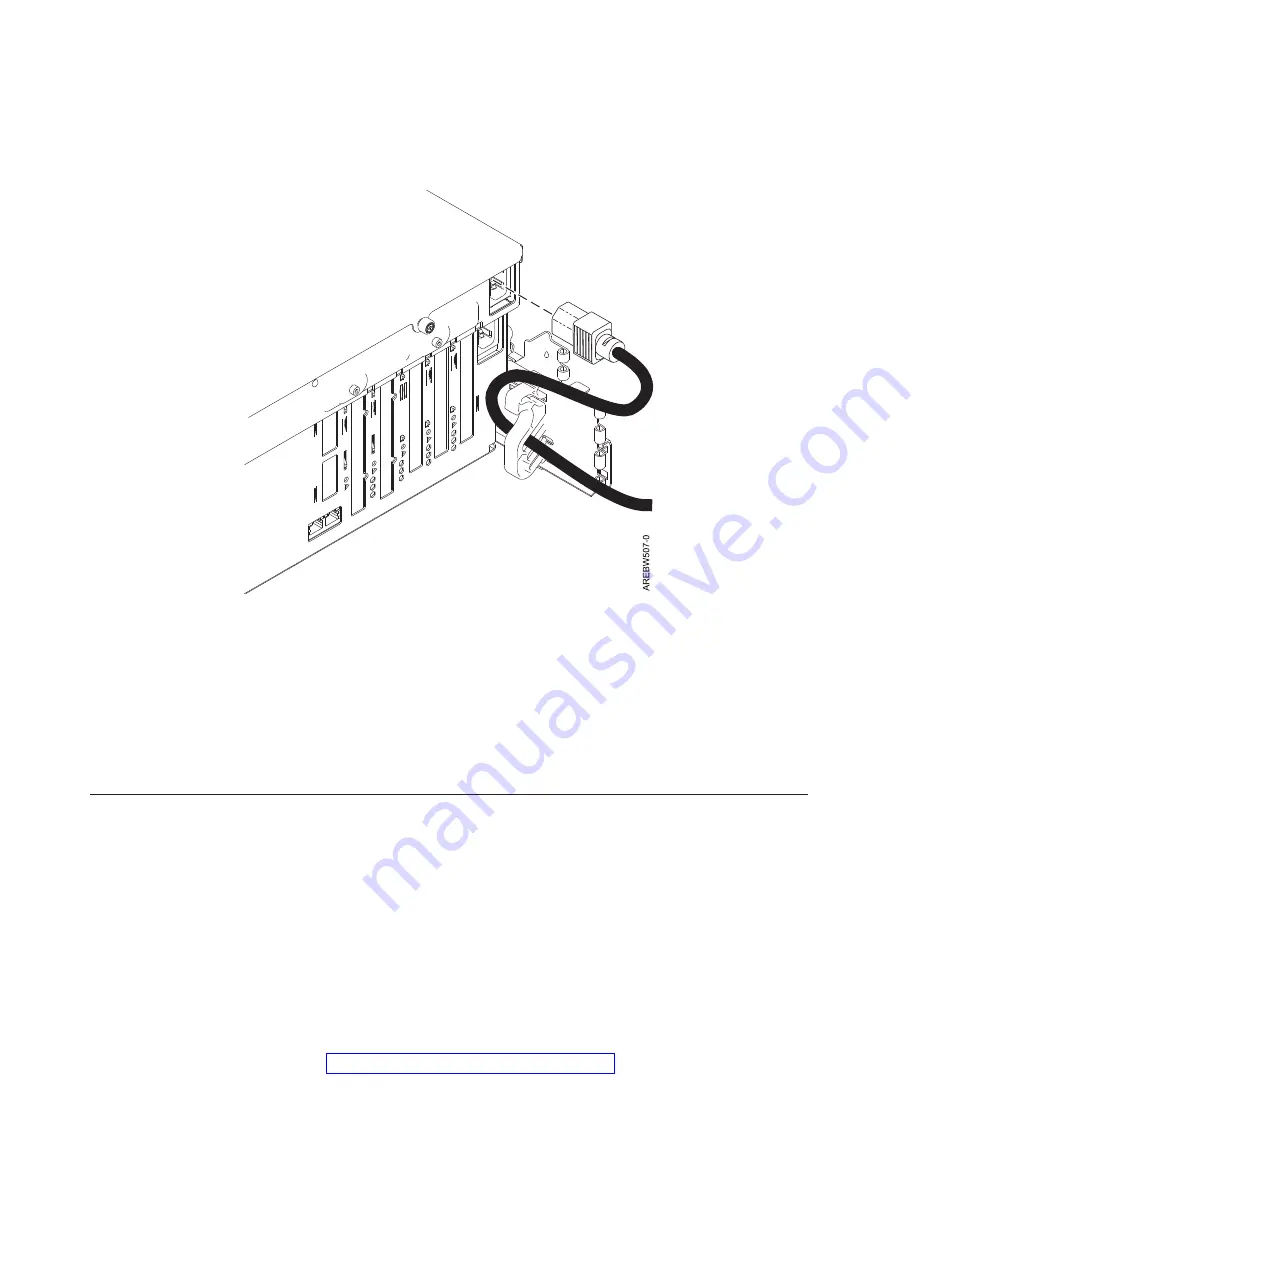
Plug the power cord into the system unit.
Note:
If the system is equipped with two power supplies, each must have its own power cord
plugged in.
3.
Plug the system power cord and the power cords for any printers or displays into the alternating
current (AC) power source.
4.
Power on the system unit and any devices connected to the system unit.
Installing the model 8203-E4A, 8261-E4S, 9407-M15, or 9408-M25 into a
rack
You might need to install the system into a rack. Use this procedure to perform this task. In addition to
information intended to promote safety and reliable operation, illustrations of the related hardware
components are also provided and how the components relate to each other.
You can perform this task yourself, or contact a service provider to perform the task for you. You might
be charged a fee by the service provider for this service.
Important:
It is suggested that you use two people to attach the rail assembly to the rack, one in front of
the rack and one at the back of the rack. You need three people to lift the system unit onto the rack.
This procedure assumes that you are installing the system into an existing rack. If the rack is not
installed, go to the instructions for Chapter 2, “Installing the rack,” on page 3 and then return to this
procedure for instructions on installing the system unit in a rack.
Note:
This procedure applies only to the models that are designed to be mounted in a rack. Do not
attempt to install a stand-alone model in a rack.
To install the 8203-E4A, 8261-E4S, 9407-M15, or 9408-M25 into a rack, complete the following steps:
Figure 32. Routing server power cord
38
Installing into a rack
Summary of Contents for 0551
Page 1: ...Power Systems Rack rack features and installing systems or expansion units into a rack ...
Page 2: ......
Page 3: ...Power Systems Rack rack features and installing systems or expansion units into a rack ...
Page 8: ...vi Installing into a rack ...
Page 12: ...2 Installing into a rack ...
Page 34: ...24 Installing into a rack ...
Page 118: ...108 Installing into a rack ...
Page 126: ...116 Installing into a rack ...
Page 130: ...120 Installing into a rack ...
Page 148: ...138 Installing into a rack ...
Page 164: ...154 Installing into a rack ...
Page 174: ...3 Close the front rack door 164 Installing into a rack ...
Page 181: ......
Page 182: ... Printed in USA ...


