5.
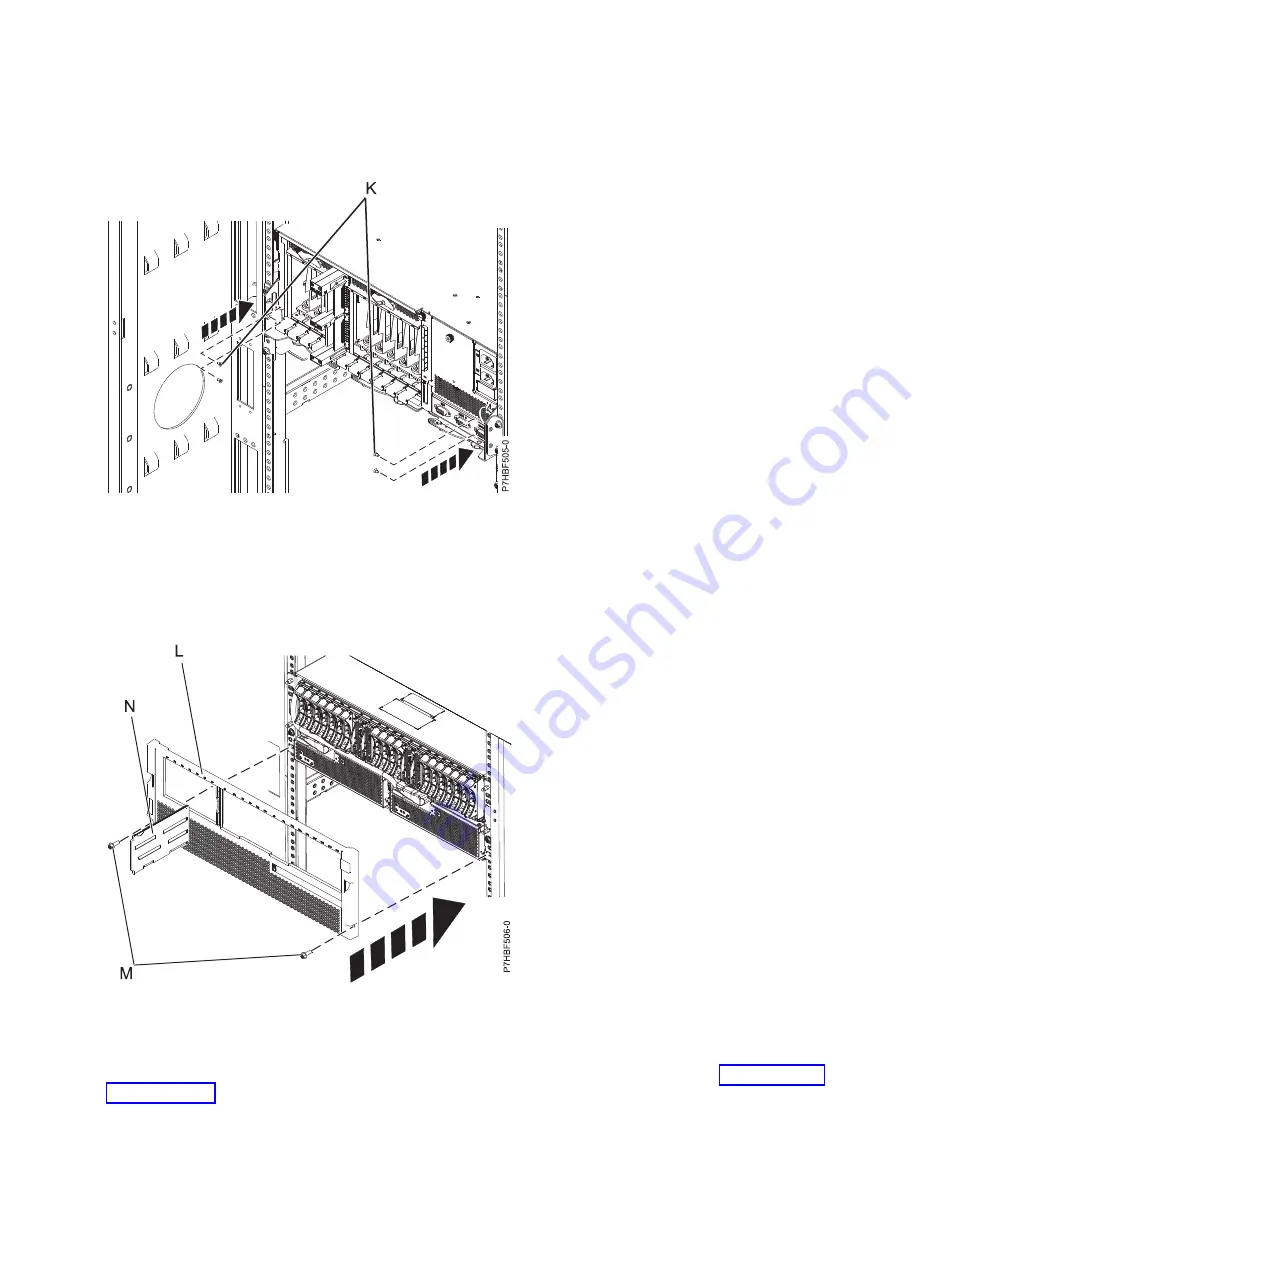
Install the two M5 securing screws
(K)
through the expansion unit and into the nut clips on the left
and right rail.
6.
Install the bezel
(L)
onto the expansion unit. Press the bezel into place and secure it with two M5
screws
(M)
on the left and right rail.
7.
Insert the service information holder
(N)
into the slot in the bezel.
For instructions on how to connect and configure the expansion unit after installation, see Enclosures and
expansion units.
Figure 63. Sliding the expansion unit in the rack
Figure 64. Installing the bezel and service information holder
Chapter 3. Installing a system or expansion unit into a rack
67
Summary of Contents for 0551
Page 1: ...Power Systems Rack rack features and installing systems or expansion units into a rack ...
Page 2: ......
Page 3: ...Power Systems Rack rack features and installing systems or expansion units into a rack ...
Page 8: ...vi Installing into a rack ...
Page 12: ...2 Installing into a rack ...
Page 34: ...24 Installing into a rack ...
Page 118: ...108 Installing into a rack ...
Page 126: ...116 Installing into a rack ...
Page 130: ...120 Installing into a rack ...
Page 148: ...138 Installing into a rack ...
Page 164: ...154 Installing into a rack ...
Page 174: ...3 Close the front rack door 164 Installing into a rack ...
Page 181: ......
Page 182: ... Printed in USA ...


