2.
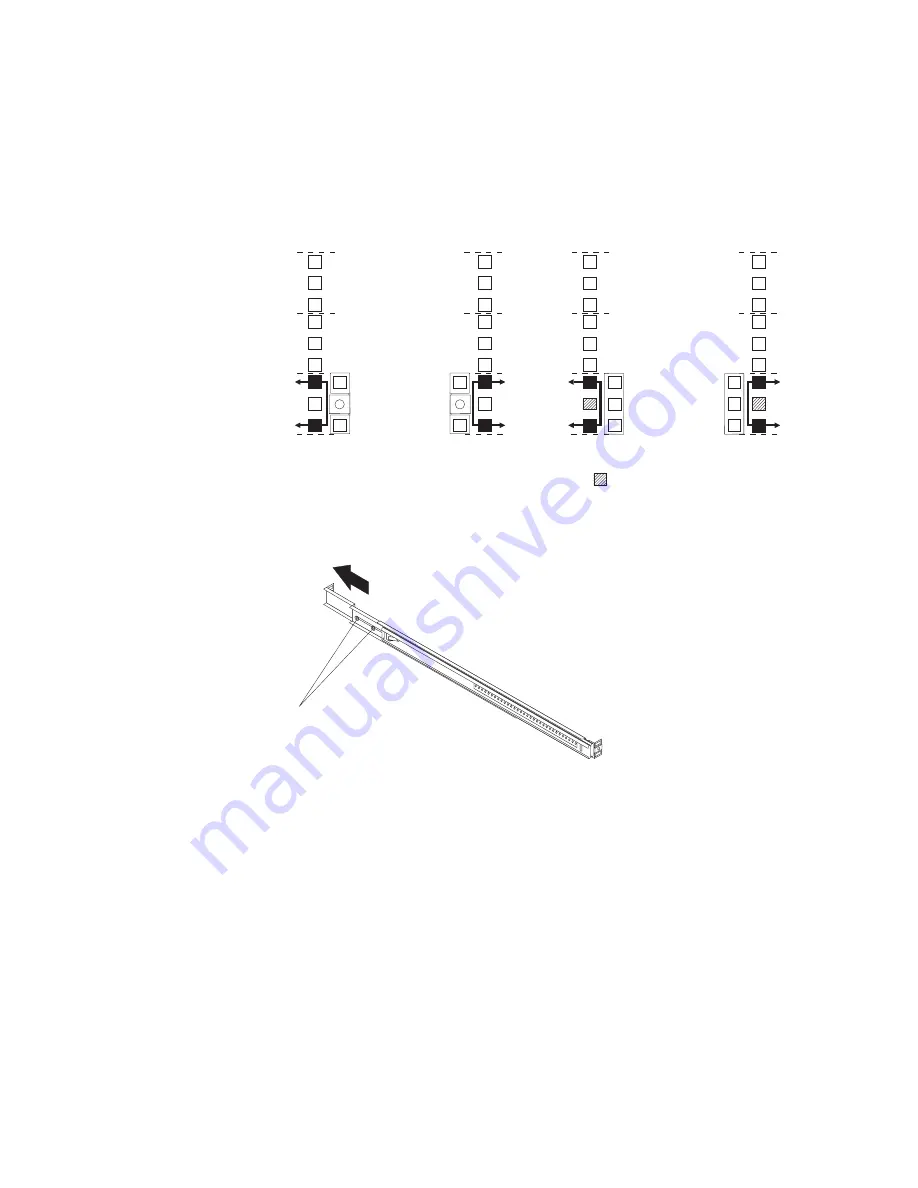
Select
a
1U
location
in
the
rack
for
the
console
unit.
Install
either
three
cage
nuts
or
three
clip
nuts
in
the
front
of
the
rack.
Install
two
cage
nuts
or
two
clip
nuts
in
the
rear
of
the
rack.
Use
the
cage
nuts
or
clip
nuts
from
the
miscellaneous
hardware
kit.
Note:
If
you
are
installing
an
optional
console
switch
behind
the
console
unit,
make
sure
that
you
install
a
cage
nut
or
clip
nut
in
the
center-rear
position
that
is
shown
shaded
in
the
following
illustration.
U
U
U
U
U
U
U
U
U
U
U
U
Front
Rear
Optional console-switch nut
3.
If
you
are
installing
the
console
unit
in
an
IBM
rack
cabinet,
no
adjustment
is
necessary.
Otherwise,
loosen
the
two
rail-adjustment
screws
on
each
of
the
outer
slide
rails
and
extend
the
rails
to
their
maximum
outward
position.
Rail-adjustment
screws
Chapter
2.
Installing
the
console
unit
in
the
rack
cabinet
11
Summary of Contents for 172319X - 1U Flat Panel Console
Page 1: ...1U 17 inch Flat Panel Console Kit Installation and Maintenance Guide ...
Page 2: ......
Page 3: ...1U 17 inch Flat Panel Console Kit Installation and Maintenance Guide ...
Page 32: ...22 1U 17 inch Flat Panel Console Kit Installation and Maintenance Guide ...
Page 91: ......
Page 92: ... Part Number 46M1369 Printed in USA 1P P N 46M1369 ...


