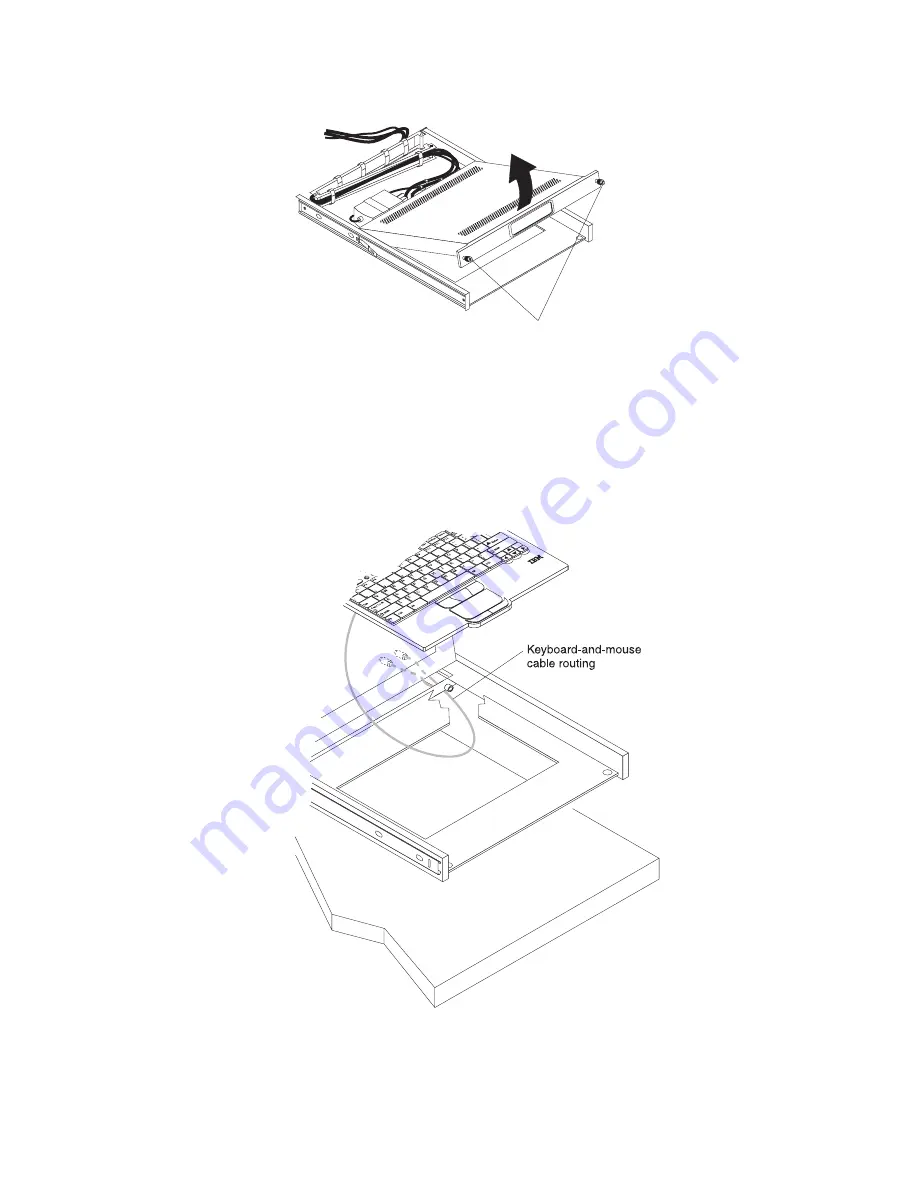
4.
Carefully
lift
the
flat-panel
display
to
the
full
upright
position.
Thumbscrews
5.
Remove
the
keyboard
and
cable
from
the
console
unit
and
set
it
aside.
6.
Unpack
the
replacement
console
unit
and
place
it
on
a
table
or
other
flat
surface.
Make
sure
that
the
right
side
of
the
unit
extends
approximately
76
mm
(3
in.)
over
the
edge
of
the
surface.
This
will
help
you
route
the
keyboard-and-mouse
cable
more
easily.
(See
the
illustration
in
step
7.)
7.
Carefully
route
the
keyboard-and-mouse
cable
down
through
the
keyboard
tray
opening
on
the
replacement
console
unit,
up
through
the
opening
on
the
right
side
of
the
tray,
and
toward
the
cable-management
arm.
Pull
the
full
length
of
the
cable
through
the
opening.
8.
Place
the
keyboard
in
the
tray
and
press
the
hook-and-loop
fasteners
together.
9.
Close
the
flat-panel
display.
Chapter
4.
Hardware
maintenance
information
43
Summary of Contents for 172319X - 1U Flat Panel Console
Page 1: ...1U 17 inch Flat Panel Console Kit Installation and Maintenance Guide ...
Page 2: ......
Page 3: ...1U 17 inch Flat Panel Console Kit Installation and Maintenance Guide ...
Page 32: ...22 1U 17 inch Flat Panel Console Kit Installation and Maintenance Guide ...
Page 91: ......
Page 92: ... Part Number 46M1369 Printed in USA 1P P N 46M1369 ...


