4. After you attach the hoses and fill the heat exchanger with water, complete the
following steps:
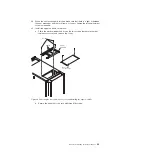
a. Install the inner hose access panel on the inside bottom of the heat
exchanger.
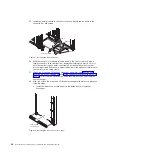
b. Install the outer hose access panel on the outside bottom of the heat
exchanger.
c. (Optional) Secure the outer hose access panel to the heat exchanger with
an M4 screw (see Figure 14).
d. Reconnect power to the rack and all components; then, close and latch the
heat exchanger.
Inner hose
access panel
Figure 13. Installing the inner hose access panel
Outer hose
access panel
Optional
screw
Figure 14. Installing the outer hose access panel
26
Rear Door Heat eXchanger V2: Installation and Maintenance Guide
Summary of Contents for 1756
Page 1: ...Rear Door Heat eXchanger V2 Type 1756 Installation and Maintenance Guide ...
Page 2: ......
Page 3: ...Rear Door Heat eXchanger V2 Type 1756 Installation and Maintenance Guide ...
Page 38: ...28 Rear Door Heat eXchanger V2 Installation and Maintenance Guide ...
Page 64: ...54 Rear Door Heat eXchanger V2 Installation and Maintenance Guide ...
Page 90: ...80 Rear Door Heat eXchanger V2 Installation and Maintenance Guide ...
Page 98: ...88 Rear Door Heat eXchanger V2 Installation and Maintenance Guide ...
Page 101: ...website continued support line telephone numbers 79 Index 91 ...
Page 102: ...92 Rear Door Heat eXchanger V2 Installation and Maintenance Guide ...
Page 103: ......
Page 104: ... Part Number 00D2434 Printed in USA 1P P N 00D2434 ...


