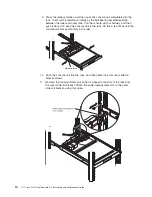
9.
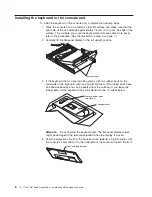
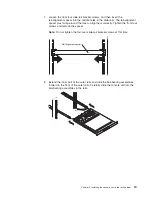
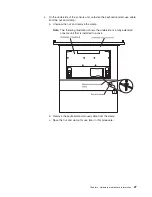
Press
the
release
latches,
and
then
push
the
console
unit
completely
into
the
rack.
There
will
be
resistance
initially
as
the
ball-bearing
assemblies
align
between
the
inner
and
outer
rails.
Pull
the
console
unit
out
halfway,
and
then
push
it
back
in
to
seat
the
console
unit
in
the
rails.
Do
this
a
few
times
until
the
console
unit
moves
smoothly
in
the
rails.
Release latch
10.
Push
the
console
unit
into
the
rack,
and
then
tighten
the
four
rear
slide-rail
bracket
screws.
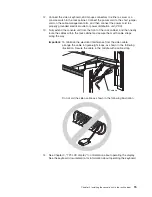
11.
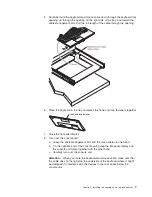
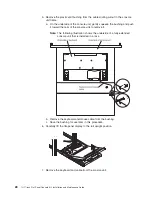
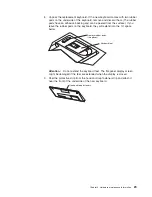
Remove
the
rail-adjustment
screw
that
is
closest
to
the
rear
of
the
rack
from
the
outer
slide-rail
bracket.
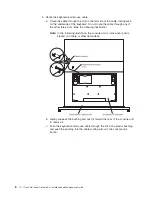
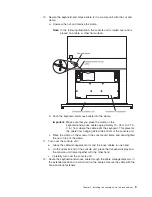
Attach
the
cable-management
arm
to
the
outer
slide-rail
bracket,
using
this
screw.
14
1U
17-inch
Flat
Panel
Console
Kit:
Installation
and
Maintenance
Guide
Summary of Contents for 1U
Page 1: ...1U 17 inch Flat Panel Console Kit Installation and Maintenance Guide...
Page 2: ......
Page 3: ...1U 17 inch Flat Panel Console Kit Installation and Maintenance Guide...
Page 32: ...22 1U 17 inch Flat Panel Console Kit Installation and Maintenance Guide...
Page 91: ......
Page 92: ...Part Number 46M1369 Printed in USA 1P P N 46M1369...

