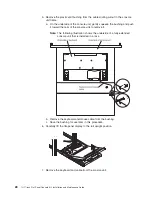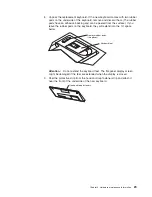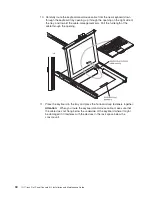
12.
Connect
the
video,
keyboard,
and
mouse
connectors
to
either
a
server
or
a
console
switch
in
the
rack
cabinet.
Connect
the
power
cord
to
the
short
jumper
cord
on
the
cable-management
arm,
and
then
connect
the
power
cord
to
a
properly
grounded
electrical
outlet
or
power
distribution
unit
(PDU).
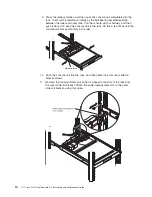
13.
Fully
extend
the
console
unit
from
the
front
of
the
rack
cabinet,
and
then
neatly
route
the
cables
within
the
rack
cabinet
and
secure
them
with
cable
straps
along
the
way.
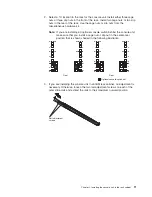
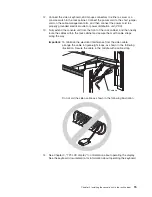
Important:
To
minimize
the
electrical
interference
from
the
video
cable,
arrange
the
cable
in
figure-eight
loops,
as
shown
in
the
following
illustration.
Secure
the
cable
in
the
middle
with
a
cable
strap.
Cable tie
Do
not
coil
the
video
cable
as
shown
in
the
following
illustration.
14.
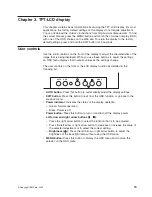
See
Chapter
3,
“TFT-LCD
display”
for
information
about
operating
the
display.
See
the
keyboard
documentation
for
information
about
operating
the
keyboard.
Chapter
2.
Installing
the
console
unit
in
the
rack
cabinet
15
Summary of Contents for 1U
Page 1: ...1U 17 inch Flat Panel Console Kit Installation and Maintenance Guide...
Page 2: ......
Page 3: ...1U 17 inch Flat Panel Console Kit Installation and Maintenance Guide...
Page 32: ...22 1U 17 inch Flat Panel Console Kit Installation and Maintenance Guide...
Page 91: ......
Page 92: ...Part Number 46M1369 Printed in USA 1P P N 46M1369...

