12.
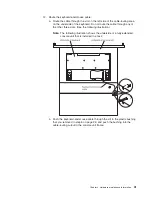
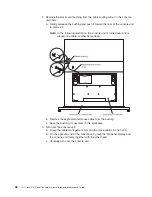
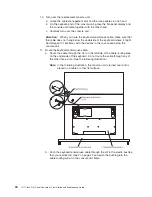
Fasten
the
keyboard-and-mouse
cable
to
the
console
unit
with
the
nut
and
clamp:
a.
Push
the
keyboard-and-mouse
cable
into
the
clamp
that
you
removed
in
step
1
on
page
41.
Important:
Make
sure
that
you
place
the
clamp
on
the
keyboard-and-mouse
cable
approximately
70
-
76
mm
(2.75
-
3
in.)
from
where
the
cable
exits
the
keyboard.
This
prevents
the
cable
from
hanging
below
the
bottom
of
the
console
unit.
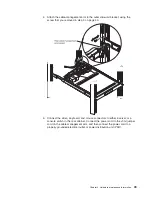
Note:
In
the
following
illustration,
the
console
unit
is
turned
over
and
is
placed
on
a
table
or
other
flat
surface.
b.
Place
the
clamp
on
the
screw
on
the
console
unit
frame
and
hand-tighten
the
nut
on
top
of
the
clamp.
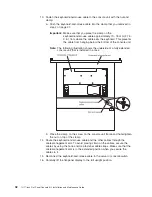
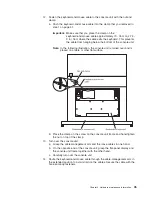
13.
Turn
over
the
console
unit:
a.
Grasp
the
cable-management
arm
and
the
loose
cables
in
one
hand.
b.
On
the
opposite
end
of
the
console
unit,
grasp
the
flat-panel
display
and
the
console
unit
frame
together
with
the
other
hand.
c.
Carefully
turn
over
the
console
unit.
14.
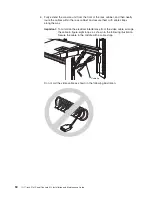
Route
the
keyboard-and-mouse
cable
through
the
cable-management
arm
in
the
extended
position
to
avoid
strain
on
the
cables.
Secure
the
cable
with
the
hook-and-loop
fasteners.
Chapter
4.
Hardware
maintenance
information
45
Summary of Contents for 1U
Page 1: ...1U 17 inch Flat Panel Console Kit Installation and Maintenance Guide...
Page 2: ......
Page 3: ...1U 17 inch Flat Panel Console Kit Installation and Maintenance Guide...
Page 32: ...22 1U 17 inch Flat Panel Console Kit Installation and Maintenance Guide...
Page 91: ......
Page 92: ...Part Number 46M1369 Printed in USA 1P P N 46M1369...

