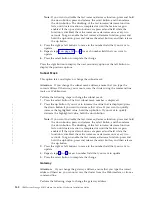
c.
Press
the
left
or
right
button
until
the
required
language
is
displayed.
d.
Press
the
select
button.
When
the
battery
is
fully
charged–if
it
needed
to
be
charged–the
Charging
message
is
replaced
by
Cluster:
and
the
progress
bar
no
longer
displays.
The
installation
of
the
SAN
Volume
Controller
hardware
is
now
complete.
No
software
installation
is
required.
Continue
with
the
instructions
in
the
IBM
System
Storage
SAN
Volume
Controller:
Software
Installation
and
Configuration
Guide
to,
if
necessary,
create
a
new
SAN
Volume
Controller
cluster
and
to
add
the
nodes
into
a
SAN
Volume
Controller
cluster.
Installing
the
hardware
master
console
If
the
master
console
hardware
product
option
is
included
with
the
SAN
Volume
Controller,
you
must
install
it
and
perform
initial
hardware
configuration
for
it.
Before
you
begin
the
installation,
ensure
that
you
have
completed
the
following
tasks:
v
Important:
Review
and
complete
all
of
the
safety
checks
that
are
detailed
in
the
documentation
for
the
master
console
IBM
eServer
xSeries
hardware,
the
keyboard,
and
the
display.
v
Ensure
that
you
have
all
the
customer-completed
information
that
you
need,
including
the
configuration
data
table,
hardware
location
chart,
and
the
cable
connection
table,
which
are
provided
at
http://www.ibm.com/storage/support/
The
IBM
System
Storage
SAN
Volume
Controller:
Planning
Guide
provides
guidelines
for
completing
these
tables
and
charts.
If
you
experience
a
problem
with
your
master
console,
use
the
2145
machine
type
and
the
serial
number
of
the
SAN
Volume
Controller
node
that
was
installed
with
the
master
console
to
open
a
hardware
problem.
Perform
the
following
steps
to
install
the
master
console
hardware
option:
Note:
Do
not
install
the
pull-out
monitor
and
keyboard
of
the
master
console
directly
below
a
SAN
Volume
Controller
node.
The
front
panel
of
the
node
protrudes
beyond
the
front
of
the
rack
and
overlaps
part
of
the
monitor,
which
prevents
you
from
being
able
to
open
it.
1.
Install
the
master
console
hardware
in
the
rack,
following
the
hardware
installation
instructions
that
are
provided
by
your
xSeries
Installation
Guide
and
by
the
instructions
that
are
provided
with
the
mounting
rails.
If
there
are
any
devices
directly
above
and
below
the
master
console
server
unit,
it
might
be
very
difficult
to
reach
in
and
connect
the
cables
to
the
back
of
the
server
after
it
is
placed
in
the
rack.
If
that
is
the
only
slot
available,
connect
the
keyboard,
mouse,
monitor,
and
Ethernet
cables
at
the
back
of
the
master
console
server
before
installing
it
in
the
rack.
Leave
the
other
end
of
the
Ethernet
cable
disconnected
from
the
network
until
you
are
directed
to
connect
it.
Important:
Do
not
follow
any
software
installation
procedures
in
the
xSeries
Installation
Guide.
2.
Ensure
that
no
cables
are
connected
to
the
Ethernet
ports.
3.
Turn
on
the
master
console.
a.
Type
administrator
in
the
User
ID
field.
Appendix
B.
SAN
Volume
Controller
2145-4F2
139
|
|
|
|
|
|
|
|
|
|
|
|
|
|
|
|
|
|
|
|
|
|
|
|
|
|
Summary of Contents for 2145UPS-1U
Page 2: ......
Page 8: ...vi IBM System Storage SAN Volume Controller Hardware Installation Guide...
Page 56: ...18 IBM System Storage SAN Volume Controller Hardware Installation Guide...
Page 72: ...34 IBM System Storage SAN Volume Controller Hardware Installation Guide...
Page 102: ...64 IBM System Storage SAN Volume Controller Hardware Installation Guide...
Page 138: ...100 IBM System Storage SAN Volume Controller Hardware Installation Guide...
Page 190: ...152 IBM System Storage SAN Volume Controller Hardware Installation Guide...
Page 192: ...154 IBM System Storage SAN Volume Controller Hardware Installation Guide...
Page 200: ...162 IBM System Storage SAN Volume Controller Hardware Installation Guide...
Page 228: ...190 IBM System Storage SAN Volume Controller Hardware Installation Guide...
Page 231: ......
Page 232: ...Part Number 31P1046 Printed in USA GC27 2132 01 1P P N 31P1046...


