Note:
If
you
want
to
disable
the
fast
increase/decrease
function,
press
and
hold
the
down
button,
press
and
release
the
select
button,
and
then
release
the
down
button.
The
disabling
of
the
fast
increase/decrease
function
lasts
until
cluster
creation
is
completed
or
until
the
feature
is
again
enabled.
If
the
up
or
down
buttons
are
pressed
and
held
while
the
function
is
disabled,
the
value
increases
or
decreases
once
every
two
seconds.
To
again
enable
the
fast
increase/decrease
function,
press
and
hold
the
up
button,
press
and
release
the
select
button,
and
then
release
the
up
button.
4.
Press
the
right
or
left
buttons
to
move
to
the
number
field
that
you
want
to
update.
5.
Repeat
steps
and
for
each
number
field
that
you
want
to
update.
6.
Press
the
select
button
to
complete
the
change.
Press
the
right
button
to
display
the
next
secondary
option
or
the
left
button
to
display
the
previous
options.
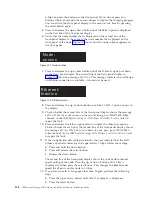
Subnet
Mask
This
option
lets
you
display
or
change
the
subnet
mask.
Attention:
If
you
change
the
subnet
mask
address,
ensure
that
you
type
the
correct
address.
Otherwise,
you
cannot
access
the
cluster
using
the
command
line
tools
or
a
Web
browser.
Perform
the
following
steps
to
change
the
subnet
mask:
1.
Press
the
select
button.
The
first
subnet
mask
number
is
displayed.
2.
Press
the
up
button
if
you
want
to
increase
the
value
that
is
displayed;
press
the
down
button
if
you
want
to
decrease
that
value.
If
you
want
to
quickly
increase
the
highlighted
value,
hold
the
up
button.
If
you
want
to
quickly
decrease
the
highlighted
value,
hold
the
down
button.
Note:
If
you
want
to
disable
the
fast
increase/decrease
function,
press
and
hold
the
down
button,
press
and
release
the
select
button,
and
then
release
the
down
button.
The
disabling
of
the
fast
increase/decrease
function
lasts
until
cluster
creation
is
completed
or
until
the
feature
is
again
enabled.
If
the
up
or
down
buttons
are
pressed
and
held
while
the
function
is
disabled,
the
value
increases
or
decreases
once
every
two
seconds.
To
again
enable
the
fast
increase/decrease
function,
press
and
hold
the
up
button,
press
and
release
the
select
button,
and
then
release
the
up
button.
3.
Press
the
right
or
left
buttons
to
move
to
the
number
field
that
you
want
to
update.
4.
Repeat
steps
and
for
each
number
field
that
you
want
to
update.
5.
Press
the
select
button
to
complete
the
change.
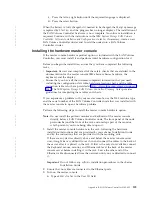
Gateway
Attention:
If
you
change
the
gateway
address,
ensure
that
you
type
the
correct
address.
Otherwise,
you
cannot
access
the
cluster
from
the
Web
interface
or
from
a
command
line.
Perform
the
following
steps
to
change
the
gateway
address:
148
IBM
System
Storage
SAN
Volume
Controller:
Hardware
Installation
Guide
|
|
|
|
|
|
|
|
|
|
|
|
|
Summary of Contents for 2145UPS-1U
Page 2: ......
Page 8: ...vi IBM System Storage SAN Volume Controller Hardware Installation Guide...
Page 56: ...18 IBM System Storage SAN Volume Controller Hardware Installation Guide...
Page 72: ...34 IBM System Storage SAN Volume Controller Hardware Installation Guide...
Page 102: ...64 IBM System Storage SAN Volume Controller Hardware Installation Guide...
Page 138: ...100 IBM System Storage SAN Volume Controller Hardware Installation Guide...
Page 190: ...152 IBM System Storage SAN Volume Controller Hardware Installation Guide...
Page 192: ...154 IBM System Storage SAN Volume Controller Hardware Installation Guide...
Page 200: ...162 IBM System Storage SAN Volume Controller Hardware Installation Guide...
Page 228: ...190 IBM System Storage SAN Volume Controller Hardware Installation Guide...
Page 231: ......
Page 232: ...Part Number 31P1046 Printed in USA GC27 2132 01 1P P N 31P1046...

