4
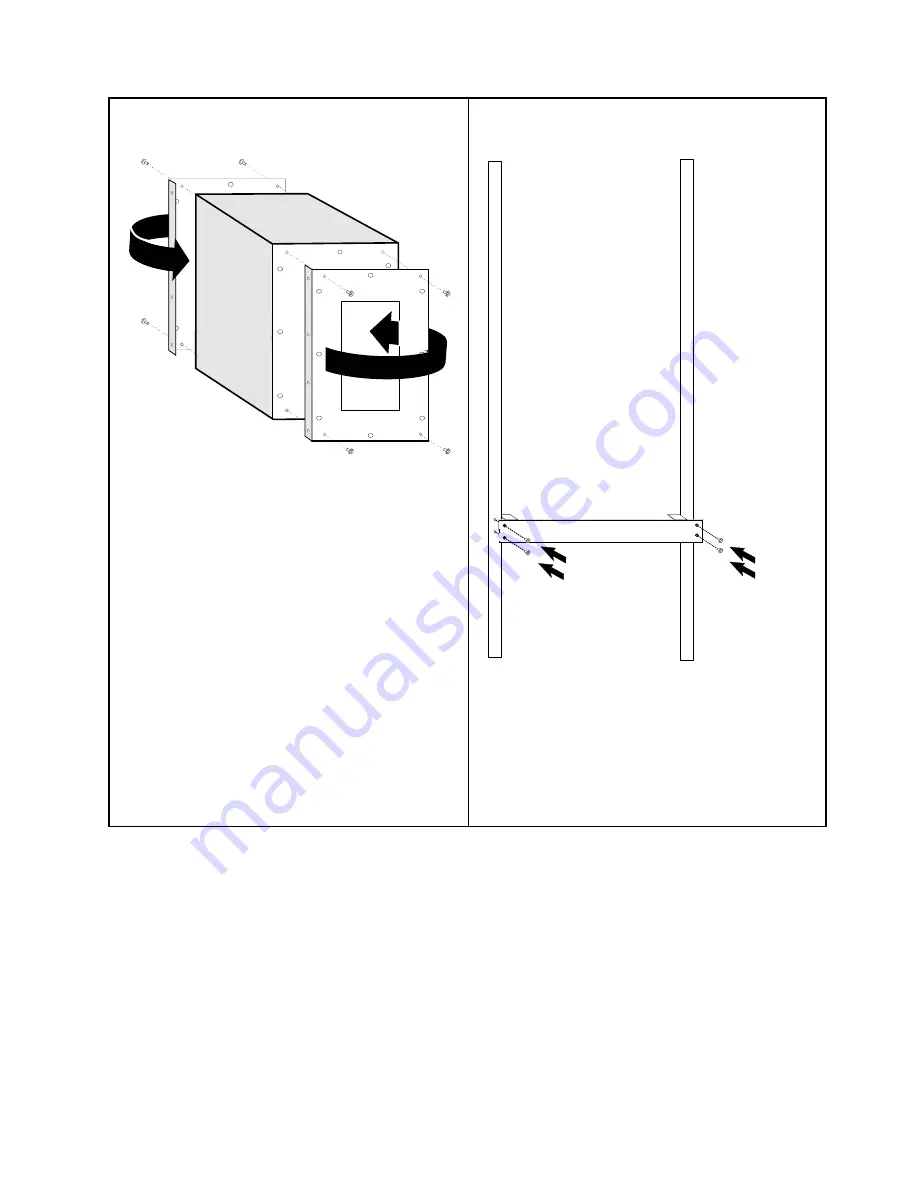
(Rack-Mounting)
REAR
The mounting brackets are shipped with the
flanges facing the rear:
1. Remove the two screws at the top and
bottom of each bracket
2. Reverse each bracket so that the IBM 2216
can be rack-mounted
3. Reinstall the four screws.
When the brackets are fitted correctly, the letter
embossed on each bracket is in the top-rear
corner; an A on the right side and a B on the
left side.
5
(Rack-Mounting)
The installation aid is a metal bar that supports
the IBM 2216 as you install it in the rack. The
installation aid ensures that the IBM 2216 and
rack are lined up correctly.
Line up the holes in the installation aid with the
rack and install all screws.
3
Summary of Contents for 2216
Page 1: ...2216 Nways Multiaccess Connector Hardware Installation Guide GA27 4106 00...
Page 2: ......
Page 3: ...2216 Nways Multiaccess Connector Hardware Installation Guide GA27 4106 00...
Page 6: ...iv 2216 Hardware Installation Guide...
Page 12: ...6 2216 Hardware Installation Guide...
Page 14: ...8 2216 Hardware Installation Guide...
Page 16: ...10 2216 Hardware Installation Guide...
Page 24: ...18 2216 Hardware Installation Guide...
Page 26: ...20 2216 Hardware Installation Guide...
Page 27: ......
Page 28: ...Part Number 38H7825 Printed in U S A 38H7825 GA27 4106 00...


