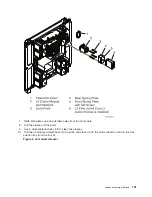
2.
Open
the
rear
cover
to
access
the
field
replaceable
unit
(FRU).
See
3.
Locate
the
DCA
to
be
replaced
by
decoding
the
SRC
(see
the
topic).
4.
Note
the
state
of
the
DCA’s
LEDs.
Then,
press
the
(green)
Start
Service
button
and
only
proceed
if
both
of
the
DCA’s
LEDs
are
off,
or
the
repair
has
been
scheduled
(System
outage
-
EPO
off).
5.
Verify
labeling
and
location,
then
unplug
the
cables
from
the
DCA.
6.
Loosen
the
upper
and
lower
thumb
screws
using
the
torque
tool
(PN
6422789),
alternating
between
thumb
screws
(two
upper,
and
two
lower)
until
the
unit
can
be
slid
out
of
the
slot.
7.
Grasp
both
sides
of
the
DCA
and
pull
it
out
of
the
drawer.
To
replace
the
DC
converter
assembly
(DCA):
1.
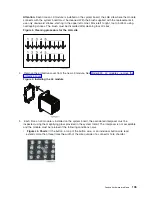
Carefully
slide
the
DCA
into
the
slot
as
far
as
it
will
go.
The
back
edge
of
the
top
of
the
DCA
should
be
approximately
0.25
″
from
the
cage
bracket.
Attention
:
In
no
instances
should
the
unit
be
slammed
or
pushed
vigorously
against
the
backplane,
as
this
may
damage
the
connector.
2.
Hold
the
’upper
part’
of
the
DCA
against
the
backplane,
and
using
the
torque
tool
(PN
6422789),
start
the
’upper’
thumb
screw
into
the
matching
hole
in
the
cage
bracket
(approximately
two
turns).
3.
Start
the
lower
thumb
screw
(two
turns).
4.
Alternate
tightening
the
upper
and
then
the
lower
thumb
screws
until
both
are
fully
torqued
in.
5.
Check
the
torque
on
both
thumb
screws.
6.
Plug
all
the
cables
into
the
DCA,
ensuring
correspondence
of
plug
locations
and
cable
labeling.
7.
To
indicate
completion
of
these
steps,
press
the
(white)
Service
Complete
button.
This
ends
the
procedure.
Models
870
and
890
-
L3
modules
For
use
by
authorized
service
providers.
Use
this
procedure
to
remove
or
replace
L3
modules
on
the
Models
870
and
890.
Handling
static-sensitive
modules
Attention:
L3
modules
are
sensitive
to
static
electricity
discharge.
These
devices
are
shipped
in
antistatic
containers
to
prevent
damage
caused
by
electrostatic
discharge.
Take
the
following
precautions:
v
Use
an
antistatic
wrist
strap
while
handling
the
device.
v
Do
not
remove
the
device
from
the
antistatic
container
until
you
are
ready
to
install
the
device
in
the
system
unit.
v
With
the
device
still
in
its
antistatic
container,
touch
it
to
a
metal
frame
of
the
system.
v
Grasp
modules
by
the
heatsink.
Avoid
touching
the
interposer
buttons.
v
If
you
need
to
lay
the
device
down
while
it
is
out
of
the
antistatic
container:
–
Lay
the
L3s
with
the
LGA
connector
down
in
the
antistatic
tray.
–
Before
picking
it
up
again,
touch
the
antistatic
container
and
the
metal
frame
of
the
system
unit
at
the
same
time.
v
Handle
the
devices
carefully
in
order
to
prevent
permanent
damage.
Attention:
Before
you
remove
or
replace
any
L3
module,
STOP,
read,
and
understand
this
entire
procedure.
Also,
check
to
ensure
that
the
MCM/L3
Label
Map
is
installed.
Refer
to
Analyze
hardware
problems
99
Summary of Contents for 270
Page 2: ......
Page 12: ...x Hardware Remove and Replace Part Locations and Listings...
Page 279: ...Figure 3 CCIN 2881 with pluggable DIMM Analyze hardware problems 267...
Page 281: ...Figure 6 Models 830 SB2 with FC 9074 HSL and SPCN locations Analyze hardware problems 269...
Page 283: ...Figure 1b Model 840 SB3 processor tower dual line cord Analyze hardware problems 271...
Page 294: ...01 gif port and LED locations 282 Hardware Remove and Replace Part Locations and Listings...
Page 295: ...s src rzaq4519 gif locations Analyze hardware problems 283...
Page 483: ...Table 1 Cover assembly FC 5095 Expansion I O Tower Analyze hardware problems 471...
Page 614: ...602 Hardware Remove and Replace Part Locations and Listings...
Page 618: ...606 Hardware Remove and Replace Part Locations and Listings...
Page 621: ......
Page 622: ...Printed in USA SY44 5917 02...

