


© Copyright IBM Corporation 2019, 2020, 2021 Customer Install Guide, 1U Chassis
26
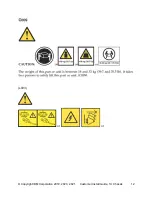
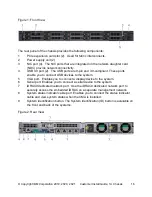
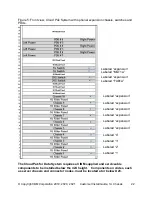
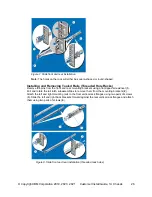
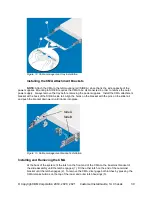
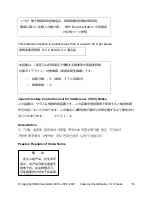
Figure 7. Slide front and rear installation
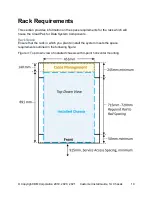
Note:
The holes on the rack will either be square-shaped or round-shaped.
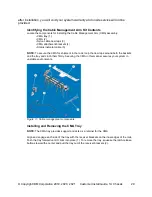
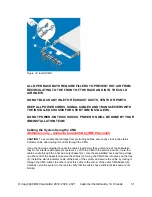
Installing and Removing Tooled Rails (Threaded Hole Racks)
Remove the pins from the front and rear mounting brackets using a flat-tipped screwdriver (
1
).
Pull and rotate the rail latch subassemblies to remove them from the mounting brackets (
2
).
Attach the left and right mounting rails to the front vertical rack flanges using two pairs of screws
(
3
). Slide the left and right back brackets forward against the rear vertical rack flanges and attach
them using two pairs of screws (
4
).
Figure 8. Slide front and rear installation (threaded rack holes)