Chapter 2. Installing the drive
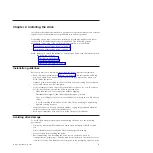
This chapter describes the installation procedures for both the internal and external
tape drives. It is the customer's responsibility to install this product.
Depending on the type of enclosure, installation procedures might vary. Refer to
the enclosure documentation for drive installation. The following generic
procedures can be used if the enclosure documentation is not available:
v
“Installing an internal tape drive” on page 10
v
“Installing an external tape drive” on page 15
Note:
Before you install the internal or external tape drive, read the information in
the following sections:
v
v
v
“Inventory checklist” on page 10
Installation guidelines
Before you remove or replace a device, read the following safety information:
v
Read the safety information in “Safety” on page iii. This information will help
you work safely. Take standard electrostatic discharge precautions when you
work inside the server.
v
Observe good housekeeping in the area where you are working. Place removed
covers and other parts in a safe place.
v
Do not attempt to lift an object that you think is too heavy for you. If you have
to lift a heavy object, observe the following precautions:
– Make sure that you can stand safely without slipping.
– Distribute the weight of the object equally between your feet.
– Use a slow lifting force. Never move suddenly or twist when you lift a heavy
object.
– To avoid straining the muscles in your back, lift by standing or by pushing
up with your leg muscles.
v
Make sure that you have an adequate number of properly grounded electrical
outlets for the server and all attached devices.
v
Back up all important data before you make changes to disk drives.
Avoiding drive damage
To avoid static electricity damage when handling the drive, use the following
precautions:
v
Limit your movement. Movement can cause static electricity to build around
you.
v
Always handle the drive carefully. Never touch exposed circuitry.
v
Prevent others from touching the drive.
v
Before unpacking and installing the drive into an enclosure, touch its
static-protective packaging to an unpainted metal surface on the enclosure for at
least two seconds. This reduces static electricity in the packaging and your body.
© Copyright IBM Corp. 2011
9
Summary of Contents for 3628
Page 2: ......
Page 10: ...viii Half High LTO Gen 5 SAS Tape Drive Installation and User s Guide ...
Page 14: ...xii Half High LTO Gen 5 SAS Tape Drive Installation and User s Guide ...
Page 16: ...xiv Half High LTO Gen 5 SAS Tape Drive Installation and User s Guide ...
Page 58: ...40 Half High LTO Gen 5 SAS Tape Drive Installation and User s Guide ...
Page 71: ...Figure 14 RID tag on rear panel Chapter 5 Resolving problems 53 ...
Page 72: ...54 Half High LTO Gen 5 SAS Tape Drive Installation and User s Guide ...
Page 76: ...58 Half High LTO Gen 5 SAS Tape Drive Installation and User s Guide ...
Page 90: ...72 Half High LTO Gen 5 SAS Tape Drive Installation and User s Guide ...
Page 102: ...84 Half High LTO Gen 5 SAS Tape Drive Installation and User s Guide ...
Page 119: ......
Page 120: ... Part Number 60Y1487 Printed in USA 1P P N 60Y1487 ...


