


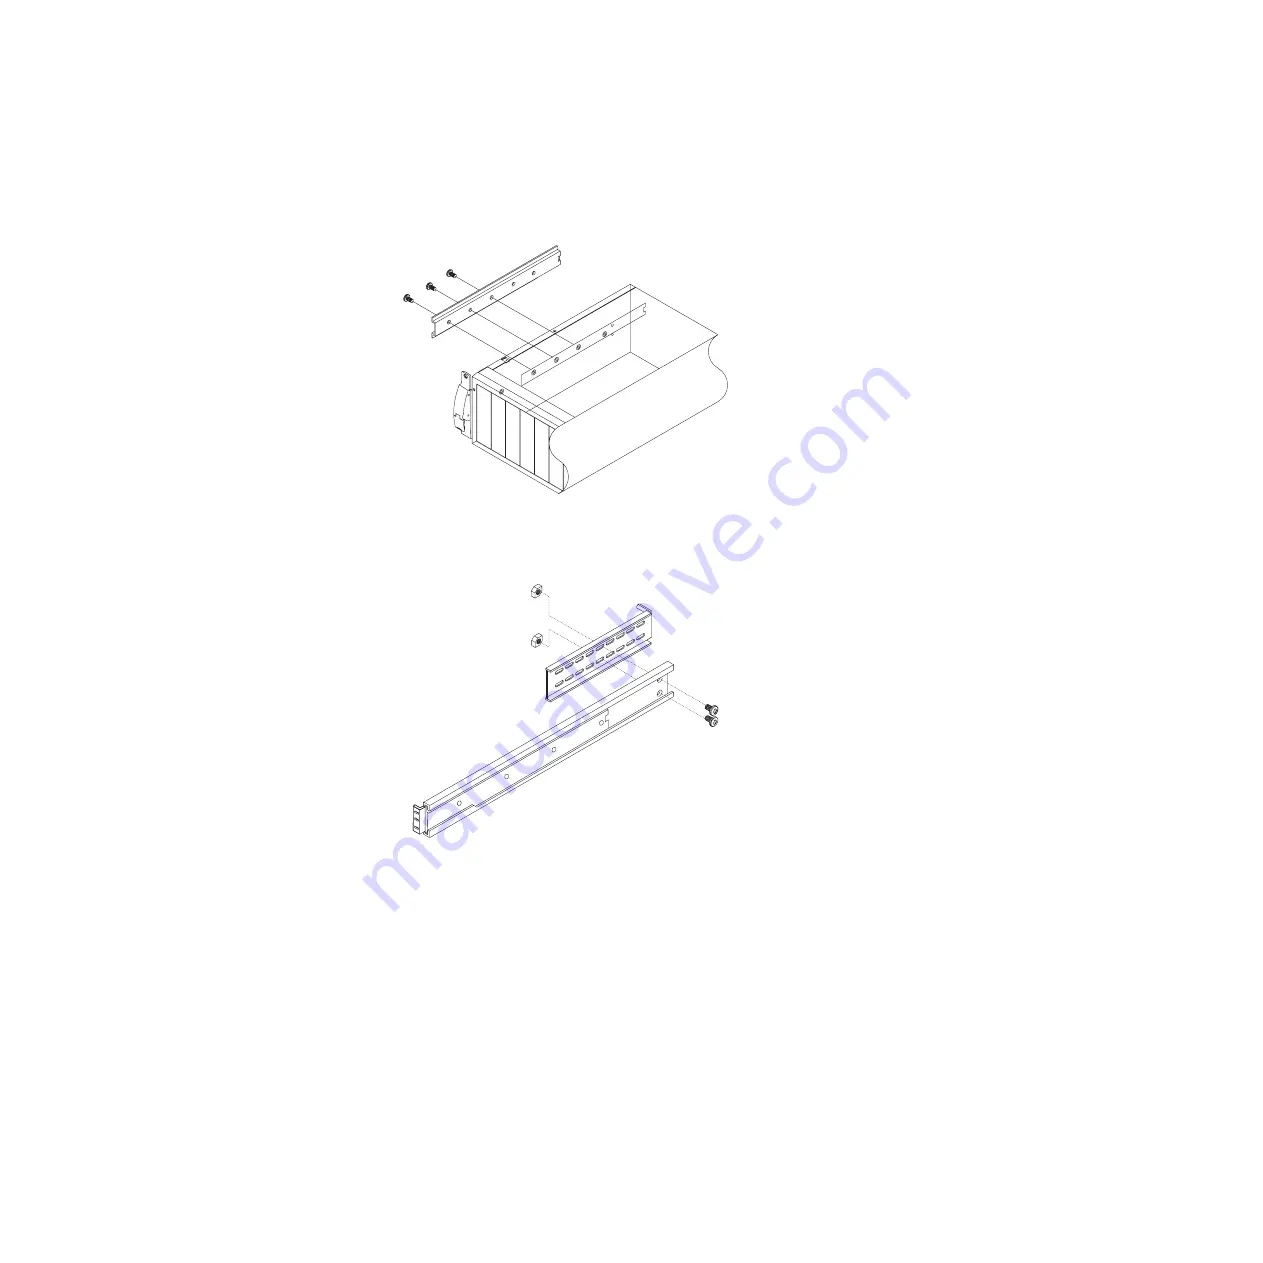
3.
Install
the
slide
rails
on
the
enclosure.
(The
six
10-32
x
3/8-inch
screws
are
provided
in
the
miscellaneous
hardware
bag.)
4.
Attach
the
adjustable
rear-rack
rails
to
the
front-rack
rails.
(The
four
10-32
x
1/2-inch
screws
and
nuts
are
provided
in
the
miscellaneous
hardware
bag.)
Chapter
2.
Installing
the
tape
enclosure
11
Summary of Contents for 4 U
Page 1: ...IBM 4 U Rack Mount Tape Enclosure Installation Guide...
Page 2: ......
Page 3: ...IBM 4 U Rack Mount Tape Enclosure Installation Guide...
Page 8: ...vi IBM 4 U Rack Mount Tape Enclosure Installation Guide...
Page 14: ...6 IBM 4 U Rack Mount Tape Enclosure Installation Guide...
Page 28: ...20 IBM 4 U Rack Mount Tape Enclosure Installation Guide...
Page 55: ......
Page 56: ...Part Number 44E8015 Printed in USA 1P P N 44E8015...


