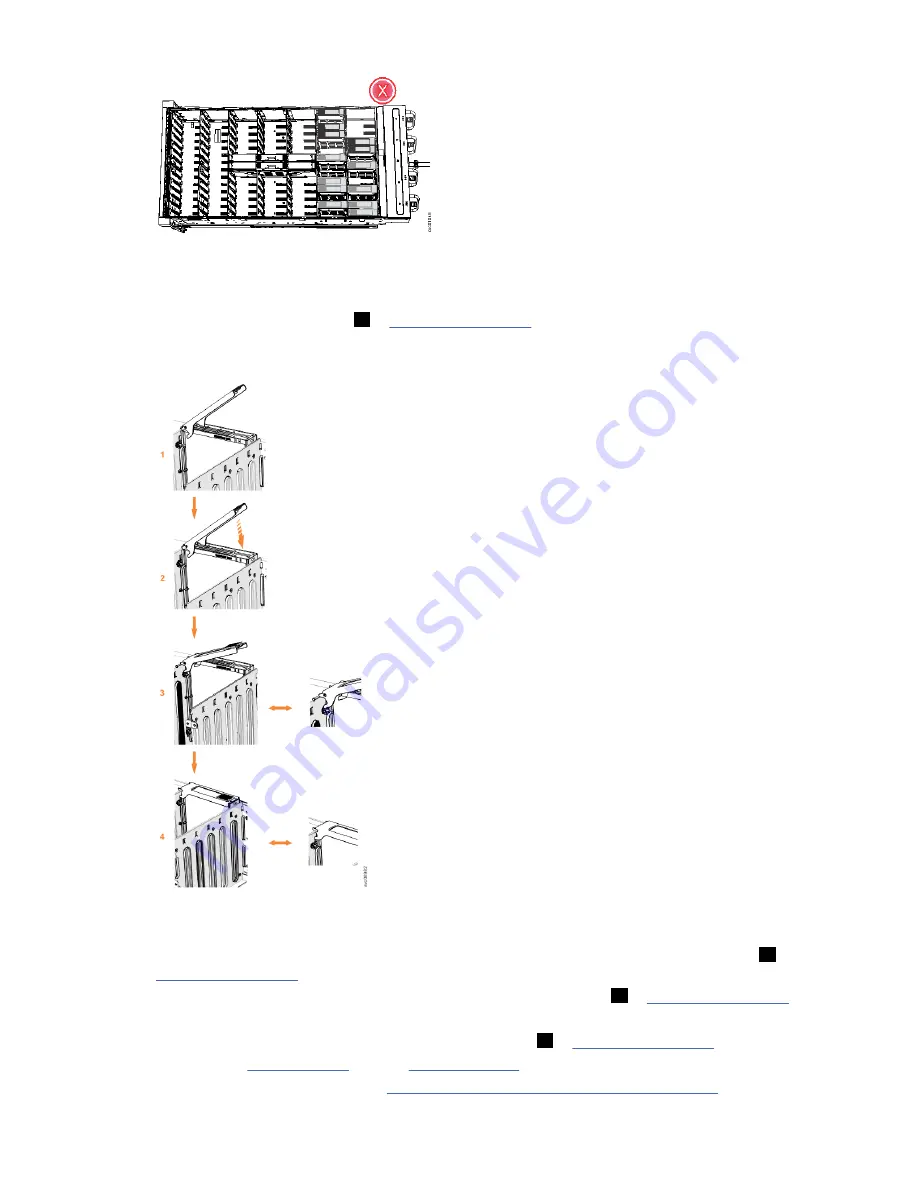
Figure 22. Incorrect drive installation
5. Touch the static-protective package that contains the drive to any unpainted metal surface on the
enclosure. Wear an anti-static wrist strap to remove the drive from the package.
6. Ensure that the drive handle (
1
in Figure 23 on page 27) of the drive assembly is in the open
(unlocked) position.
7. Align the drive carrier into the appropriate drive slot.
Figure 23. Replace the drive
8. Gently push the drive down until it stops and the bottom of the latch is aligned with the top of the
partition. Ensure that the handle is not open more than 45 degrees from the drive carrier. (
2
in
9. Rotate the handle down to lock the drive assembly into the chassis (
3
10. Ensure the toe on the bottom of the latch is fully engaged with the partition in the chassis.
11. Ensure that the top toe of the latch is also fully engaged (
4
12. Repeat steps “5” on page 27 through “11” on page 27 for each drive you are replacing.
13. Replace the cover, as described in “Installing or replacing the top cover” on page 28.
Chapter 2. Installing the system hardware 27
Summary of Contents for 5U92
Page 1: ...IBM Cloud Object Storage System Version 3 15 6 J15 Appliance Manual IBM...
Page 10: ...x...
Page 12: ...xii...
Page 24: ...xxiv IBM Cloud Object Storage System Version 3 15 6 J15 Appliance Manual...
Page 32: ...4 IBM Cloud Object Storage System Version 3 15 6 J15 Appliance Manual...
Page 140: ...112 IBM Cloud Object Storage System Version 3 15 6 J15 Appliance Manual...
Page 141: ......


