5. Reinstall the remaining enclosure parts, as described in the following topics. You can reinstall the parts
in any order.
• “Installing or replacing a power supply ” on page 57
• “Installing or replacing the fascia” on page 24
• “Installing or replacing an expansion canister” on page 62
• “Removing and installing a SAS cable” on page 40
• “Installing or replacing a fan module” on page 63
Sliding the enclosure into the rack
6. Locate the left and right blue release tabs near the front of the enclosure. Press both release tabs
forward to unlock the drawer mechanism (
3
7. Push the enclosure firmly into the rack (
4
8. Tighten the locking thumb screws (
5
in Figure 28 on page 36) to secure the enclosure in the rack.
9. Reconnect power to the disk enclosure.
Installing or replacing the cable-management arm
Use these procedures to install the cable-management arm (CMA) for the 5U92 expansion enclosure. You
can also use these procedures to replace a faulty CMA assembly.
About this task
As part of the initial installation of the 5U92 disk enclosure, you must attach the CMA. You might also
need to replace a faulty CMA with a new one from FRU stock.
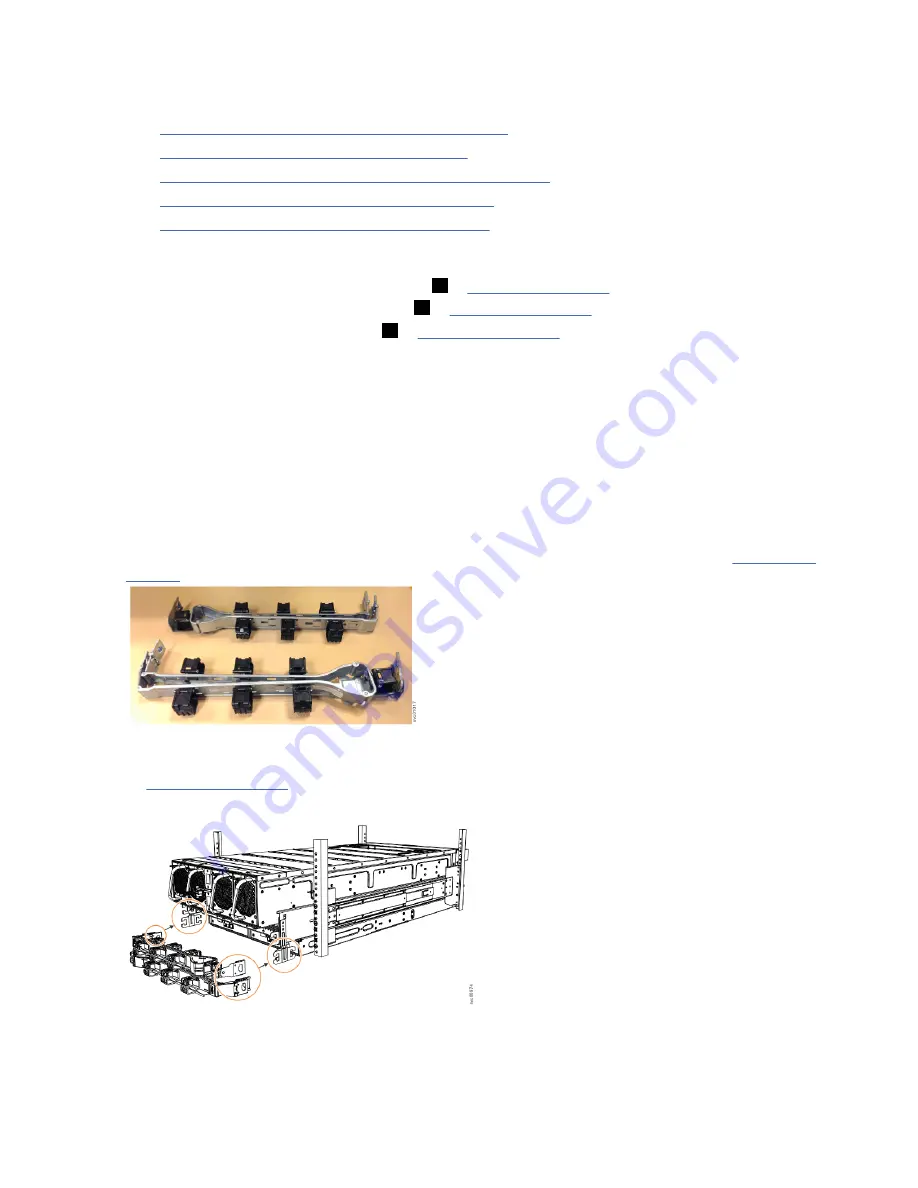
The cable management arm (CMA) consists of an upper arm and a lower arm assembly, as Figure 29 on
page 37 shows.
Figure 29. Upper and lower cable-management arms
As Figure 30 on page 37 shows, the support rail connectors of each CMA assembly are installed on the
rail hooks at the end of the support rails.
Figure 30. Upper and lower cable-management arms
Chapter 2. Installing the system hardware 37
Summary of Contents for 5U92
Page 1: ...IBM Cloud Object Storage System Version 3 15 6 J15 Appliance Manual IBM...
Page 10: ...x...
Page 12: ...xii...
Page 24: ...xxiv IBM Cloud Object Storage System Version 3 15 6 J15 Appliance Manual...
Page 32: ...4 IBM Cloud Object Storage System Version 3 15 6 J15 Appliance Manual...
Page 140: ...112 IBM Cloud Object Storage System Version 3 15 6 J15 Appliance Manual...
Page 141: ......


