6
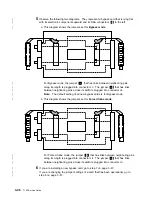
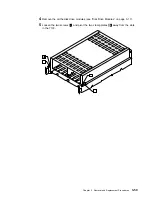
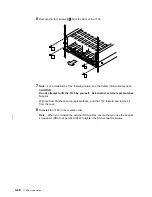
Remove the four screws
3
from the front of the 7133.
7
Note: For a translation of the following notice, see the Safety Information manual.
CAUTION:
Do not attempt to lift the 7133 by yourself. Ask another service representative
for aid.
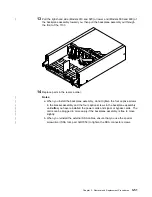
With aid from another service representative, pull the 7133 forward and remove it
from the rack.
8
Reinstall the 7133 in the reverse order.
|
Note: When you reinstall the external SSA cables, ensure that you use the special
|
screwdriver (SSA tool, part 32H7059) to tighten the SSA connector screws.
3-60
7133 Service Guide
Summary of Contents for 7133 Series
Page 1: ...7133 SSA Disk Subsystems Service Guide SY33 0185 02...
Page 2: ......
Page 3: ...7133 SSA Disk Subsystems Service Guide SY33 0185 02...
Page 8: ...vi 7133 Service Guide...
Page 14: ...xii 7133 Service Guide...
Page 44: ...Labels Dummy Fan and Power Supply Assembly 1 30 7133 Service Guide...
Page 94: ...2 10 7133 Service Guide...
Page 110: ...2 2021 6 7133 Service Guide...
Page 114: ...2 2022 4 7133 Service Guide...
Page 138: ...2 2330 18 7133 Service Guide...
Page 146: ...2 16 7133 Service Guide...
Page 210: ...3 64 7133 Service Guide...
Page 222: ...4 12 7133 Service Guide...
Page 229: ......
Page 230: ...Part Number 32H6990 Printed in the United Kingdom 32H699 SY33 185 2...

