9.
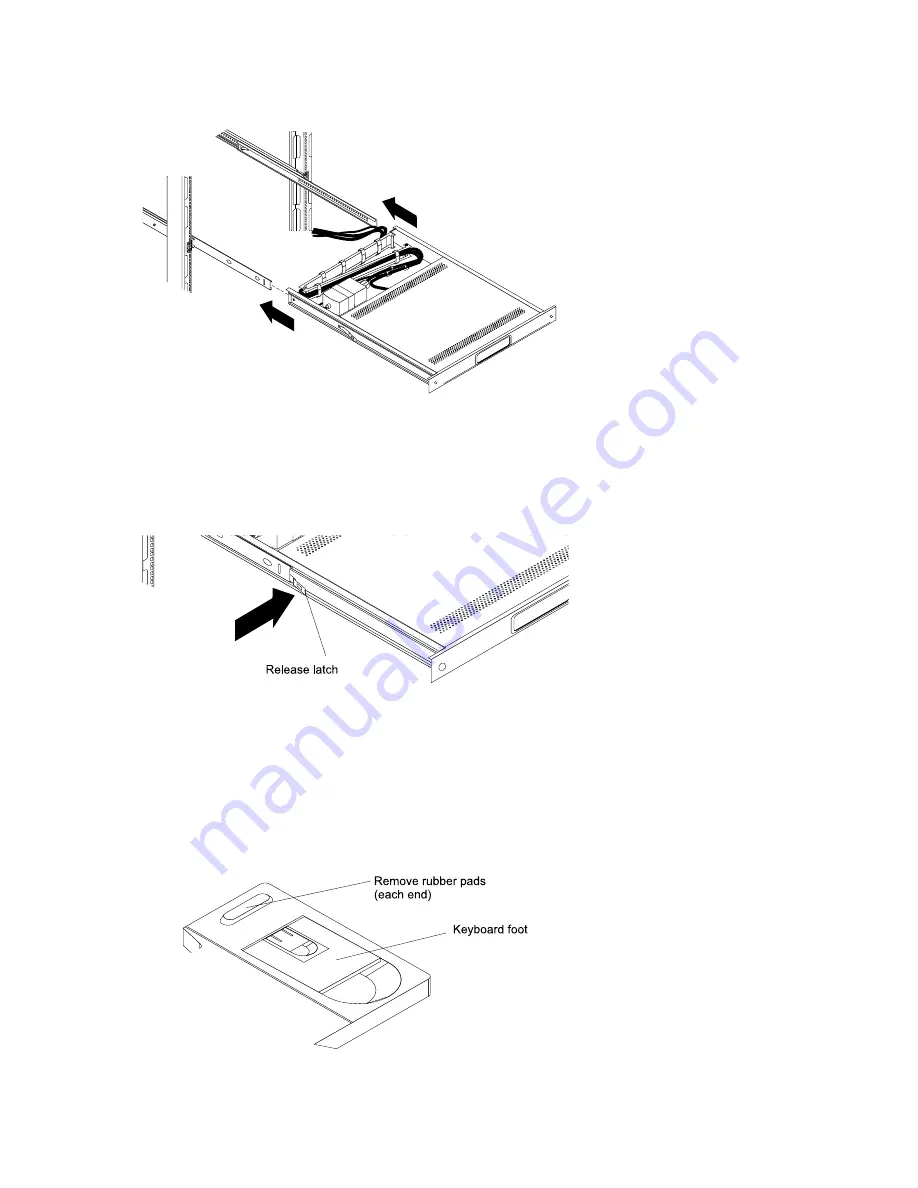
Carefully
slide
the
flat-panel
monitor
and
keyboard
tray
into
the
ball-bearing
assemblies
in
the
rails.
10.
Press
the
release
latches
and
push
the
flat-panel
monitor
and
keyboard
tray
completely
into
the
rack.
There
will
be
resistance
initially
as
the
ball-bearing
assemblies
align
between
the
inner
and
outer
rails.
Pull
the
tray
out
halfway,
then
push
it
back
in
to
seat
the
tray
in
the
rails.
Do
this
a
few
times
until
the
tray
moves
smoothly
in
the
rails.
Attention:
The
video
cable
is
connected
to
the
flat-panel
monitor.
When
you
install
the
tray
in
the
rack
cabinet,
make
sure
you
do
not
pinch
or
cut
the
video
cable.
11.
Push
the
tray
into
the
rack
and
tighten
the
four
rear
slide-rail
bracket
screws.
12.
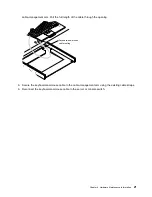
Place
the
keyboard
on
a
stable
flat
surface
and
remove
the
two
adhesive
rubber
pads
at
each
end
of
the
bottom
of
the
new
keyboard.
(If
you
leave
the
rubber
pads
on
the
keyboard,
they
will
extend
into
the
space
below
the
tray.)
Attention:
Do
not
extend
the
keyboard
feet.
The
flat-panel
monitor
screen
might
be
damaged
if
the
feet
are
extended
when
the
monitor
is
closed.
Chapter
2.
Installing
the
7316-TF3
17-Inch
Flat
Panel
Rack-Mounted
Monitor
and
Keyboard
7
Summary of Contents for 7316 - TF1 Rack Console
Page 2: ......
Page 53: ......
Page 54: ...Part Number 80P3752 Printed in USA May 2004 SA38 0643 00 1P P N 80P3752...


