


2.
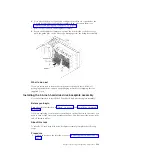
Open the bezel by pressing the button on the left edge of the bezel, and rotate
the left side of the bezel away from the server.
3.
Remove the air baffle (see “Removing the air baffle” on page 210).
4.
Remove the fan cage assembly (see “Removing the fan cage assembly” on
page 304).
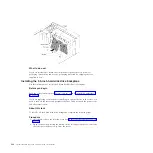
5.
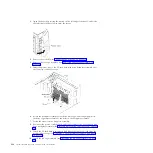
Insert the bottom tabs of the 3.5-inch hard disk drive backplate assembly onto
the lower lip of the drive cage.
6.
Rotate the backplate assembly toward the drive cage until the guide pins on
the drive cage insert securely to the holes on the backplate assembly.
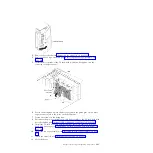
7.
Fasten the screws on the backplate assembly.
8.
Reconnect the power, configuration, and signal cables to the 3.5-inch hard disk
drive backplate assembly (see “Internal cable routing and connectors” on page
186).
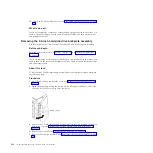
9.
Install the 3.5-inch simple-swap hard disk drives that were removed from the
hard disk drive cage (see “Installing a 3.5-inch simple-swap hard disk drive”
on page 228).
10.
Install the fan cage assembly (see “Installing the fan cage assembly” on page
306).
284
System x3500 M4 Type 7383: Installation and Service Guide
Summary of Contents for 7383
Page 1: ...System x3500 M4 Type 7383 Installation and Service Guide ...
Page 2: ......
Page 3: ...System x3500 M4 Type 7383 Installation and Service Guide ...
Page 8: ...vi System x3500 M4 Type 7383 Installation and Service Guide ...
Page 42: ...24 System x3500 M4 Type 7383 Installation and Service Guide ...
Page 200: ...182 System x3500 M4 Type 7383 Installation and Service Guide ...
Page 360: ...342 System x3500 M4 Type 7383 Installation and Service Guide ...
Page 416: ...398 System x3500 M4 Type 7383 Installation and Service Guide ...
Page 470: ...452 System x3500 M4 Type 7383 Installation and Service Guide ...
Page 479: ...Taiwan Class A compliance statement Notices 461 ...
Page 480: ...462 System x3500 M4 Type 7383 Installation and Service Guide ...
Page 487: ......
Page 488: ... Part Number 46W8192 Printed in USA 1P P N 46W8192 ...