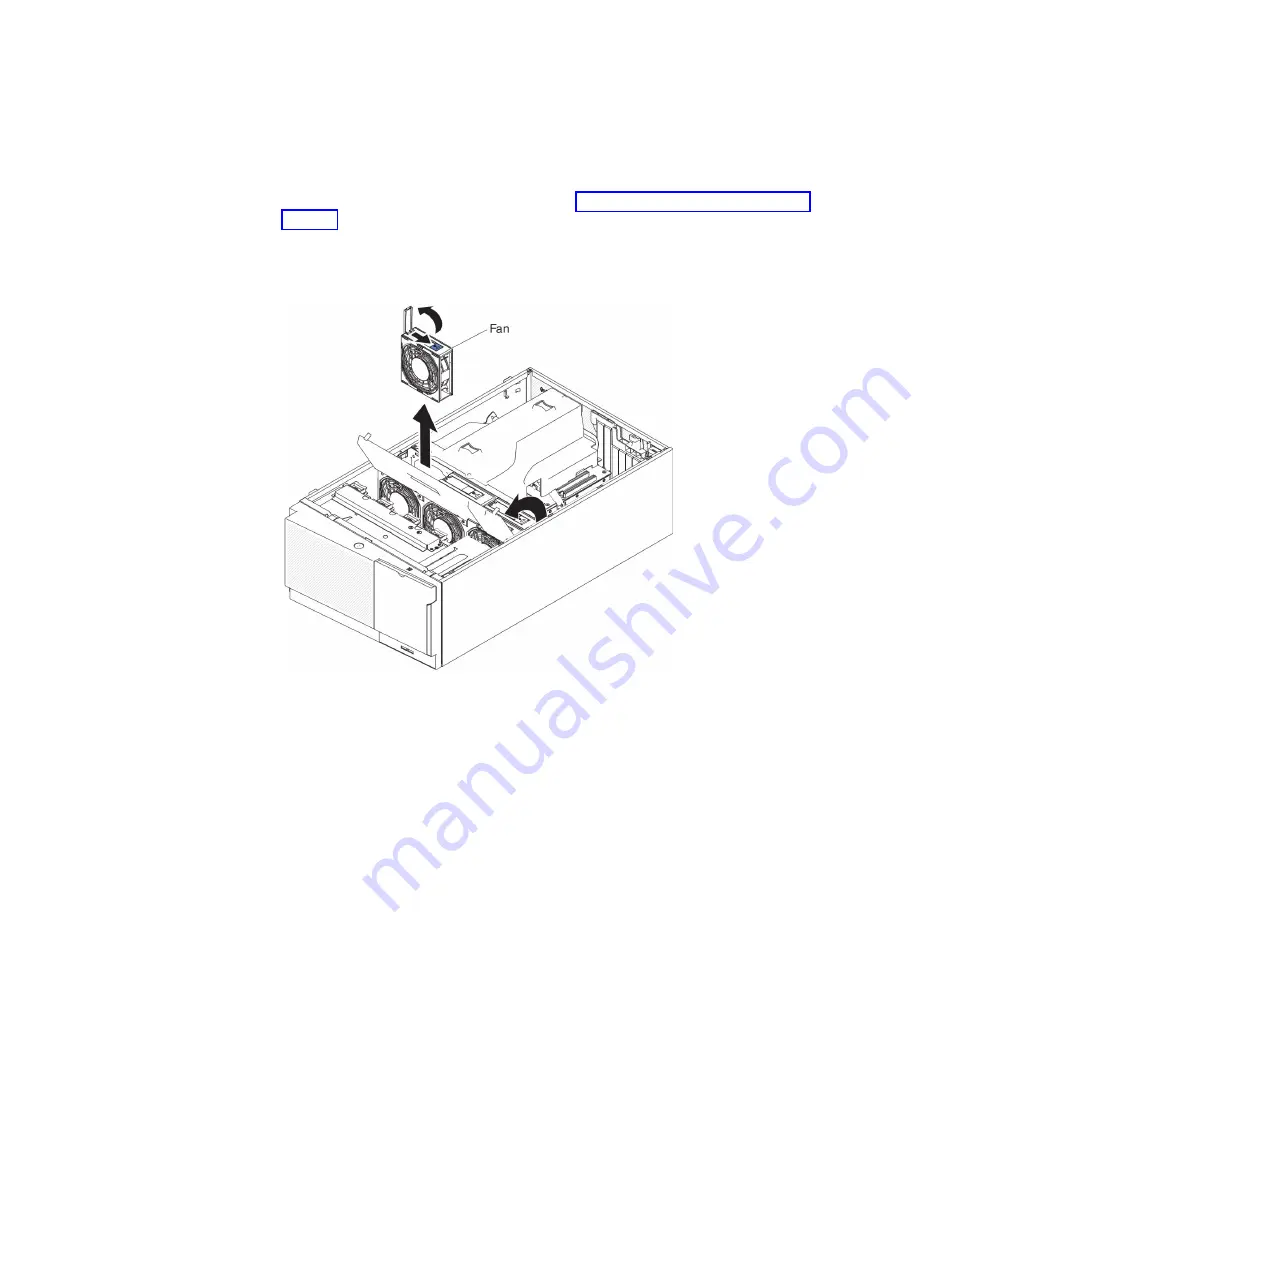
Procedure
1.
Unlock and remove the left-side cover (see “Removing the left-side cover” on
page 39).
2.
Open the fan cage cover.
3.
Open the fan-locking handle by sliding the blue release latch in the direction of
the arrow.
4.
Pull outward on the free end of the handle to remove the fan from the server.
5.
If you are instructed to return the simple-swap fan, follow all packaging
instructions, and use any packaging materials for shipping that are supplied to
you.
Installing a simple-swap fan
Use this information to install a simple-swap fan in the server.
Before you begin
The server comes with two 120 mm x 38 mm simple-swap fans in the fan cage
assembly. The following instructions can be used to install any simple-swap fan in
the server.
Note:
1.
When you install the second microprocessor, you must also install fan 2 and the
air baffle that come with the second microprocessor upgrade kit. The fan filler
can only be removed when fan 2 is installed. Otherwise, the fan filler must be
installed for proper cooling.
Chapter 6. Removing and replacing components
259
Summary of Contents for 7383
Page 1: ...System x3500 M4 Type 7383 Installation and Service Guide ...
Page 2: ......
Page 3: ...System x3500 M4 Type 7383 Installation and Service Guide ...
Page 8: ...vi System x3500 M4 Type 7383 Installation and Service Guide ...
Page 42: ...24 System x3500 M4 Type 7383 Installation and Service Guide ...
Page 200: ...182 System x3500 M4 Type 7383 Installation and Service Guide ...
Page 360: ...342 System x3500 M4 Type 7383 Installation and Service Guide ...
Page 416: ...398 System x3500 M4 Type 7383 Installation and Service Guide ...
Page 470: ...452 System x3500 M4 Type 7383 Installation and Service Guide ...
Page 479: ...Taiwan Class A compliance statement Notices 461 ...
Page 480: ...462 System x3500 M4 Type 7383 Installation and Service Guide ...
Page 487: ......
Page 488: ... Part Number 46W8192 Printed in USA 1P P N 46W8192 ...


