Note:
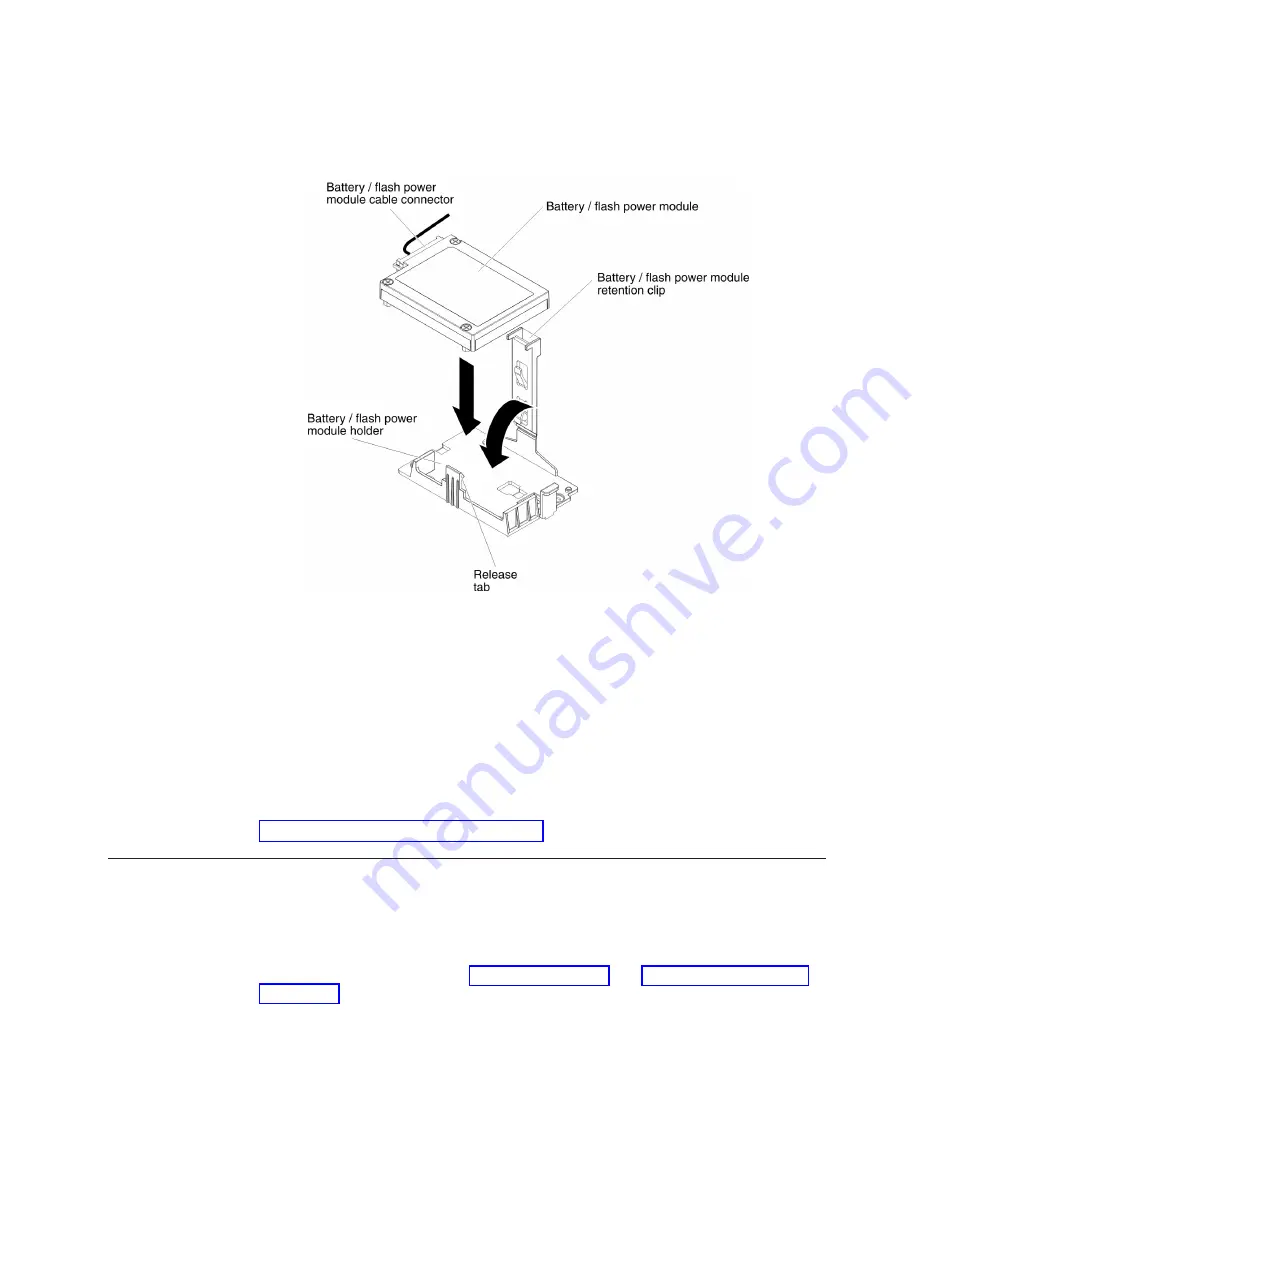
The positioning of the remote battery/flash power module depends
on the type of the remote batteries/flash power module that you install.
b.
Connect the other end of the battery/flash power module cable to the
battery/flash power module cable connector on the battery/flash power
module.
c.
Lower and press down on the retention clip until it snaps in place to hold
the battery/flash power module firmly in place.
What to do next
If you have other devices to install or remove, do so now. Otherwise, go to
“Completing the installation” on page 94.
Installing the microprocessor 2 expansion board
Use this information to install the microprocessor 2 expansion board
Before you begin
Read the safety information in “Safety” on page vii and “Installation guidelines”
on page 34.
If you are replacing a component or installing an optional device in the server, you
need to turn off the server and peripheral devices, and disconnect the power cords
and all external cables.
About this task
To install the microprocessor 2 expansion board, complete the following steps.
Chapter 2. Installing optional devices
77
Summary of Contents for 7383
Page 1: ...System x3500 M4 Type 7383 Installation and Service Guide ...
Page 2: ......
Page 3: ...System x3500 M4 Type 7383 Installation and Service Guide ...
Page 8: ...vi System x3500 M4 Type 7383 Installation and Service Guide ...
Page 42: ...24 System x3500 M4 Type 7383 Installation and Service Guide ...
Page 200: ...182 System x3500 M4 Type 7383 Installation and Service Guide ...
Page 360: ...342 System x3500 M4 Type 7383 Installation and Service Guide ...
Page 416: ...398 System x3500 M4 Type 7383 Installation and Service Guide ...
Page 470: ...452 System x3500 M4 Type 7383 Installation and Service Guide ...
Page 479: ...Taiwan Class A compliance statement Notices 461 ...
Page 480: ...462 System x3500 M4 Type 7383 Installation and Service Guide ...
Page 487: ......
Page 488: ... Part Number 46W8192 Printed in USA 1P P N 46W8192 ...


