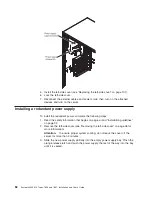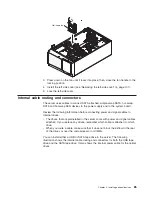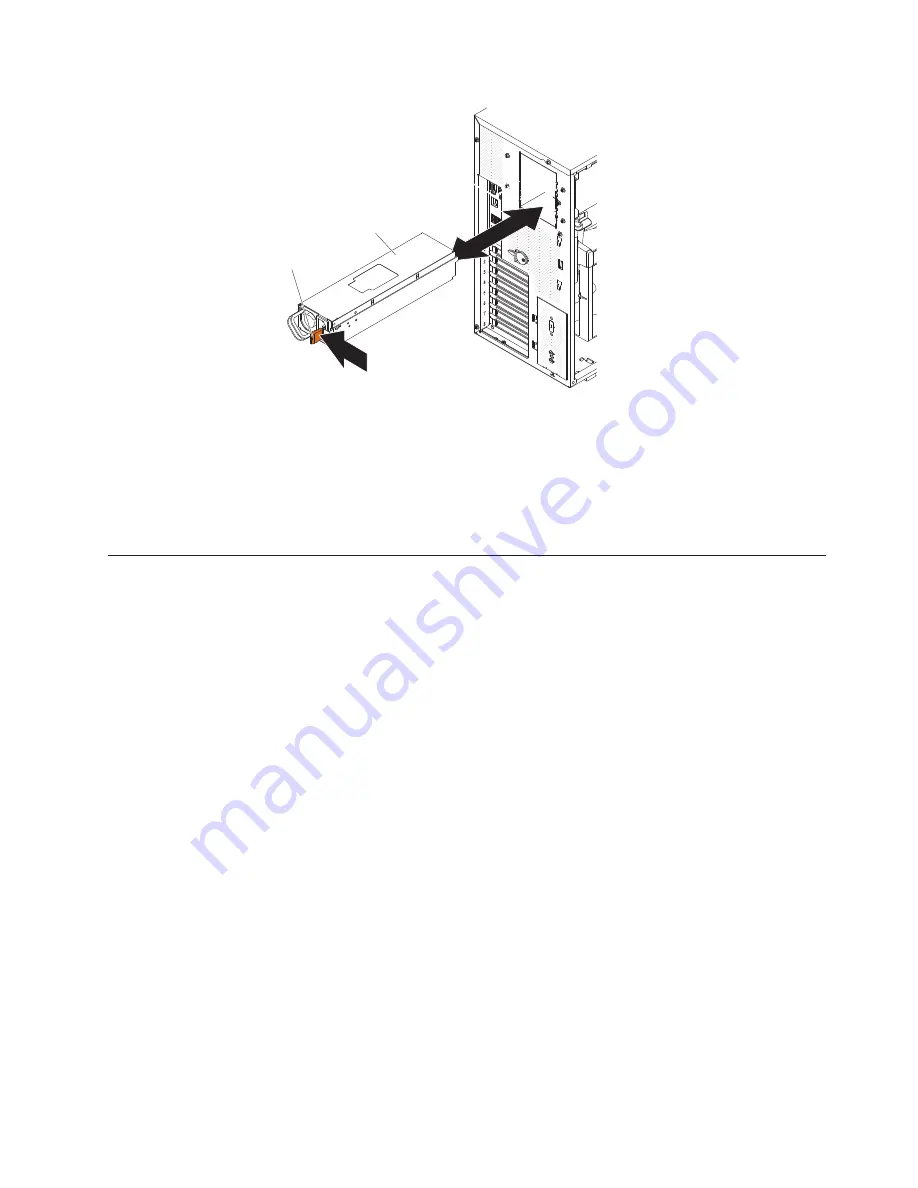
Hot-swap
power supply
Release
latch
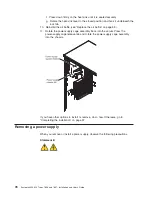
4. Install the left-side cover (see “Replacing the left-side cover” on page 101).
5. Connect one end of the new power cord into the connector on the back of
power supply, and connect the other end of the power cord to a properly
grounded electrical outlet.
6. Make sure that the ac power LED on the top of each power supply is lit,
indicating that the power supply is operating correctly. If the server is turned on,
make sure that the dc power LED on the top of the power supply is lit also.
Removing a hot-swap fan
Attention:
v
Replace a hot-swap fan within 30 seconds of removal.
v
To ensure proper cooling and airflow, do not operate the server for more than 2
minutes with the left-side cover removed.
To remove a hot-swap fan, complete the following steps.
1. Read the safety information that begins on page vii and “Installation guidelines”
on page 32.
Attention:
Static electricity that is released to internal server components
when server is powered-on might cause the server to halt, which might result in
the loss of data. To avoid this potential problem, always use an
electrostatic-discharge wrist strap or other grounding system when you work
inside the server with the power on.
2. Unlock and remove the left-side cover (see “Removing the left-side cover” on
page 36).
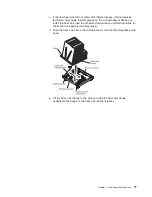
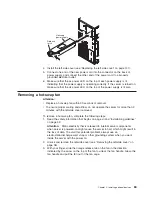
3. With your finger, slide the orange release tab on the fan in the direction
indicated by the arrow on the top of the fan to unlock the fan handle. Grasp the
fan handle and pull the fan out of the fan cage.
Chapter 2. Installing optional devices
83
Summary of Contents for 783722U
Page 1: ...System x3400 M2 Types 7836 and 7837 Installation and User s Guide...
Page 2: ......
Page 3: ...System x3400 M2 Types 7836 and 7837 Installation and User s Guide...
Page 8: ...vi System x3400 M2 Types 7836 and 7837 Installation and User s Guide...
Page 18: ...xvi System x3400 M2 Types 7836 and 7837 Installation and User s Guide...
Page 57: ...Chapter 2 Installing optional devices 39...
Page 122: ...104 System x3400 M2 Types 7836 and 7837 Installation and User s Guide...
Page 153: ......
Page 154: ...Part Number 69Y4170 Printed in USA 1P P N 69Y4170...

