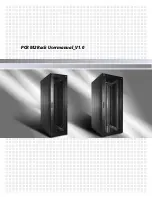
Expansion racks come with all the hardware that is required for you to attach racks together and form a
suite. A hex wrench and screws come with the expansion-rack hardware kit. You need one standard rack
to form a suite.
To attach racks together in a suite, complete the following steps:
1.
Remove the front and rear doors.
2.
On the side of the standard rack cabinet where you are attaching the expansion rack, remove the side
cover. For more information, see “Removing and installing the side covers” on page 12.
3.
Where the two racks come together at the top front, align the screw holes of an attachment bracket
(which comes with the expansion rack cabinet) with the holes in the standard rack and expansion
rack (see the illustration). Secure the bracket to the racks with four screws. Do not fully tighten the
screws. Repeat this step for the bottom front attachment bracket. Then, tighten all of the bracket
screws.
4.
Repeat step 3 to attach the rear top and bottom attachment brackets.
Repeat this procedure to attach additional expansion racks to the suite.
Figure 17. Attaching standard and expansion racks to each other to form a suite
Installing the 7953-94X and 7965-94Y rack and features
17
Summary of Contents for 7953-94X
Page 1: ...Power Systems Installing the 7953 94X and 7965 94Y rack and features ...
Page 2: ......
Page 3: ...Power Systems Installing the 7953 94X and 7965 94Y rack and features ...
Page 6: ...iv Installing the 7953 94X and 7965 94Y rack and features ...
Page 14: ...xii Installing the 7953 94X and 7965 94Y rack and features ...
Page 16: ...Figure 1 7953 94X and 7953 94Y 2 Installing the 7953 94X and 7965 94Y rack and features ...
Page 61: ......
Page 62: ... Printed in USA ...


