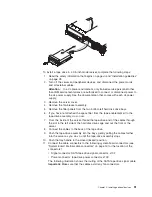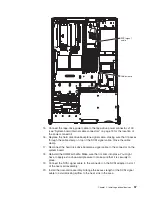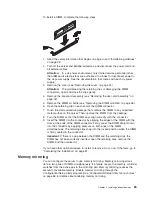
7.
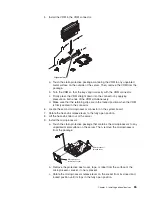
From
the
inside
of
the
server,
thread
the
tape-drive
end
of
the
cables
through
the
slot
in
the
left
side
of
the
hard
disk
drive
cage
and
out
the
front
of
the
server.
Note:
The
terminator
on
the
short
section
of
the
cable
does
not
go
through
the
slot;
do
not
attempt
to
force
it.
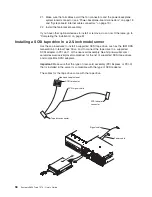
8.
Connect
the
cables
to
the
back
of
the
tape
drive.
9.
Push
the
tape-drive
assembly
into
the
bays,
gently
pulling
the
cables
farther
into
the
server
as
you
do
so,
until
the
tape-drive
assembly
stops.
10.
Push
the
tray
handle
to
the
closed
(locked)
position.
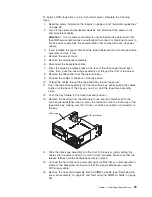
11.
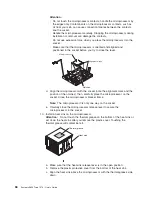
Remove
the
backing
from
the
terminator
hook-and-loop
fastener.
With
the
hook-and-loop-fastener
side
down,
orient
the
terminator
as
shown
in
the
following
illustration
and
press
the
terminator
onto
the
top
of
the
CD/DVD
drive
bay.
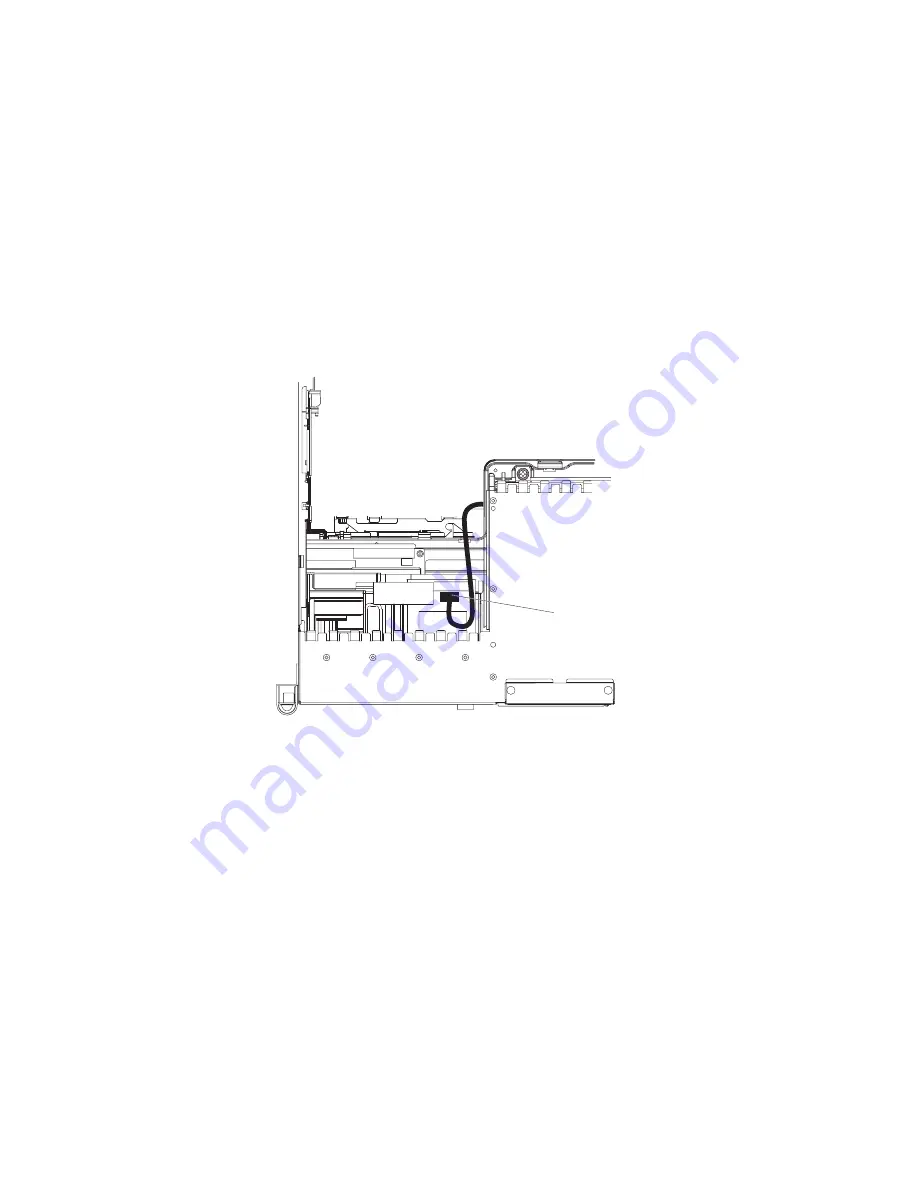
SCSI terminator
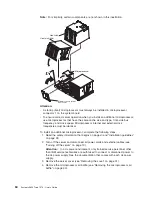
12.
Remove
the
riser-card
assembly
and
the
DIMM
air
baffle
(see
“Removing
the
riser-card
assembly”
on
page
32
and
“Removing
the
DIMM
air
baffle”
on
page
36).
13.
Temporarily
disconnect
the
hard
disk
drive
backplane
signal
cable
from
the
connector
on
the
system
board
(J92),
remove
the
cable
from
the
cable
clamp,
and
set
the
cable
aside.
See
“System-board
internal
cable
connectors”
on
page
19
for
the
location
of
the
connector
and
cable
clamp.
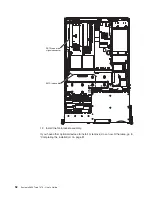
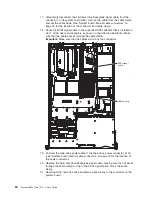
14.
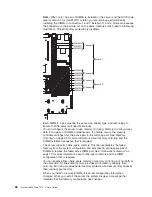
Route
the
SCSI
signal
cable
to
the
supported
SCSI
adapter
that
is
installed
in
slot
1
of
the
riser-card
assembly,
as
shown
in
the
following
illustration.
Make
sure
that
the
cable
passes
through
the
cable
clamp.
Important:
Make
sure
that
the
cables
avoid
any
fan
connectors.
56
System
x3650
Type
7979:
User’s
Guide
Summary of Contents for 7979B1U
Page 1: ...System x3650 Type 7979 User s Guide...
Page 2: ......
Page 3: ...System x3650 Type 7979 User s Guide...
Page 8: ...vi System x3650 Type 7979 User s Guide...
Page 30: ...14 System x3650 Type 7979 User s Guide...
Page 130: ...114 System x3650 Type 7979 User s Guide...
Page 138: ...122 System x3650 Type 7979 User s Guide...
Page 143: ......
Page 144: ...Part Number 44R5189 Printed in USA 1P P N 44R5189...

