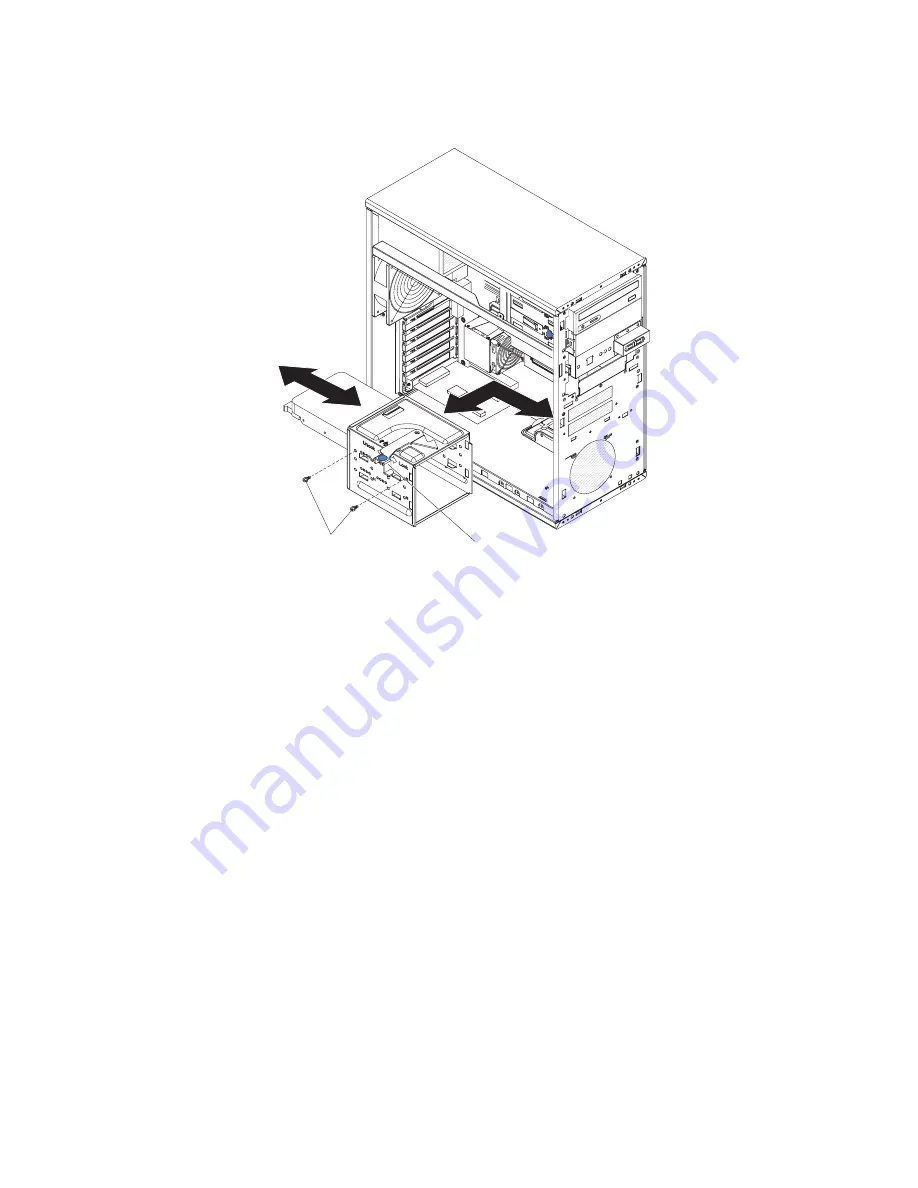
4.
Move
the
drive
cage
release
lever
to
the
unlocked
position
and
gently
pull
the
drive
cage
out
of
the
drive
cage
slot
on
the
chassis
and
set
it
aside.
Locking lever
Screws
5.
Touch
the
static-protective
package
that
contains
the
drive
to
any
unpainted
metal
surface
on
the
server;
then,
remove
the
drive
from
the
package
and
place
it
on
a
static-protective
surface.
Note:
If
the
hard
disk
drive
comes
attached
to
a
drive
tray,
remove
the
drive
from
the
drive
tray
before
you
install
the
drive
in
the
drive
bay.
6.
Set
any
jumpers
or
switches
on
the
drive
according
to
the
documentation
that
comes
with
the
drive.
7.
Align
the
drive
assembly
with
the
guide
rails
in
the
bay
(with
the
connector
end
of
the
drive
facing
you).
8.
Gently
slide
the
drive
assembly
into
the
drive
bay
as
far
as
it
will
go.
9.
Attach
the
hard
disk
drive
to
the
drive
cage
with
the
four
screws.
10.
Connect
one
end
of
the
signal
cable
into
the
back
of
the
drive
and
make
sure
that
the
other
end
of
the
cable
is
connected
into
the
connector
on
the
system
board.
See
“Power
and
signal
cables
for
internal
drives”
on
page
29
for
additional
information
about
cabling
drives
and
“System-board
internal
connectors”
on
page
14
for
the
location
of
the
SATA
connectors.
11.
Route
the
signal
cable
so
that
it
does
not
block
the
airflow
to
the
rear
of
the
drives
or
over
the
microprocessor
and
DIMMs.
12.
Connect
the
power
cable
to
the
back
of
the
drive.
The
connectors
are
keyed
and
can
be
inserted
only
one
way.
If
you
have
other
options
to
install
or
remove,
do
so
now.
Otherwise,
go
to
“Completing
the
installation”
on
page
34.
28
xSeries
100
Type
8486:
User’s
Guide
Summary of Contents for 8486 - eServer xSeries 100
Page 1: ...xSeries 100 Type 8486 User s Guide ERserver...
Page 2: ......
Page 3: ...xSeries 100 Type 8486 User s Guide ERserver...
Page 24: ...12 xSeries 100 Type 8486 User s Guide...
Page 66: ...54 xSeries 100 Type 8486 User s Guide...
Page 67: ......
Page 68: ...Part Number 31R2069 Printed in USA 1P P N 31R2069...


