


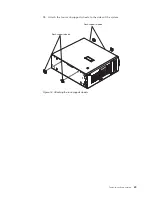


b.
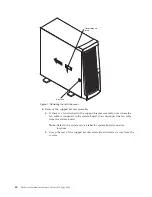
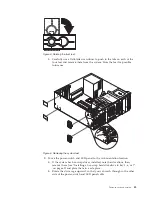
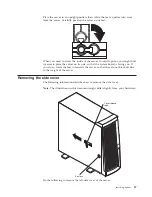
Carefully use a flat-blade screwdriver to push in the tabs on each of the
four feet and remove them from the system. Store the feet for possible
future use.
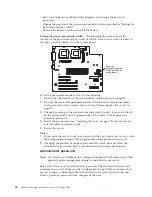
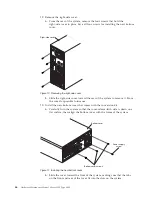
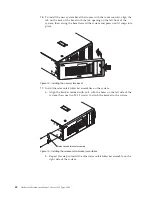
9.
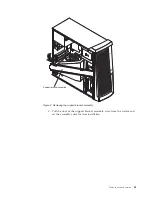
Move the power-switch and LED panel to the rack-orientation location.
a.
If the system has hot-swap drives installed, note their locations; then,
remove them (see “Installing a hot-swap hard disk drive in bay 5, 6, or 7”
on page 69) and place them in a safe place.
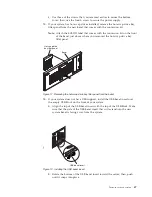
b.
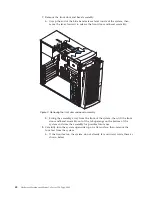
Rotate the drive cage upward, so that you can reach through to the other
side of the power-switch and LED panel cable.
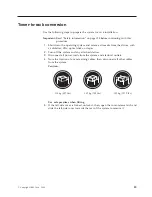
Figure 4. Rotating the front feet
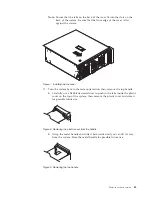
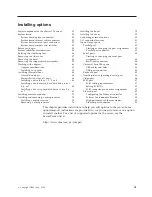
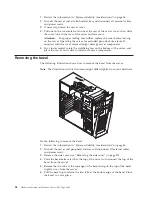
Figure 5. Removing the system feet
Tower-to-rack conversion
43
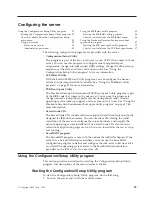
Summary of Contents for 8645 - Eserver xSeries 220
Page 1: ...Hardware Maintenance Manual xSeries 220 Type 8645...
Page 2: ......
Page 3: ...Hardware Maintenance Manual xSeries 220 Type 8645...
Page 18: ...10 Hardware Maintenance Manual xSeries 220 Type 8645...
Page 36: ...28 Hardware Maintenance Manual xSeries 220 Type 8645...
Page 58: ...50 Hardware Maintenance Manual xSeries 220 Type 8645...
Page 102: ...94 Hardware Maintenance Manual xSeries 220 Type 8645...
Page 141: ...Related service information 133...
Page 142: ...134 Hardware Maintenance Manual xSeries 220 Type 8645...
Page 143: ...Related service information 135...
Page 144: ...136 Hardware Maintenance Manual xSeries 220 Type 8645...
Page 145: ...Related service information 137...
Page 146: ...138 Hardware Maintenance Manual xSeries 220 Type 8645...
Page 147: ...Related service information 139...
Page 148: ...140 Hardware Maintenance Manual xSeries 220 Type 8645...
Page 158: ...150 Hardware Maintenance Manual xSeries 220 Type 8645...
Page 159: ...Related service information 151...
Page 160: ...152 Hardware Maintenance Manual xSeries 220 Type 8645...
Page 167: ......


