12.
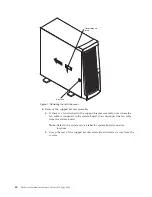
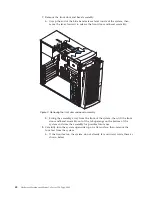
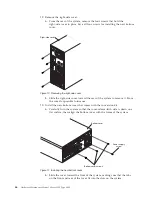
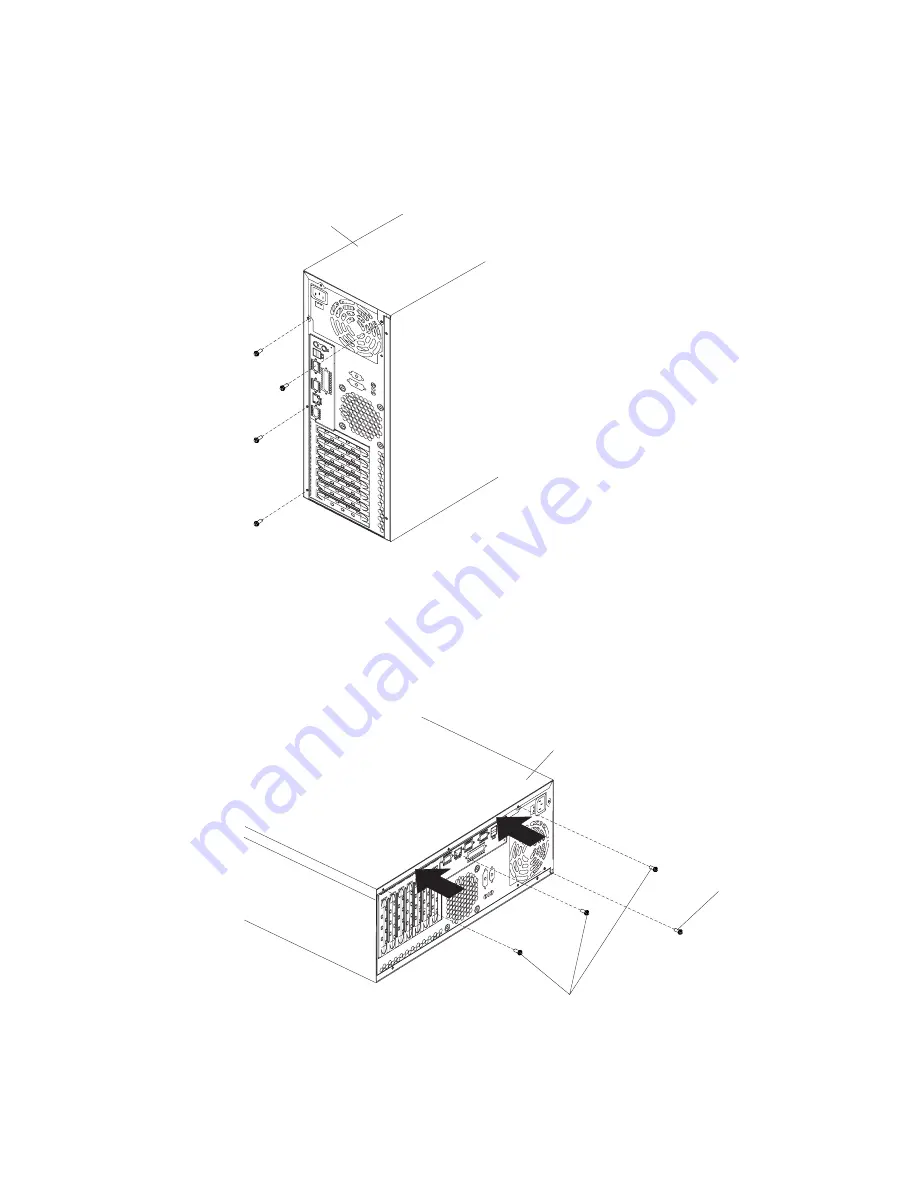
Remove the right-side cover.
a.
From the rear of the system, remove the four screws that hold the
right-side cover in place. Save all four screws for installing the new bottom
cover.
b.
Slide the right-side cover toward the rear of the system to remove it. Store
the cover for possible future use.
13.
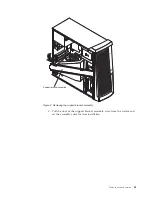
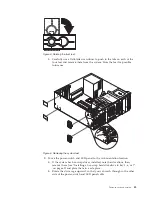
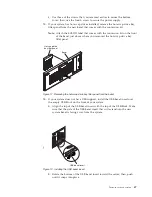
Install the new bottom cover that comes with the conversion kit.
a.
Carefully turn the system so that the cover-release-latch side is down on a
flat surface; then, align the bottom cover with the frame of the system.
b.
Slide the cover toward the front of the system, making sure that the tabs
on the front and rear of the cover fit into the slots on the system.
Right-side cover
Figure 10. Removing the right-side cover
Bottom cover
Bottom cover screws
Power supply
screw
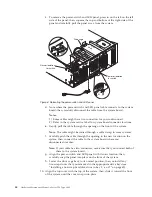
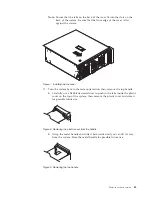
Figure 11. Installing the new bottom cover
46
Hardware Maintenance Manual: xSeries 220 Type 8645
Summary of Contents for 8645 - Eserver xSeries 220
Page 1: ...Hardware Maintenance Manual xSeries 220 Type 8645...
Page 2: ......
Page 3: ...Hardware Maintenance Manual xSeries 220 Type 8645...
Page 18: ...10 Hardware Maintenance Manual xSeries 220 Type 8645...
Page 36: ...28 Hardware Maintenance Manual xSeries 220 Type 8645...
Page 58: ...50 Hardware Maintenance Manual xSeries 220 Type 8645...
Page 102: ...94 Hardware Maintenance Manual xSeries 220 Type 8645...
Page 141: ...Related service information 133...
Page 142: ...134 Hardware Maintenance Manual xSeries 220 Type 8645...
Page 143: ...Related service information 135...
Page 144: ...136 Hardware Maintenance Manual xSeries 220 Type 8645...
Page 145: ...Related service information 137...
Page 146: ...138 Hardware Maintenance Manual xSeries 220 Type 8645...
Page 147: ...Related service information 139...
Page 148: ...140 Hardware Maintenance Manual xSeries 220 Type 8645...
Page 158: ...150 Hardware Maintenance Manual xSeries 220 Type 8645...
Page 159: ...Related service information 151...
Page 160: ...152 Hardware Maintenance Manual xSeries 220 Type 8645...
Page 167: ......


